Quick Unboxing Guide
Package Inspection
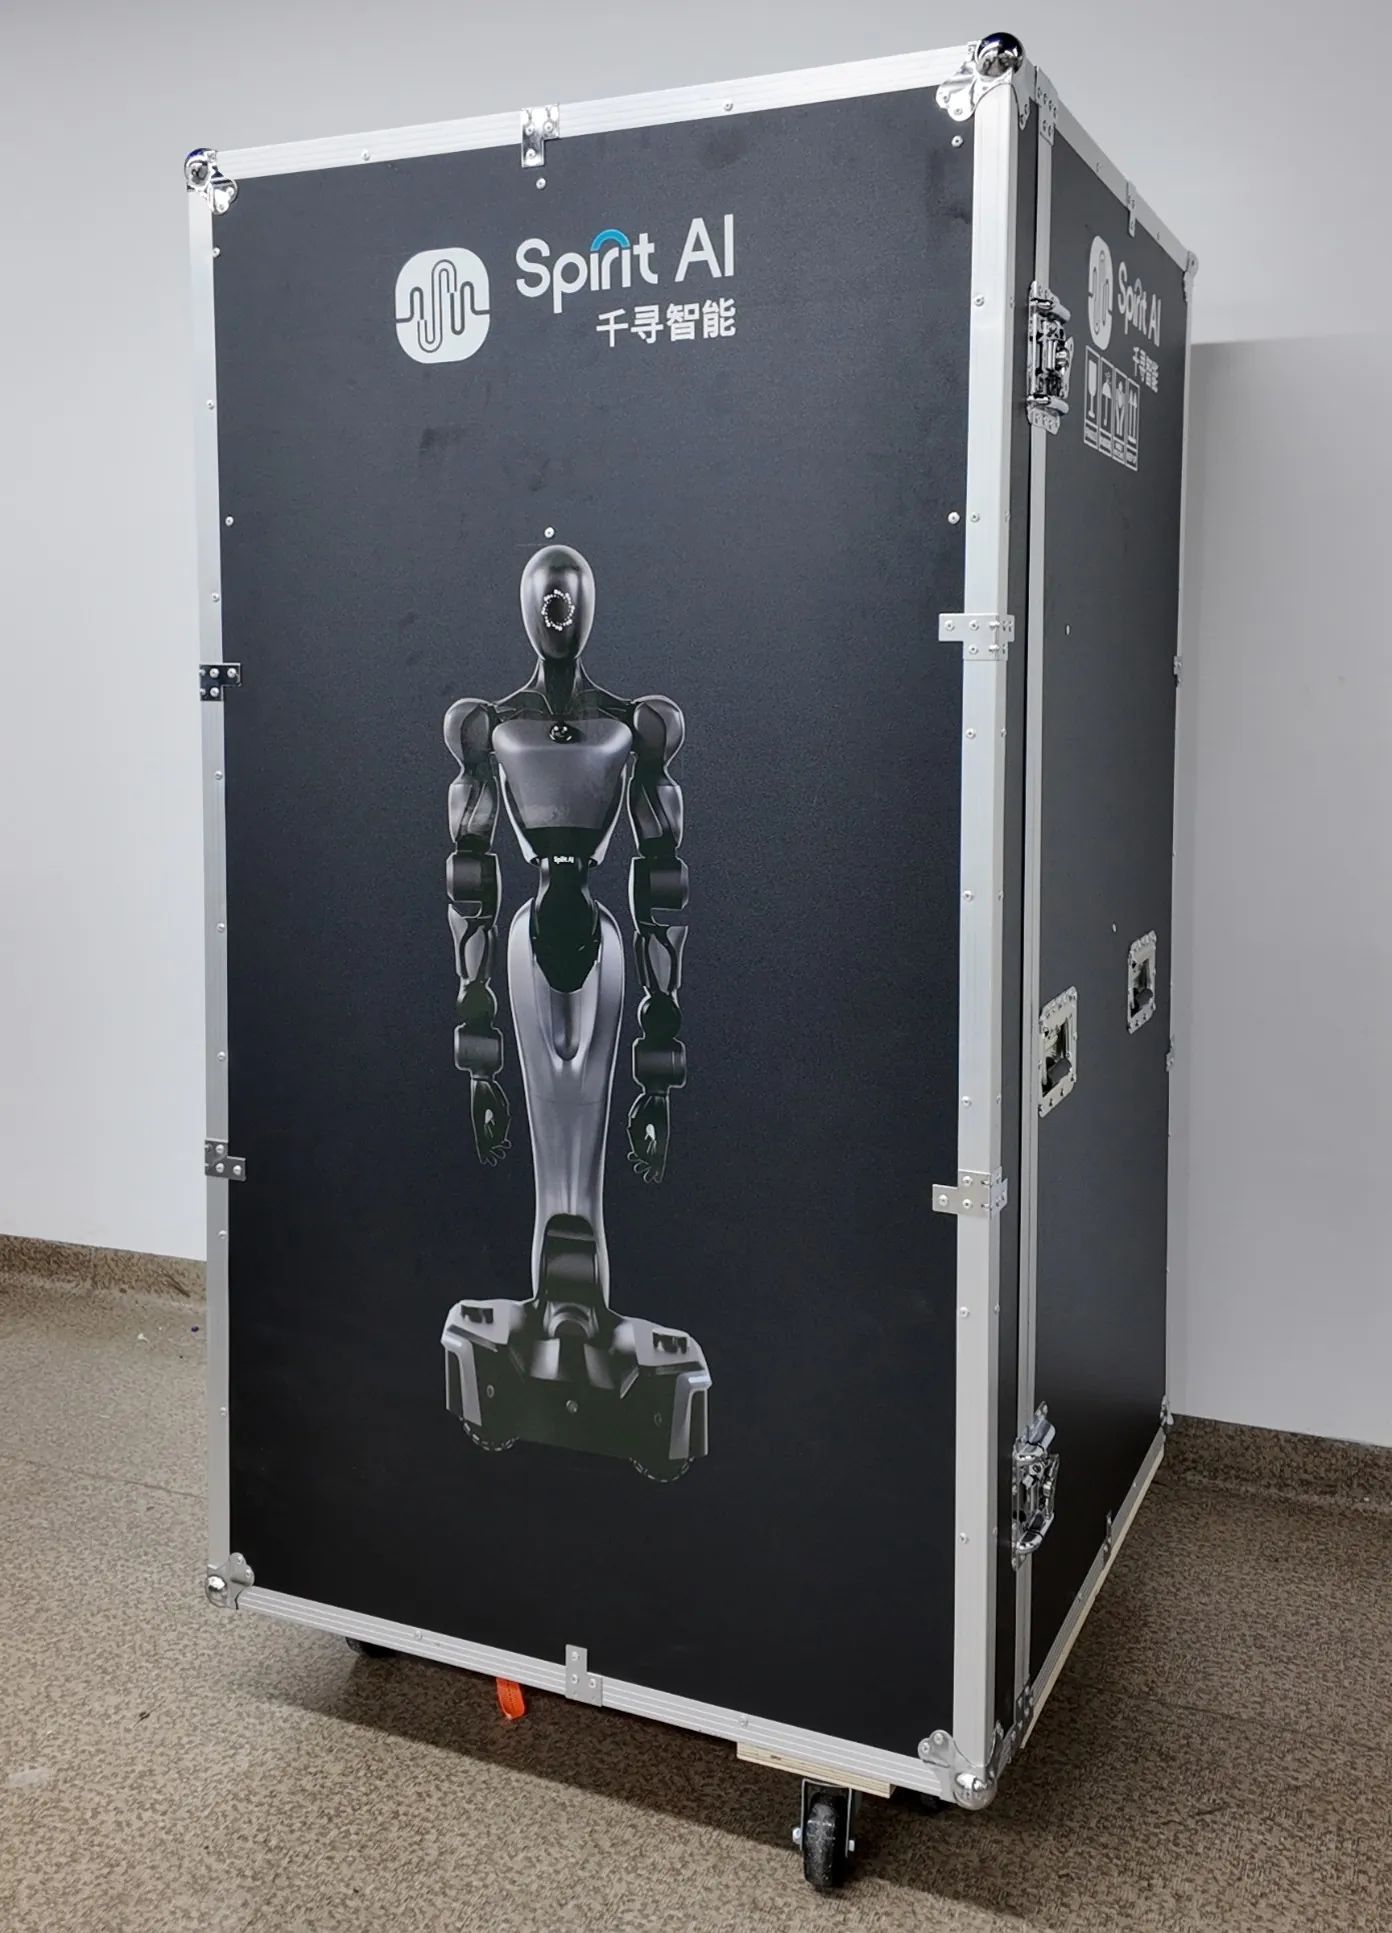
- Before unboxing the robot, move the robot packaging box to an open and level area (ensure at least 1.5–2 meters of space in front for the robot to exit);
- Walk around the packaging box counterclockwise to inspect the robot packaging, including but not limited to the exterior, box body, latches, hinges, and casters, to ensure there is no damage during transportation. If any damage is found, please contact our company immediately;
- Check whether the sealing tape on the box has been opened during transportation. If the robot appears to have been opened under unknown circumstances, please contact our company immediately;
- Also verify that the label information on the package matches the order. If there is any discrepancy, please contact us promptly.
Unboxing Steps
Before proceeding with the following steps, please ensure that all inspection items in “Package Inspection” have been completed and no abnormalities are found.
Step 1
Move the robot flight case to an open and level ground. Lock the casters to ensure the case does not slide.
Step 2
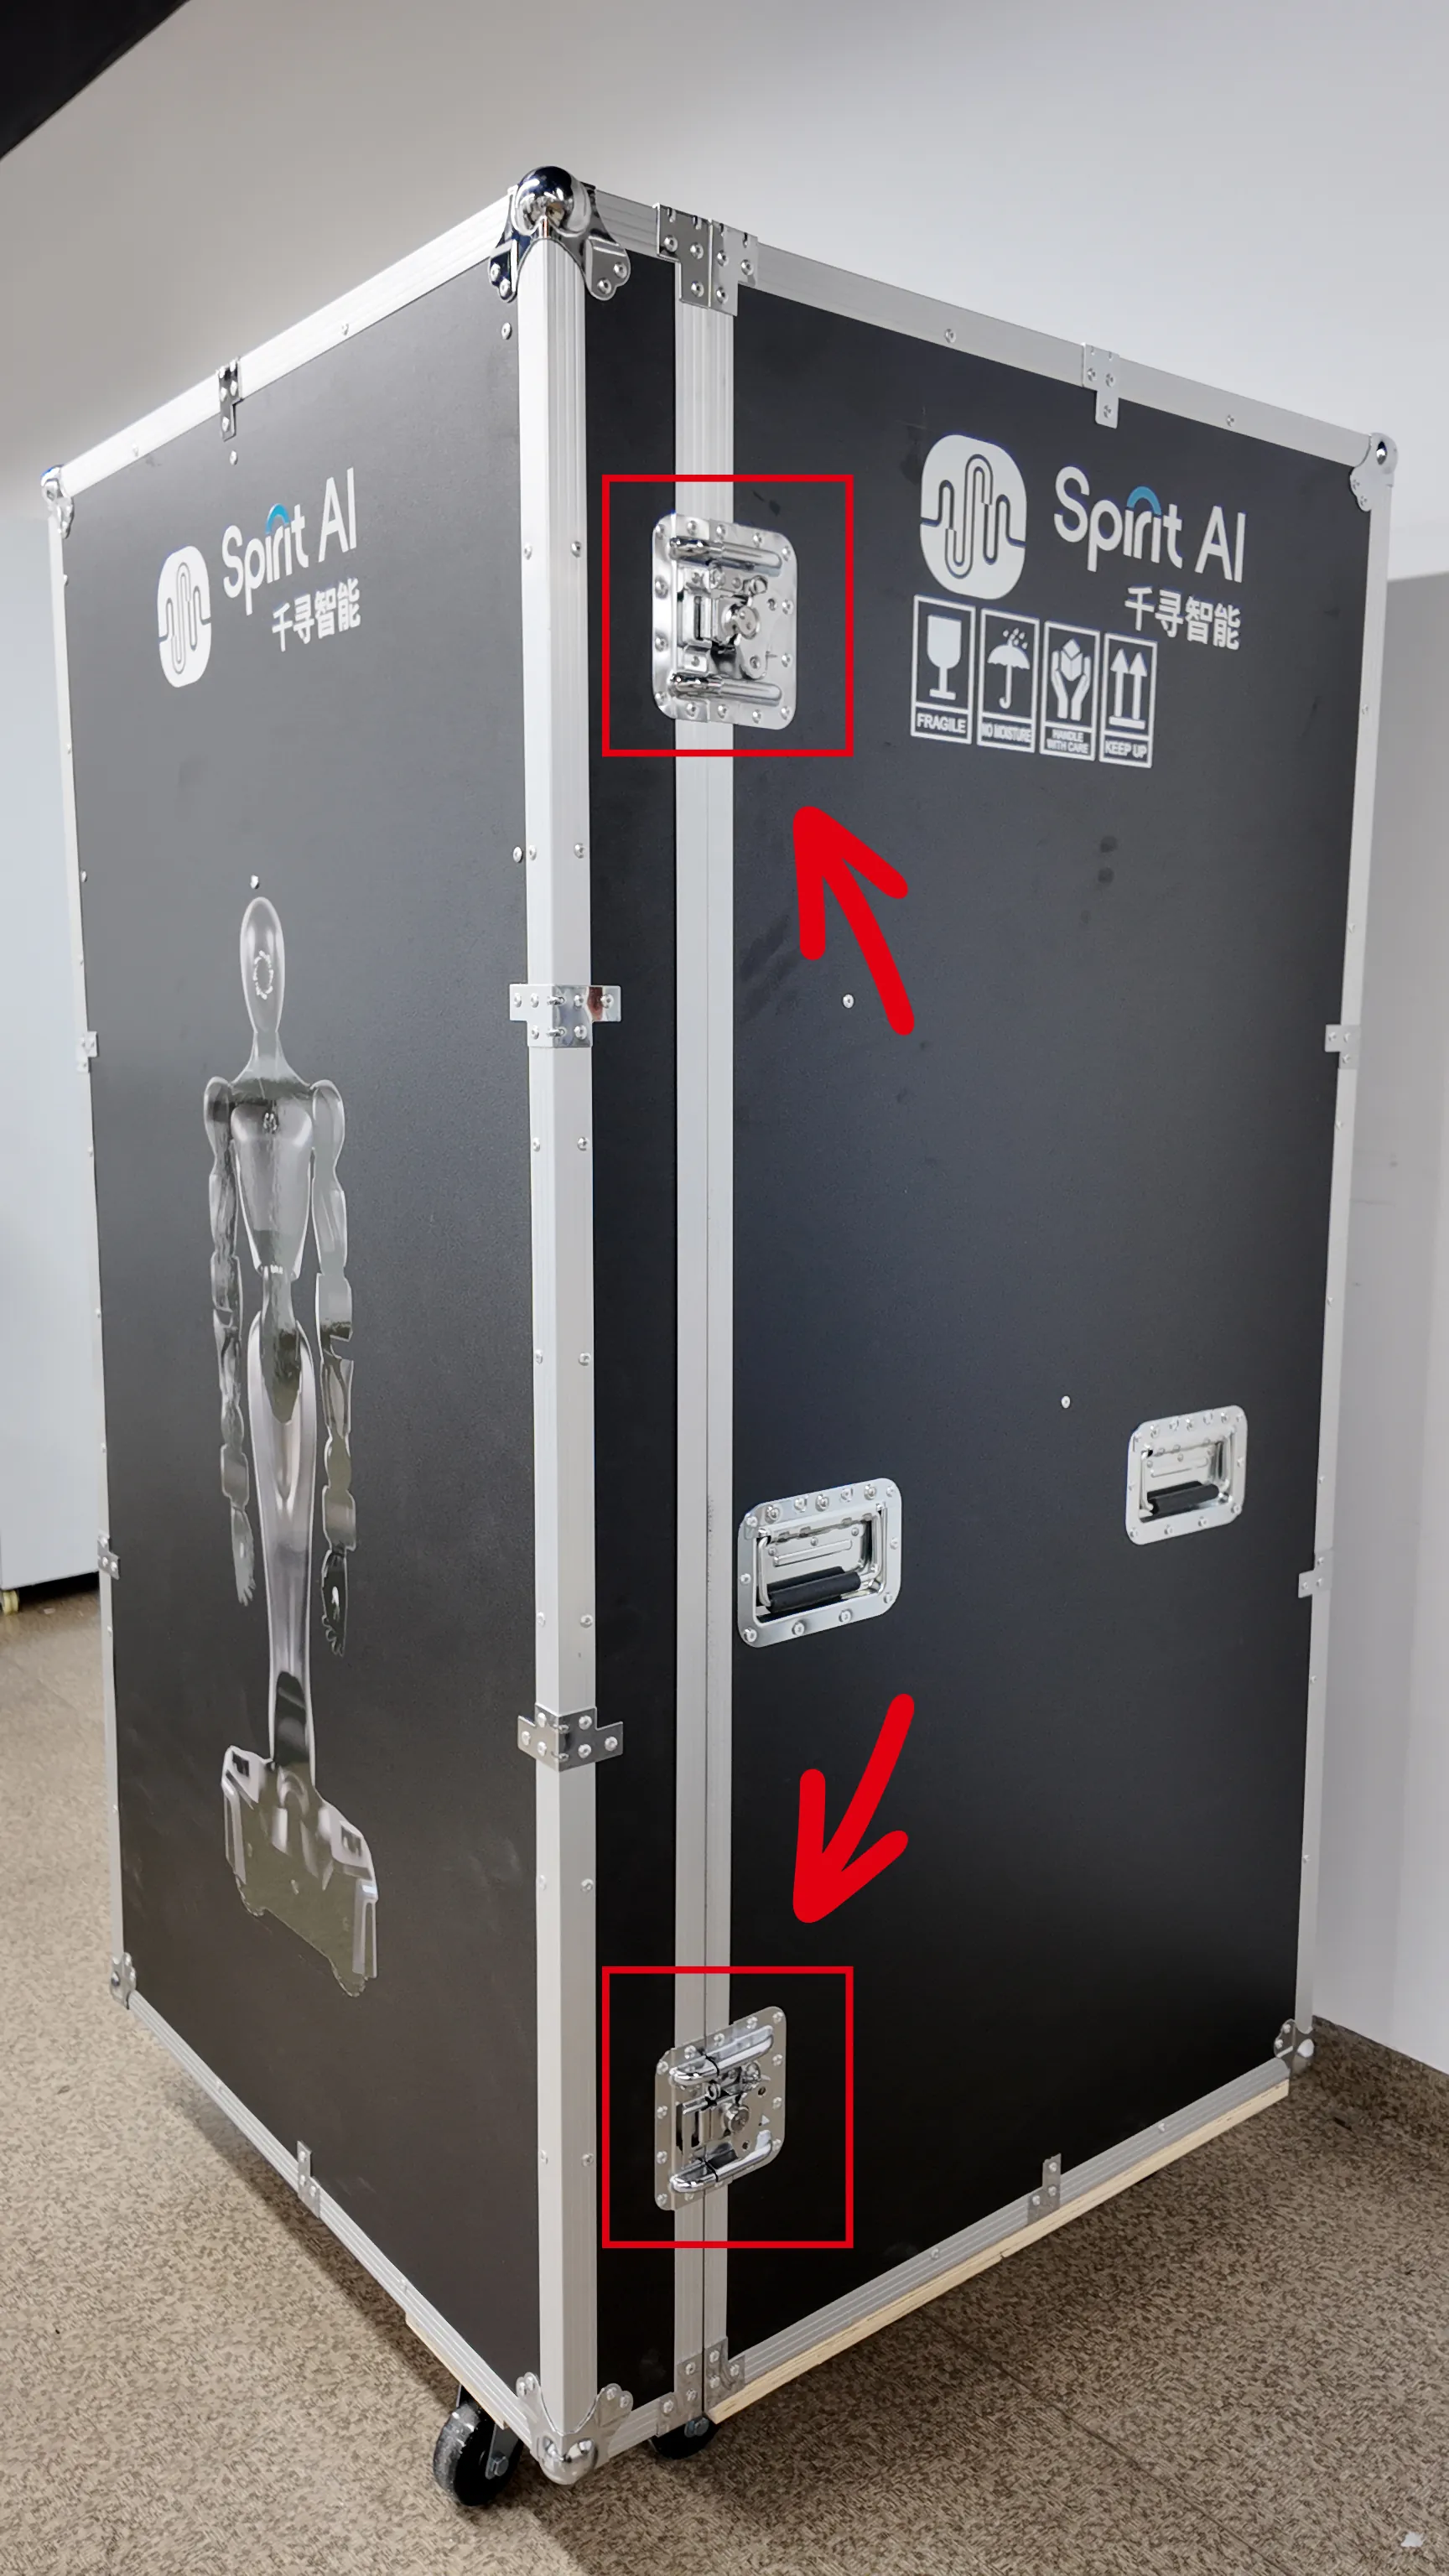
Loosen the upper and lower rotary latches on the right side of the flight case door in sequence, and disengage them from the latch slots.
Step 3
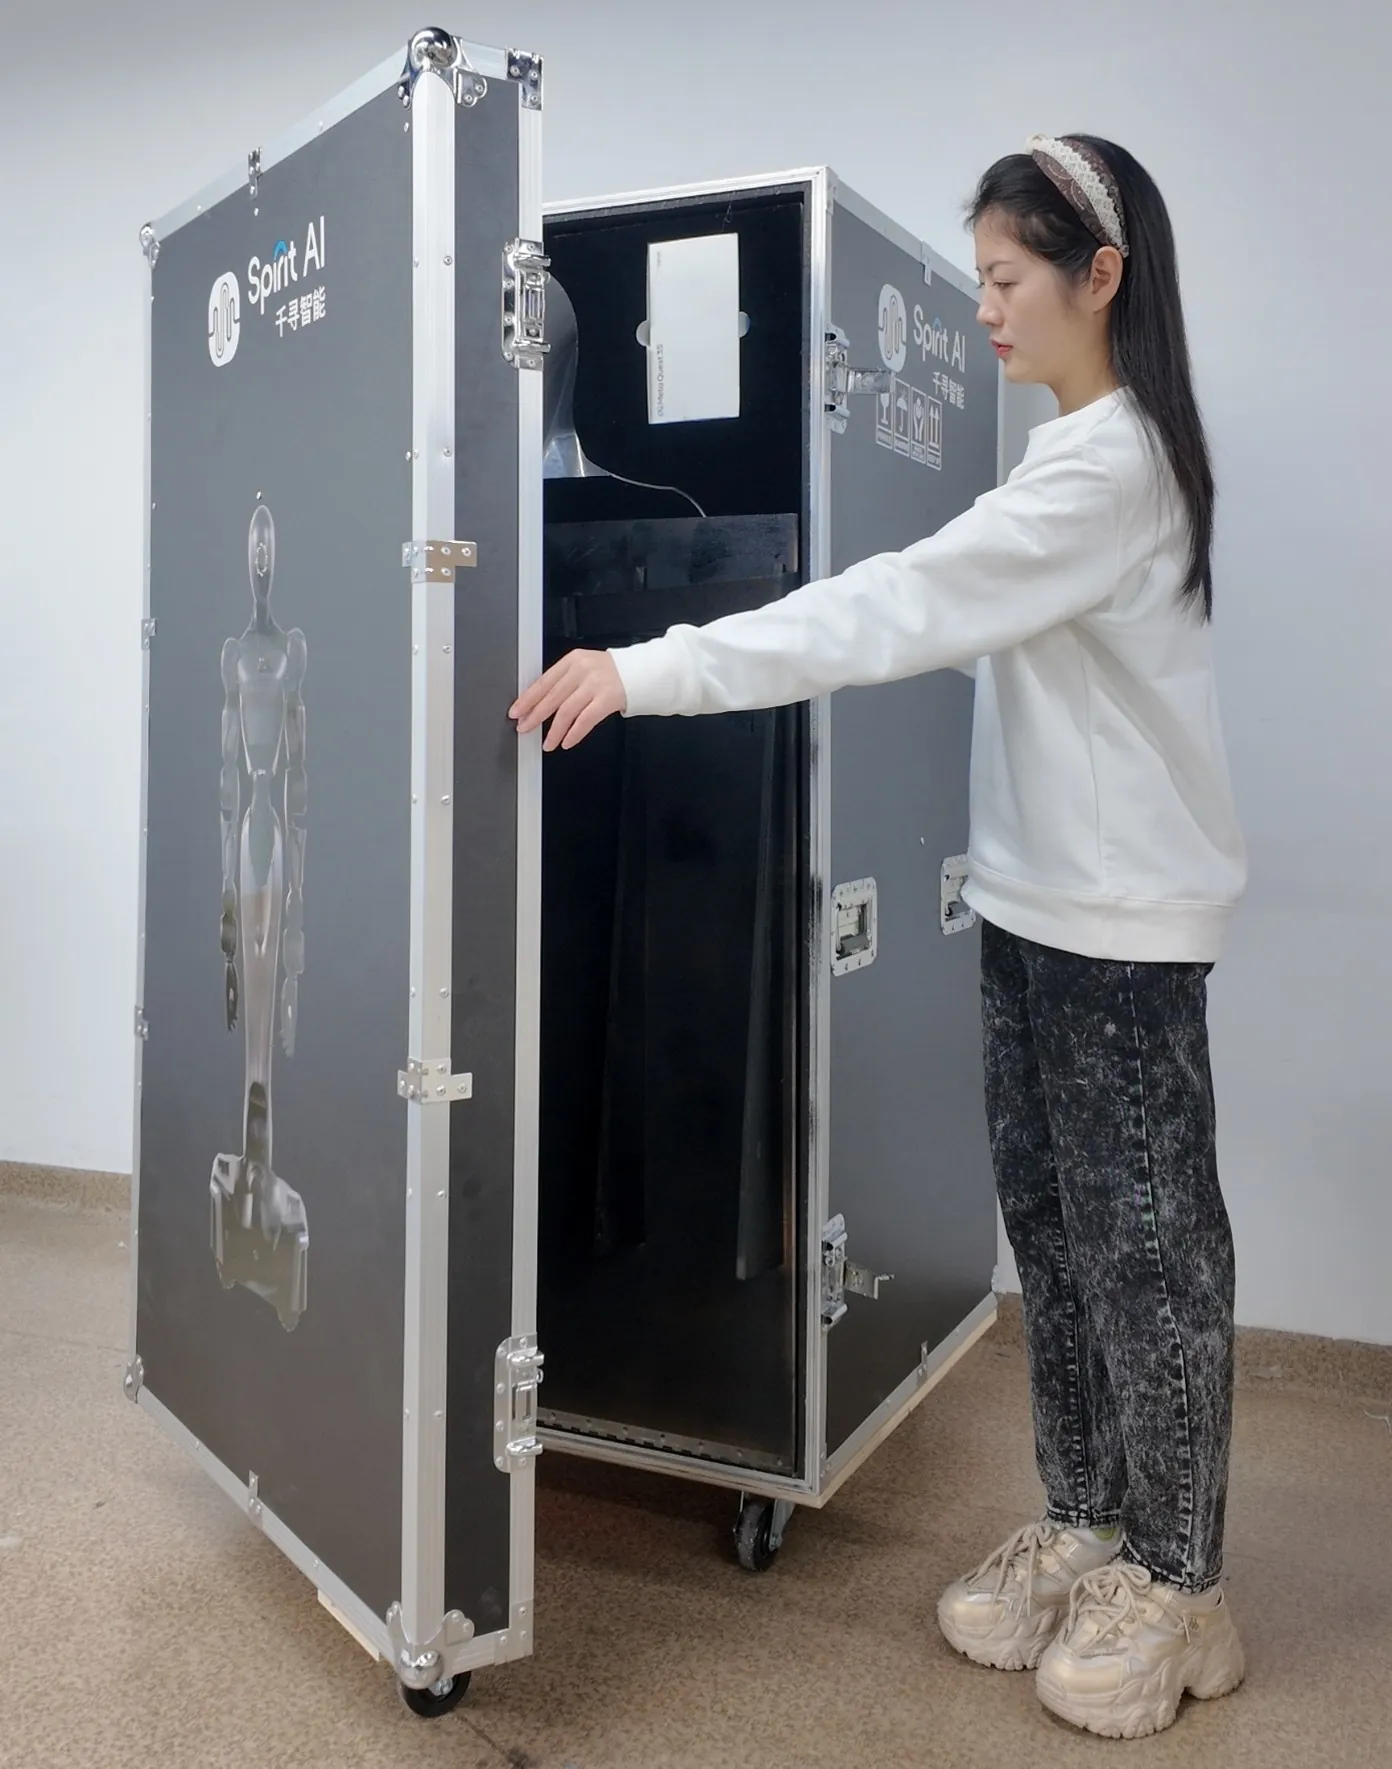
Slowly open the door while observing the interior of the case until the door is fully open. Ensure that the ramp latch remains locked throughout this process; otherwise, do not proceed to the next step.
Step 4
Remove the strap tensioner/ratchet from the lower front of the flight case. Operate the ratchet to release the strap and loosen it as much as possible, as shown below:
| No. | Illustration | Operation Description |
|---|---|---|
| 1 |  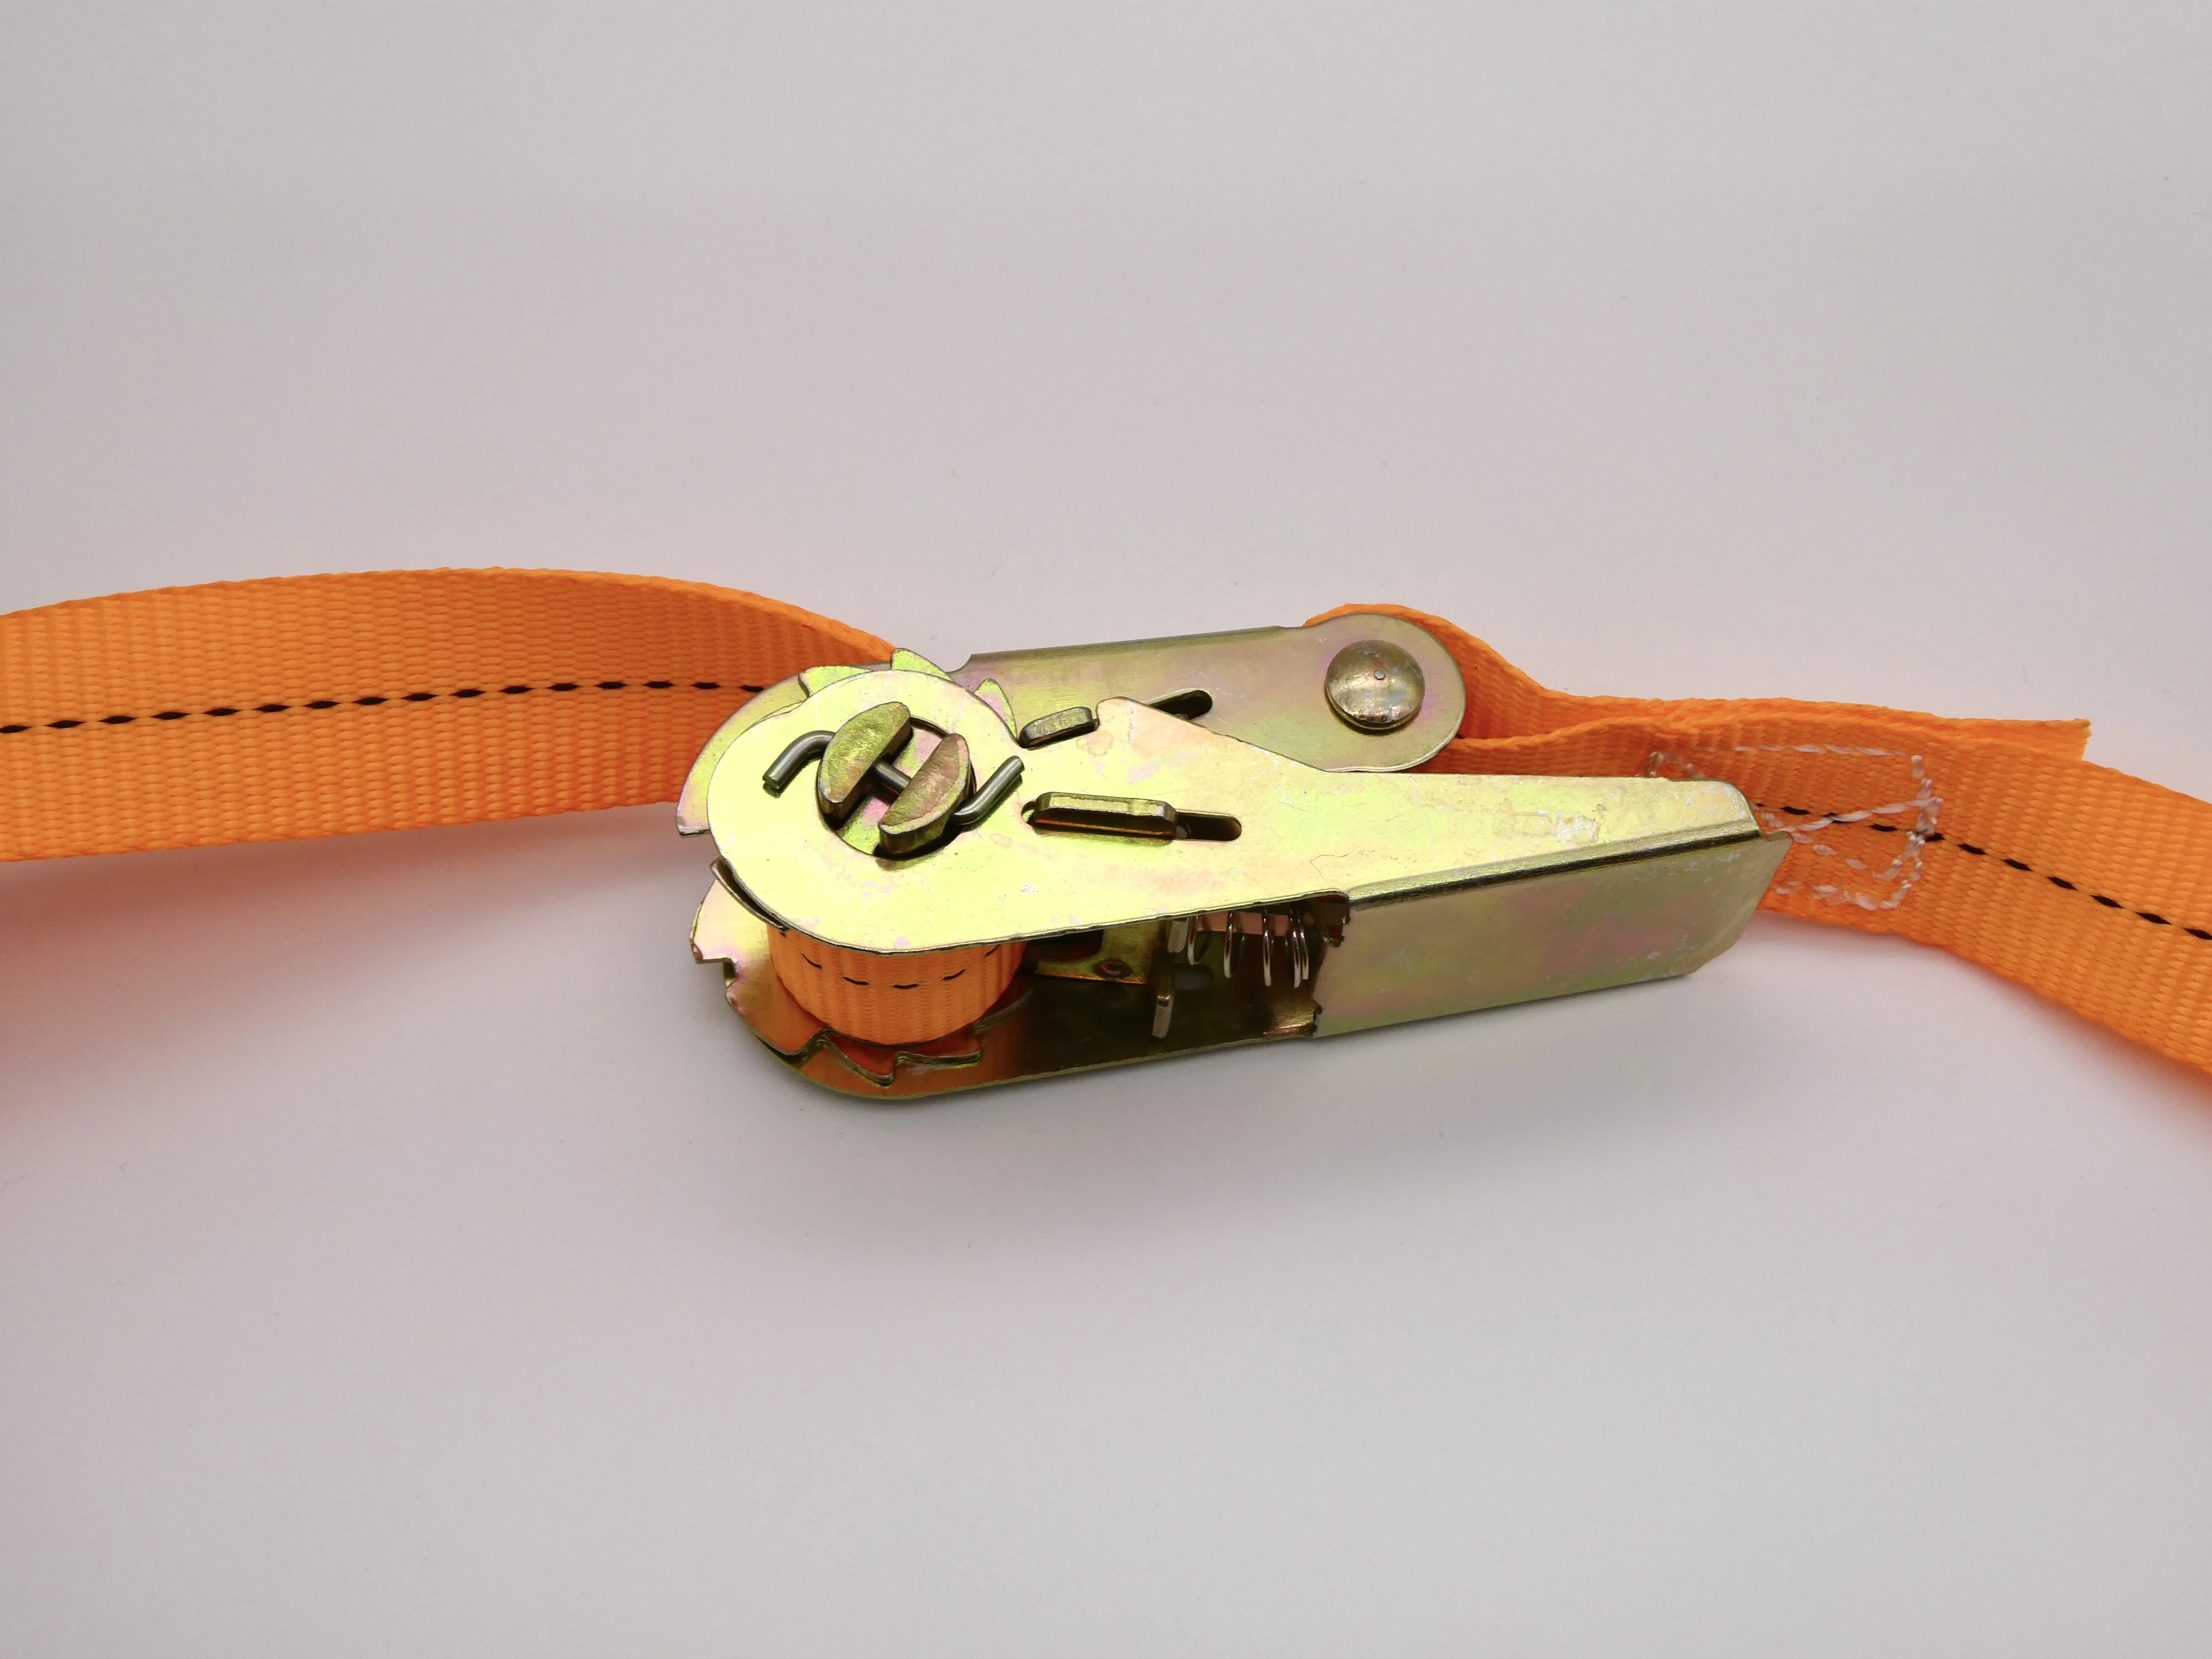 | Pull the ratchet out from the bottom front of the flight case |
| 2 | 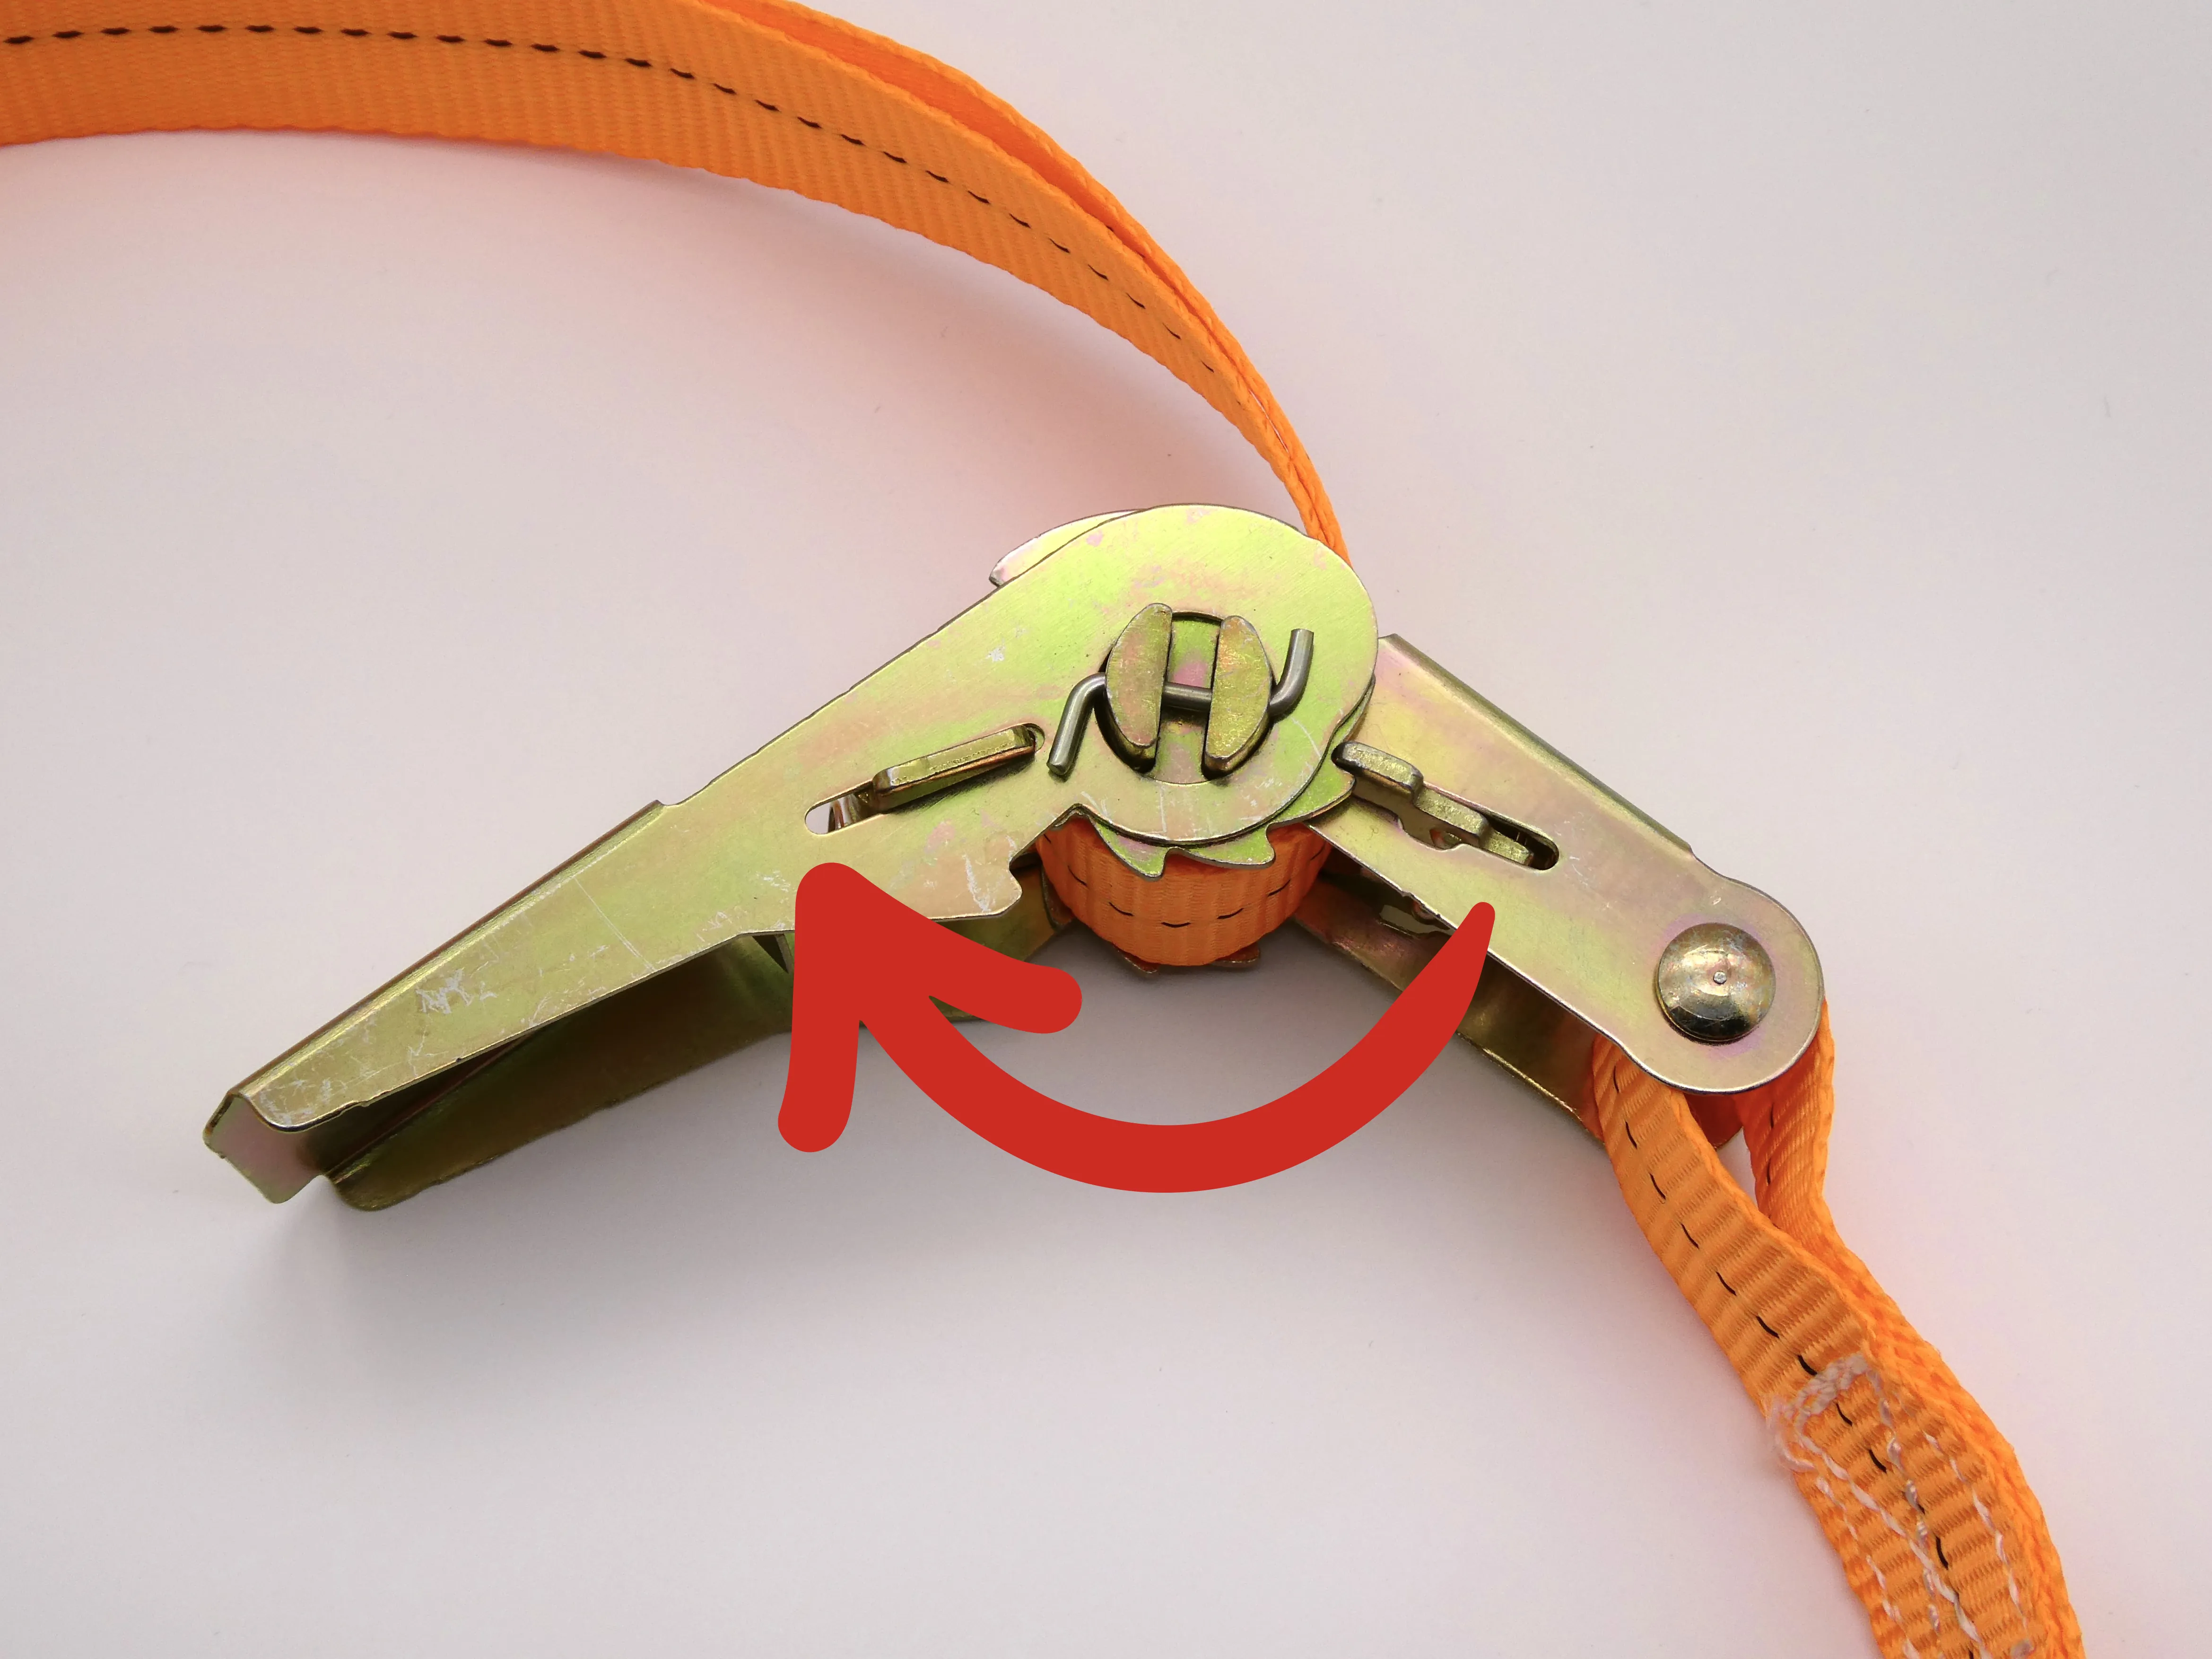 | Rotate and open the ratchet around the pivot |
| 3 |  | Pull up both side tabs (blue arrow direction) by hand, then continue rotating until it locks into the second slot, as shown in the released state |
| 4 | 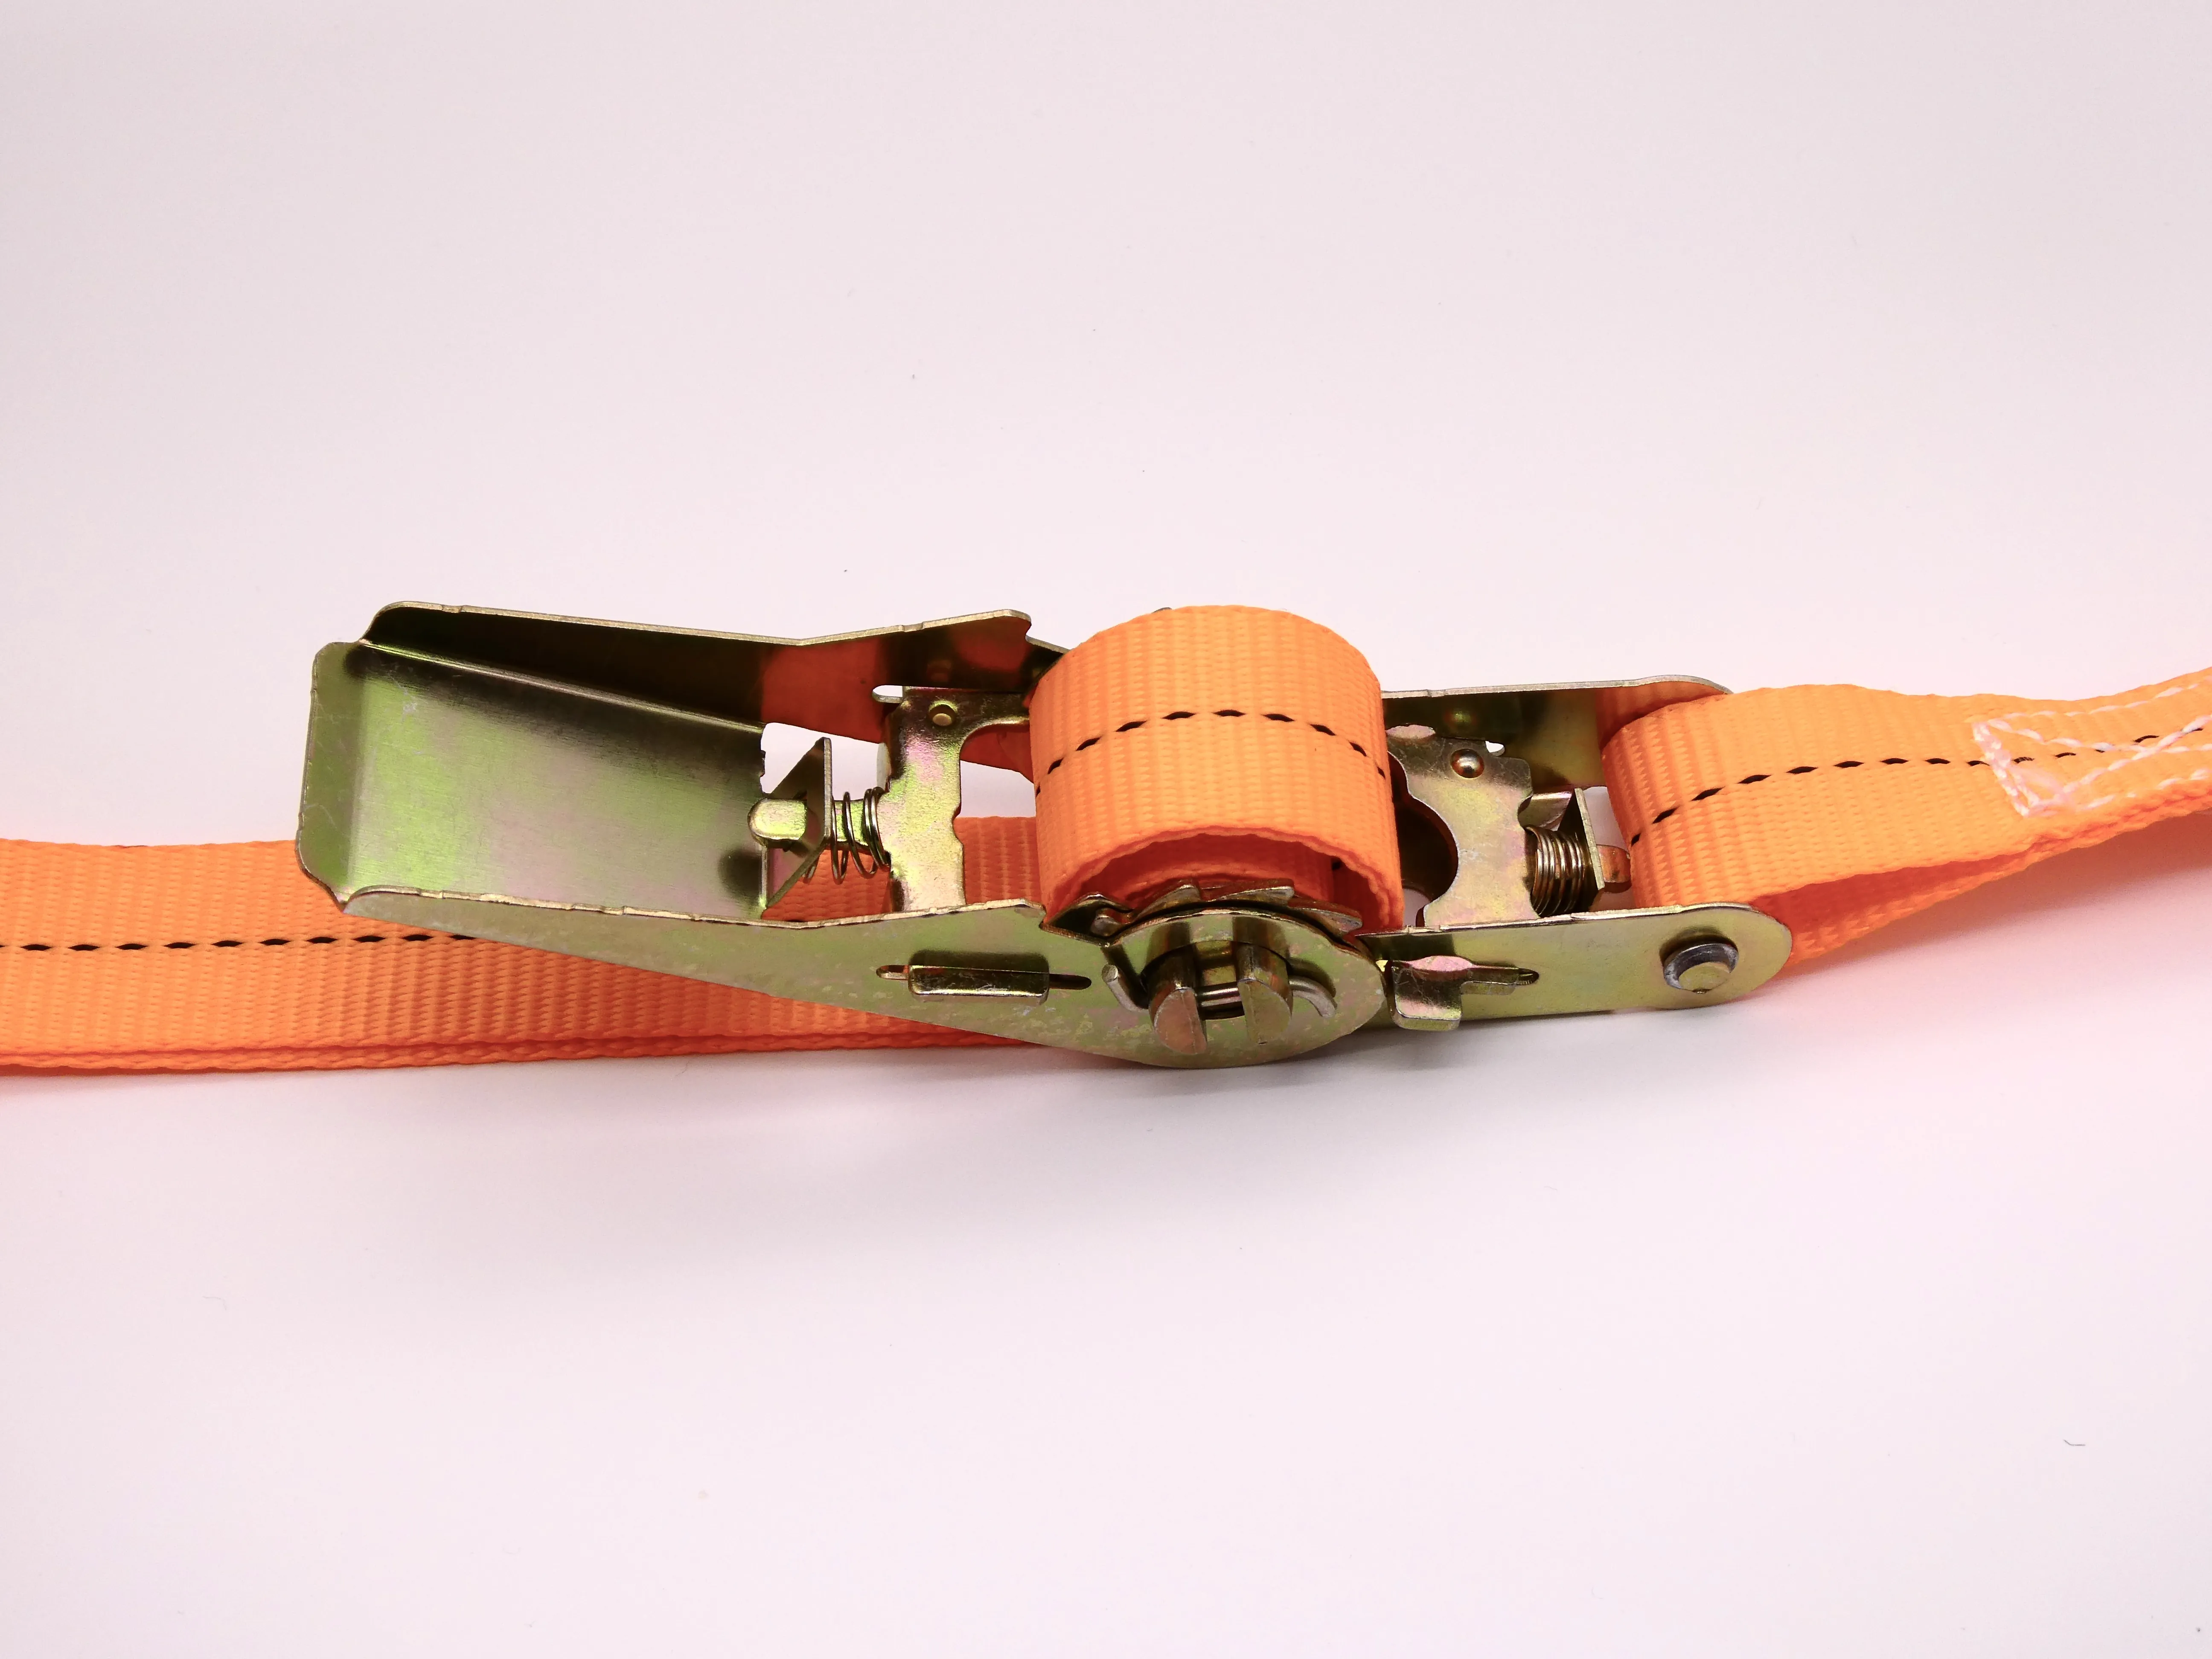 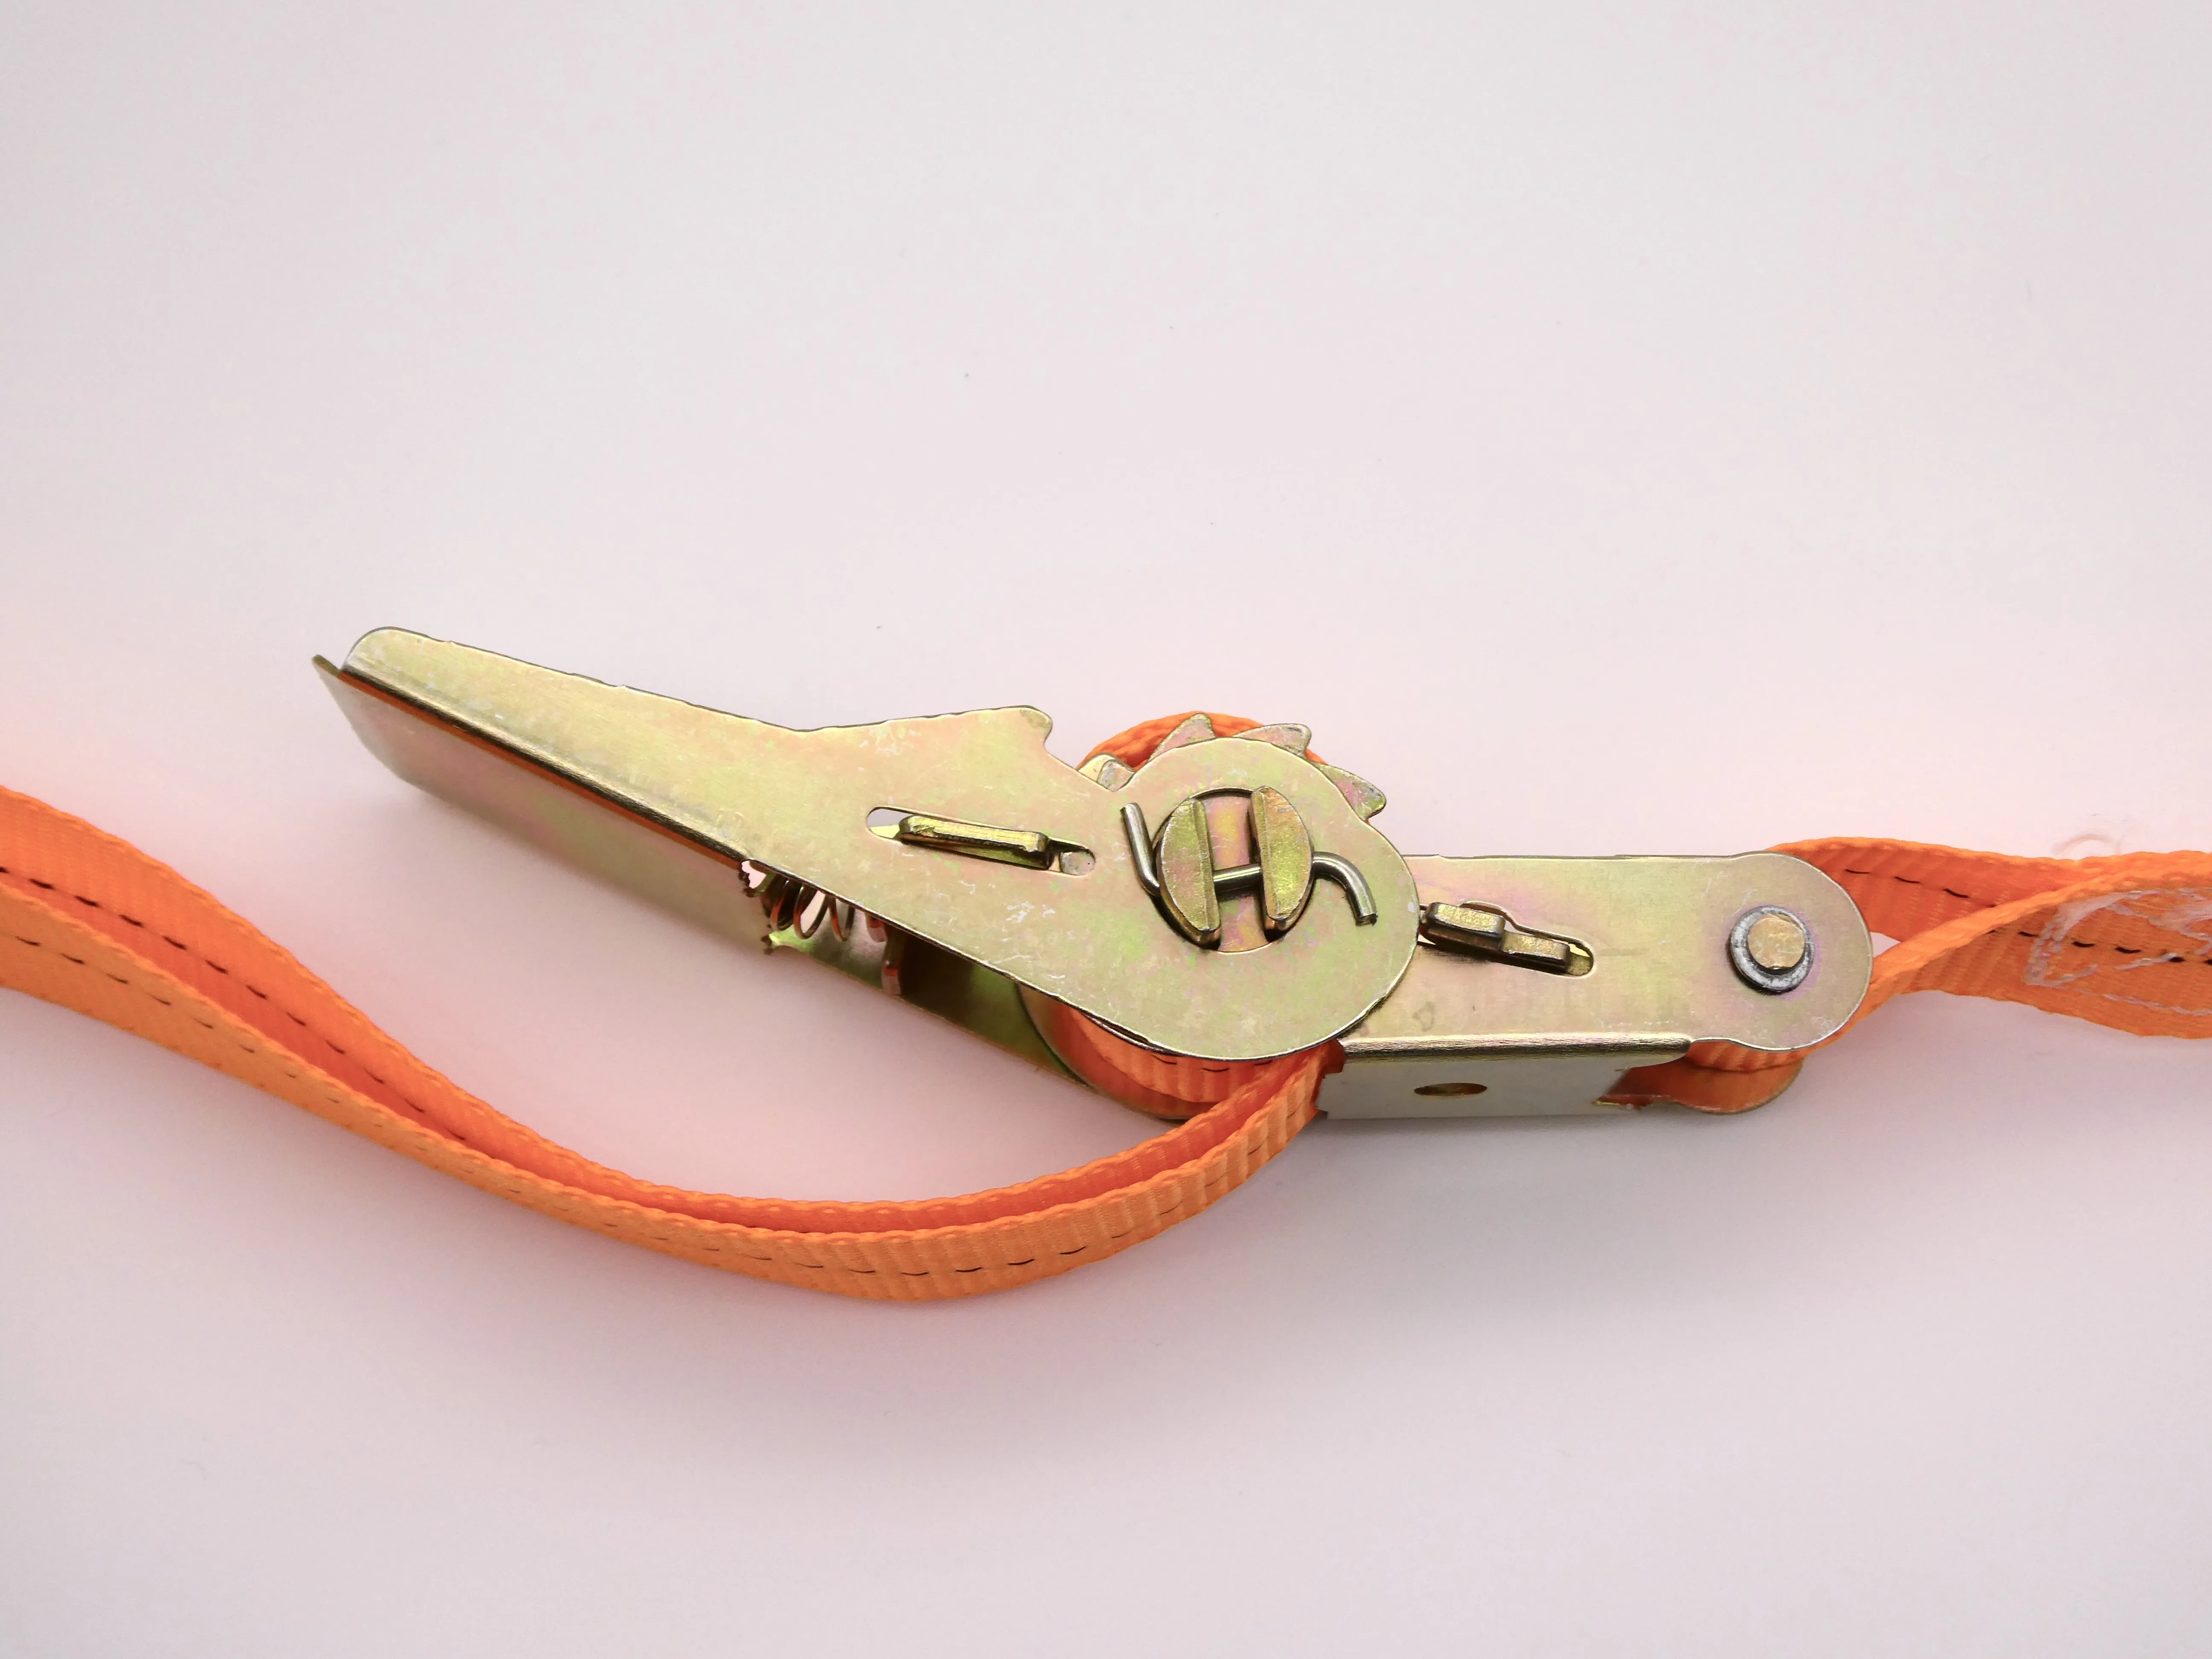 | The ratchet is now fully opened |
| 5 | 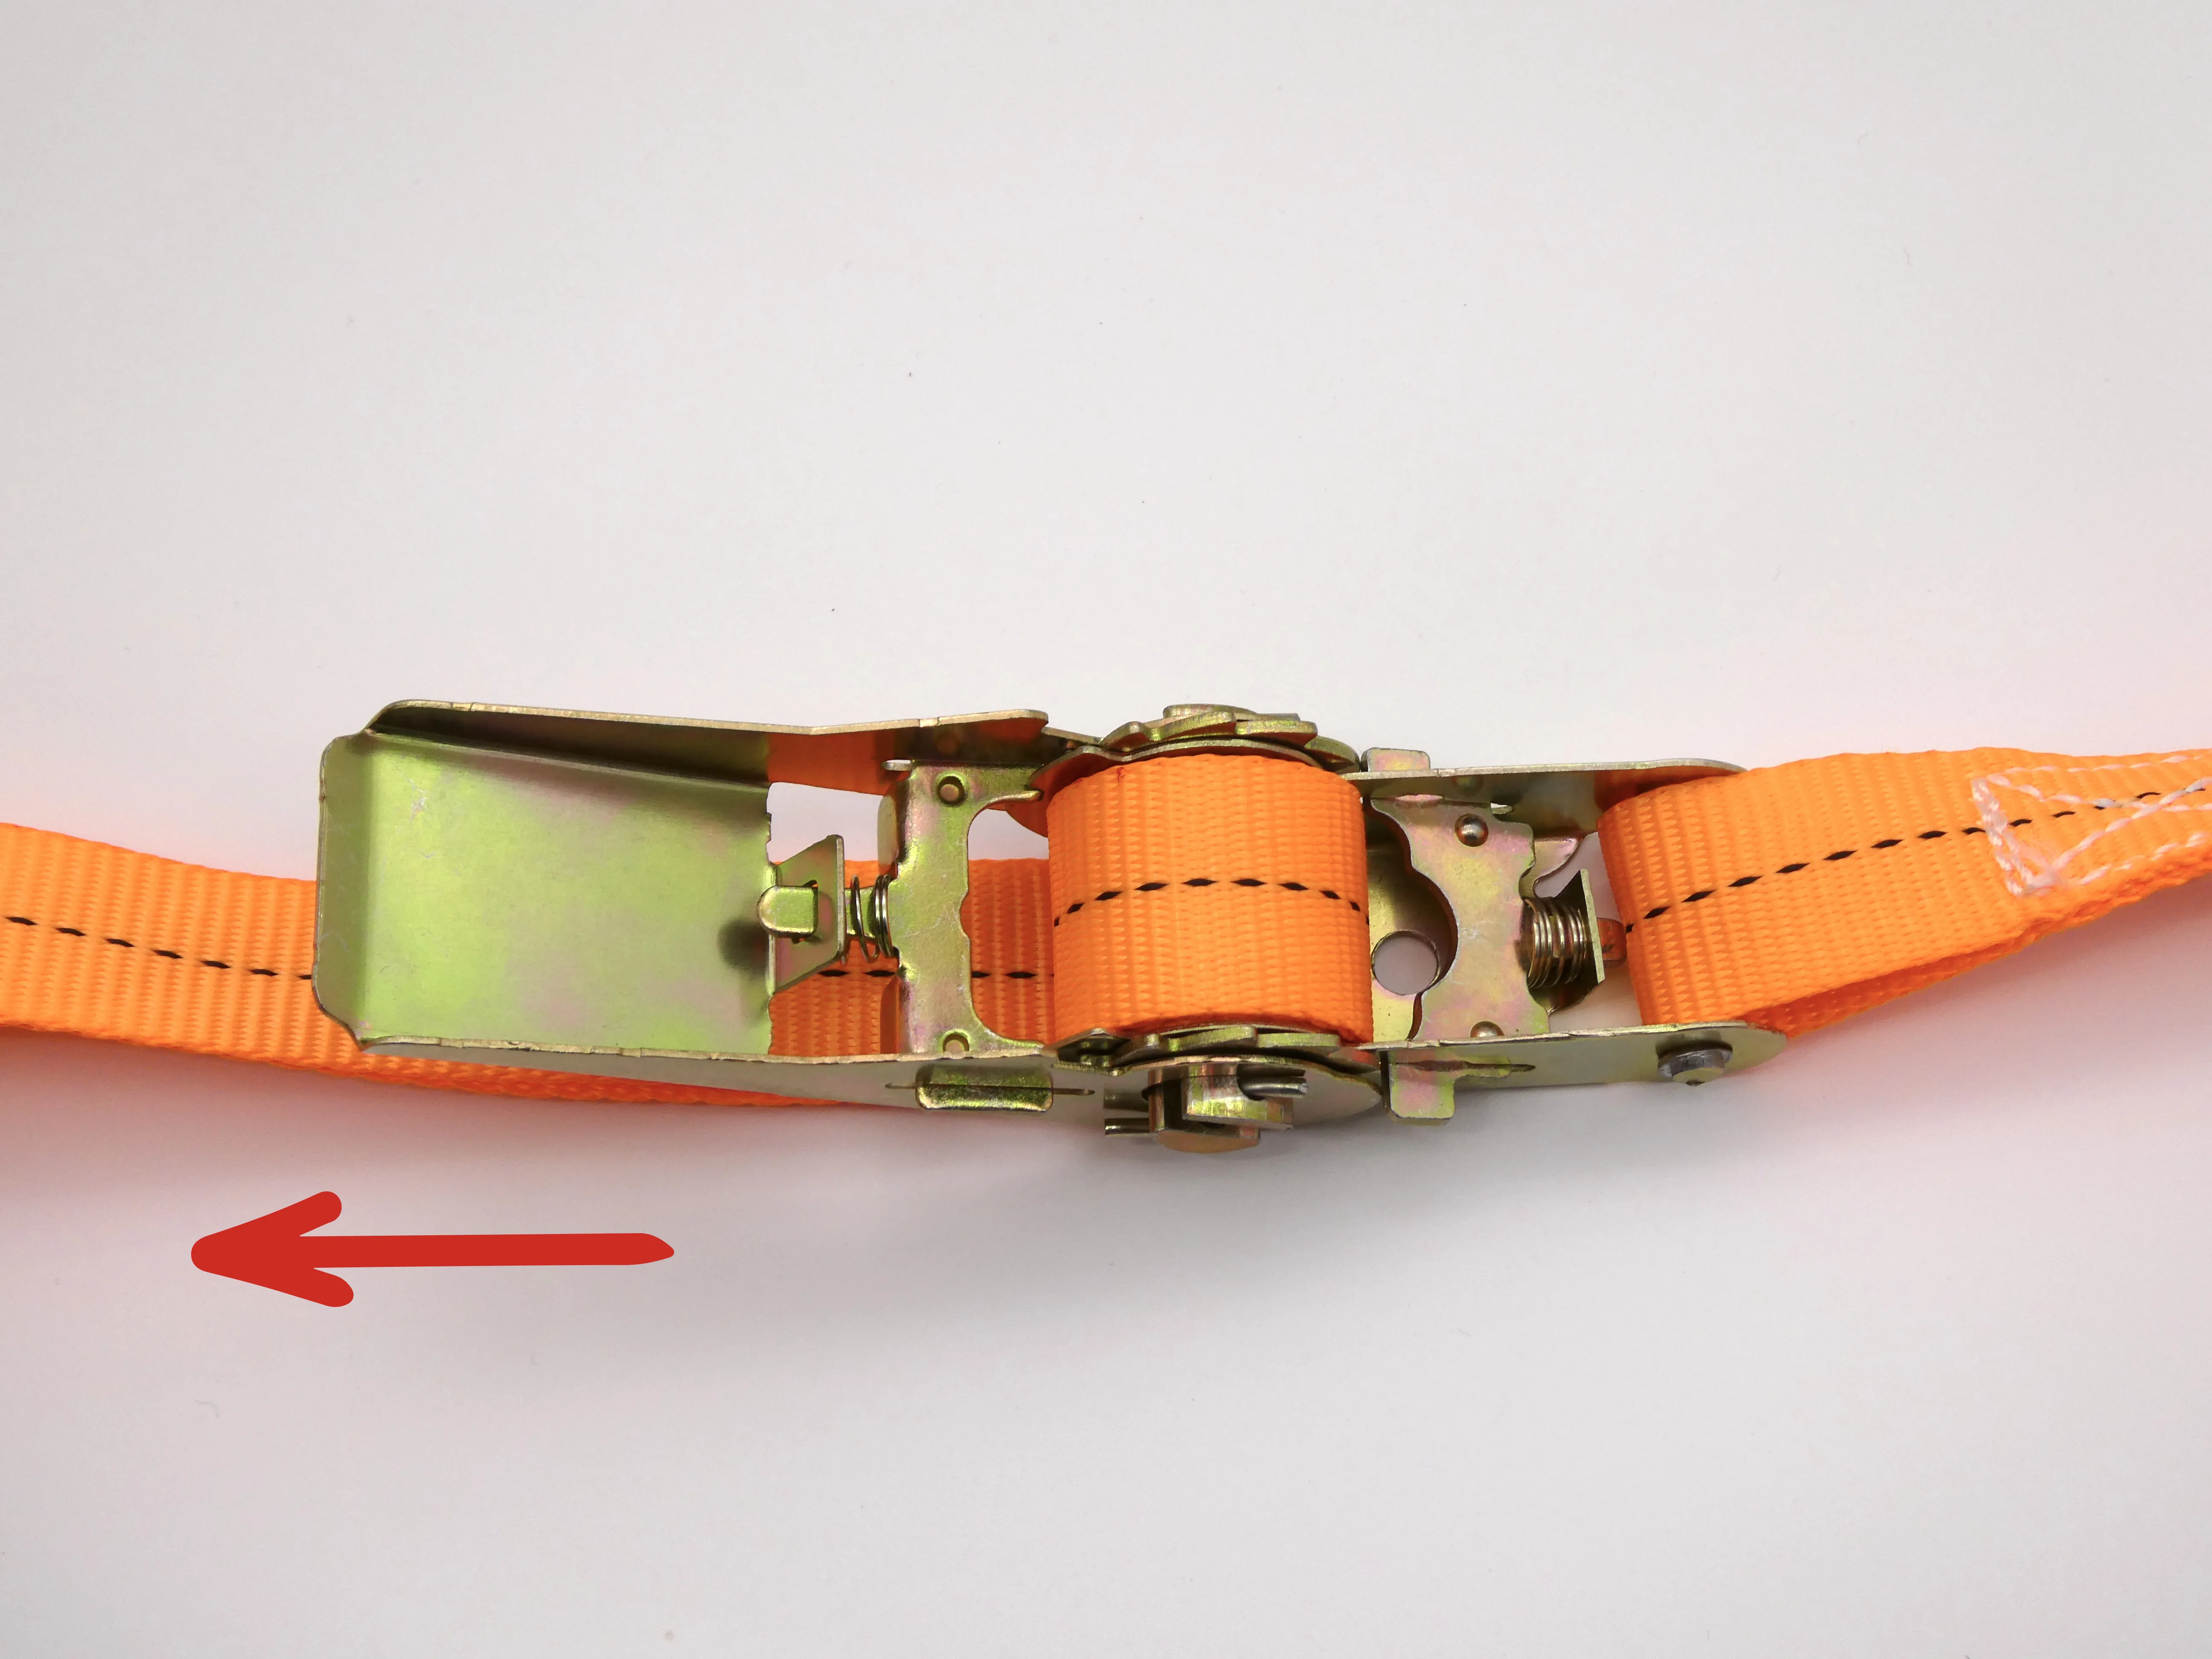 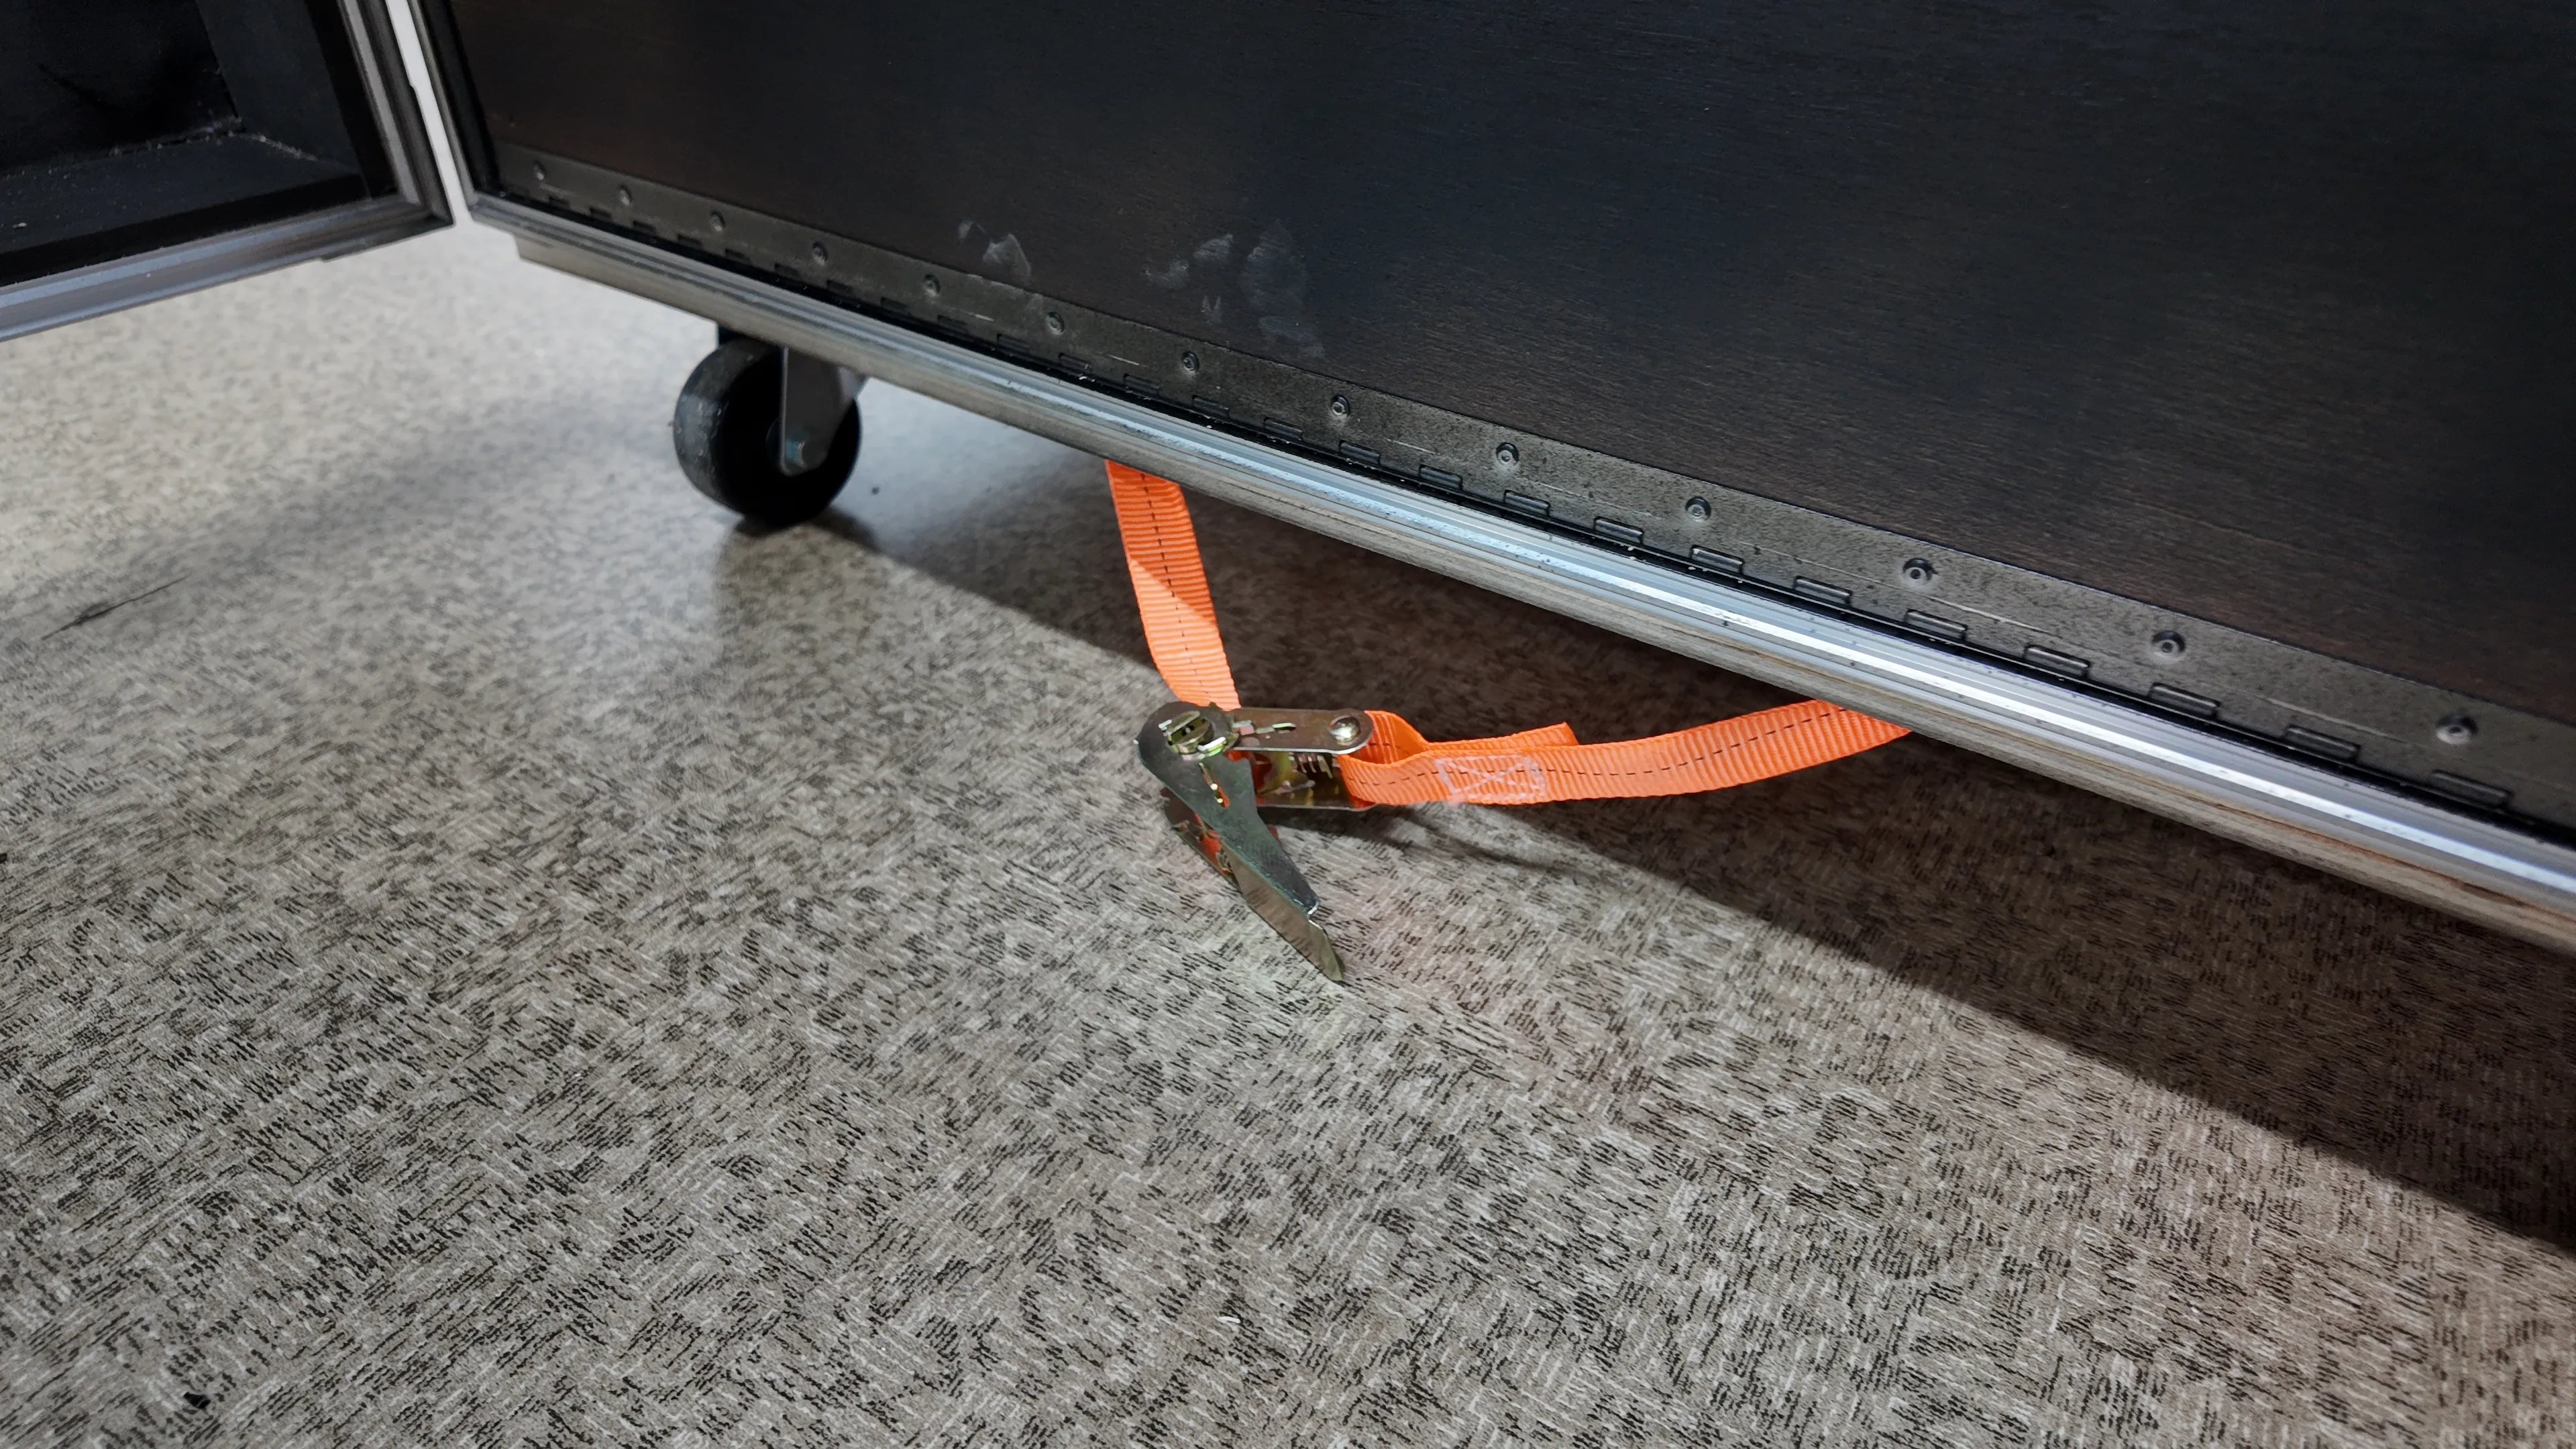 | Pull the strap from the winding side (ratchet handle side) until the strap is released from the spool (blue arrow direction) |
| 6 | 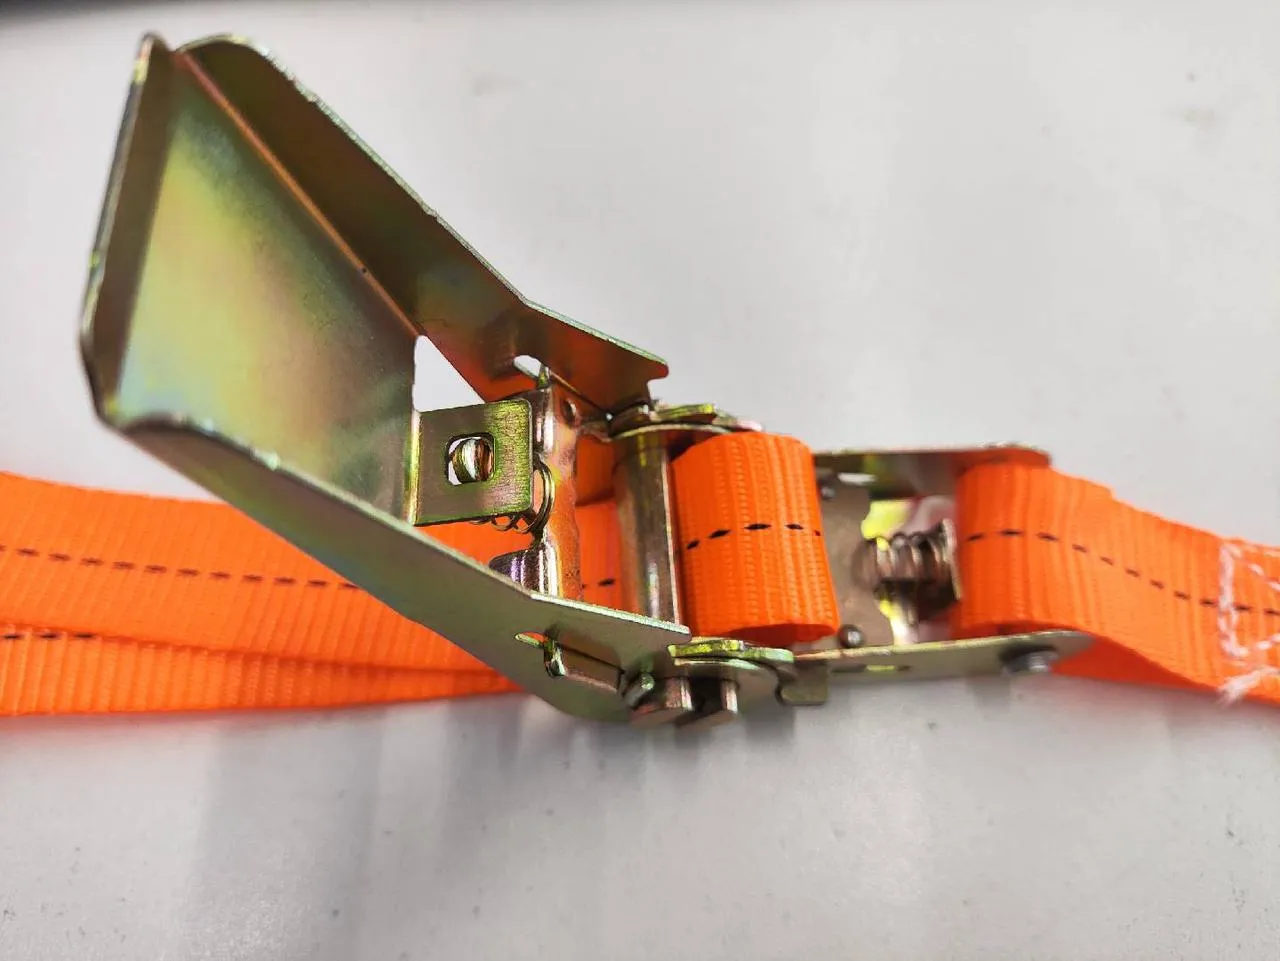 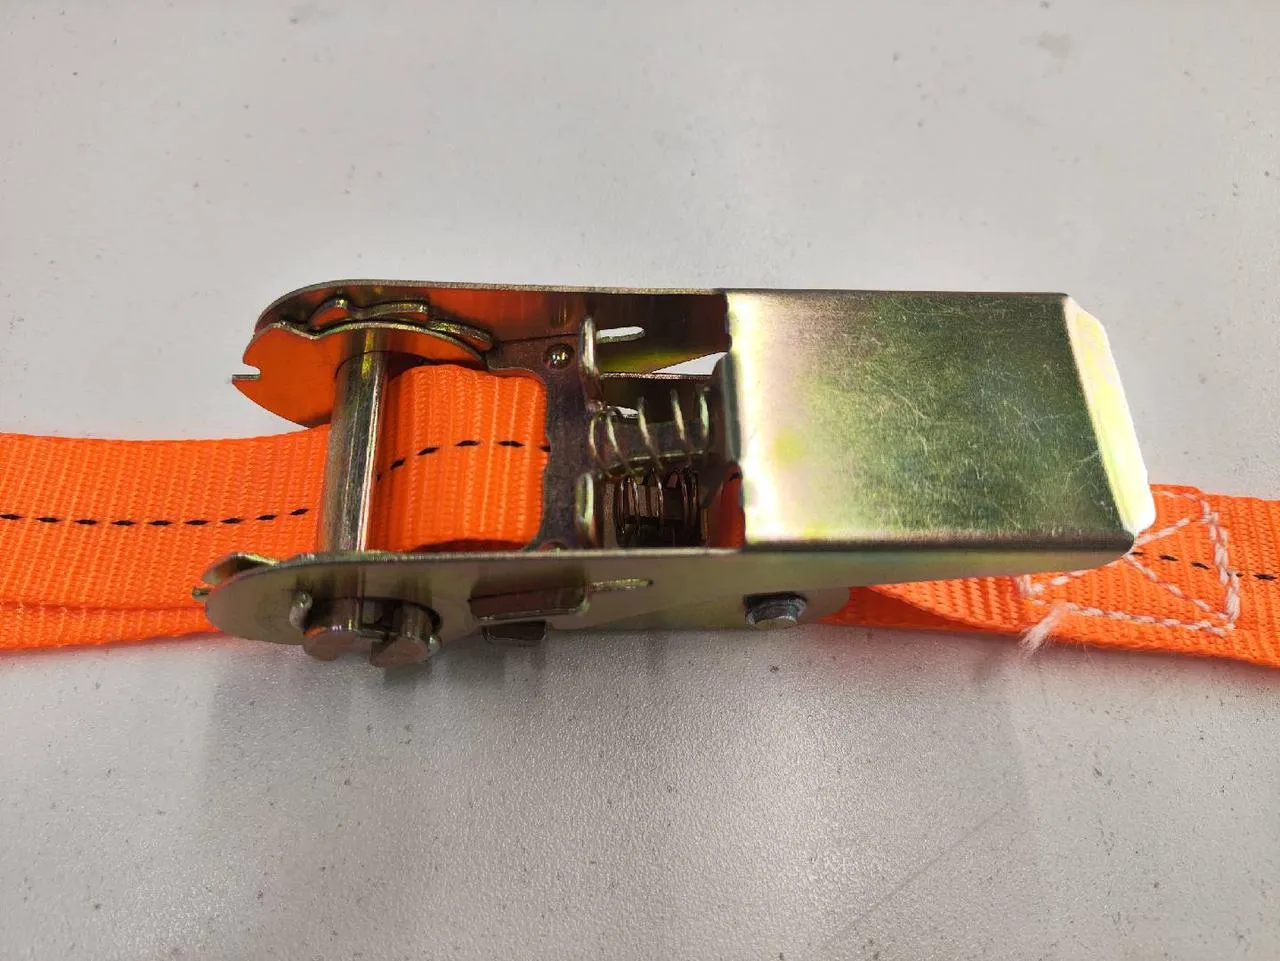 | After fully releasing, close the ratchet |
Step 5
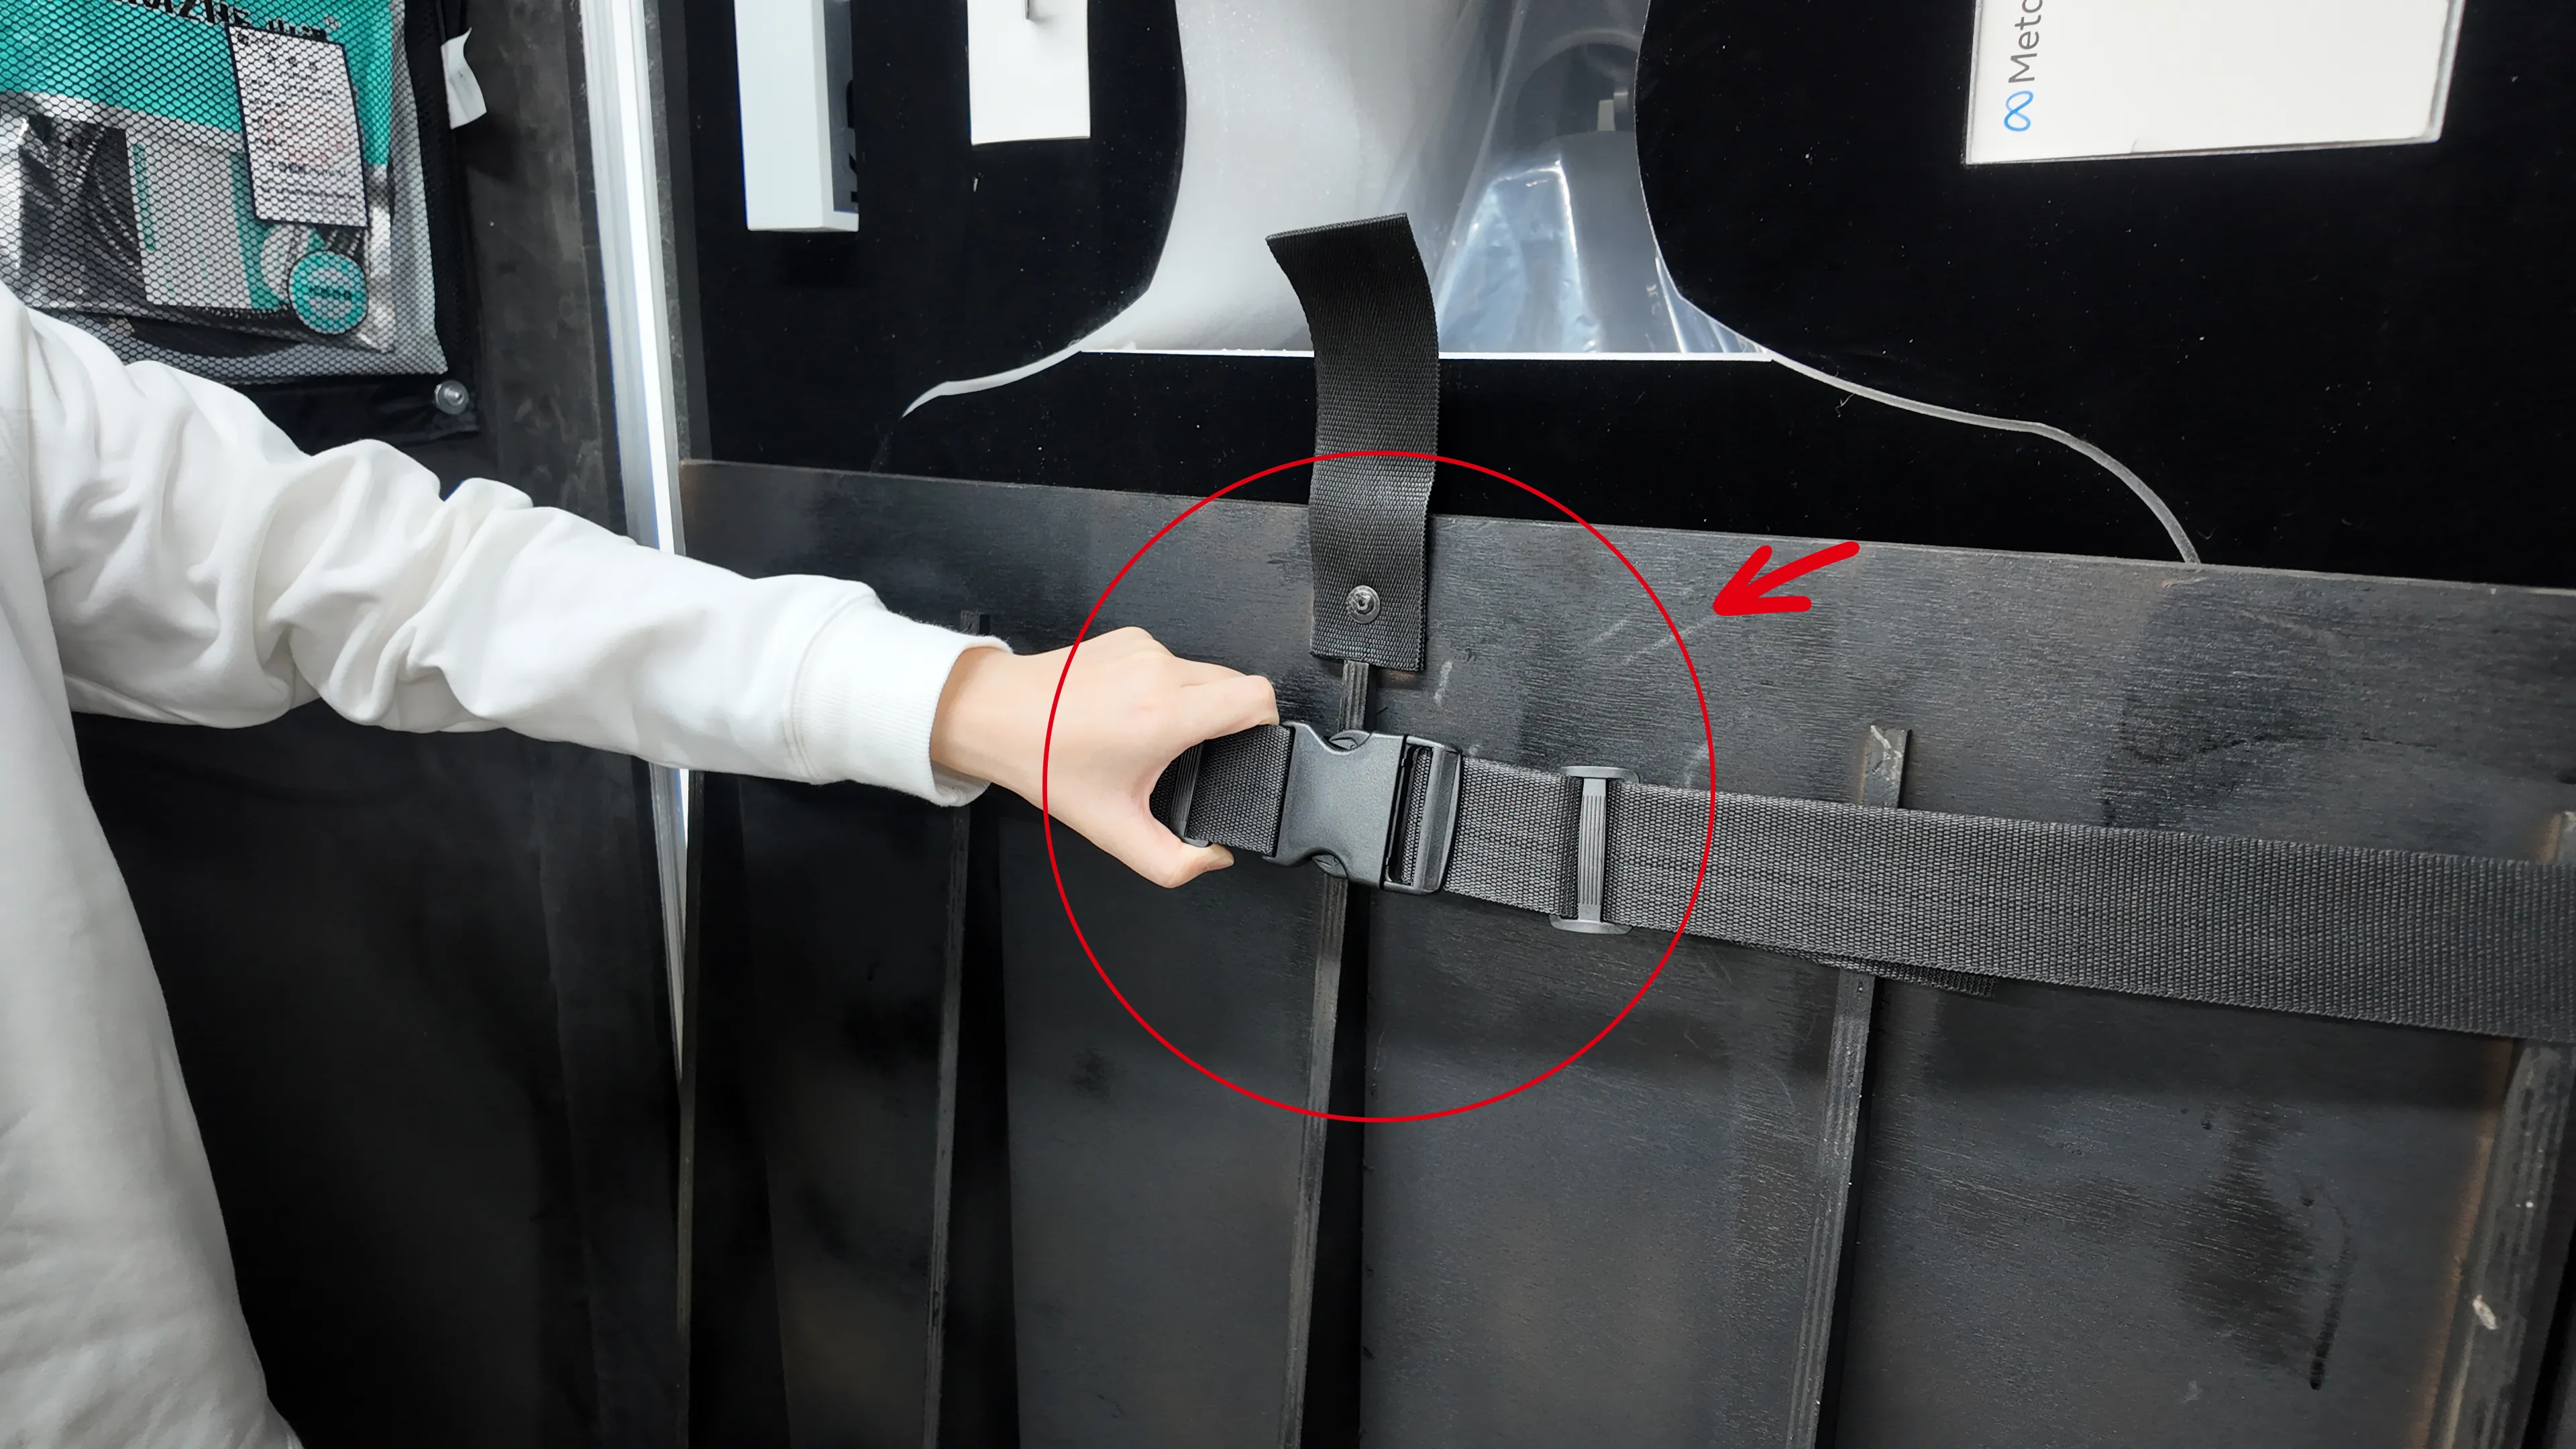
You can now fully observe the interior of the case. Use both hands to release the horizontal restraint buckles.
 | 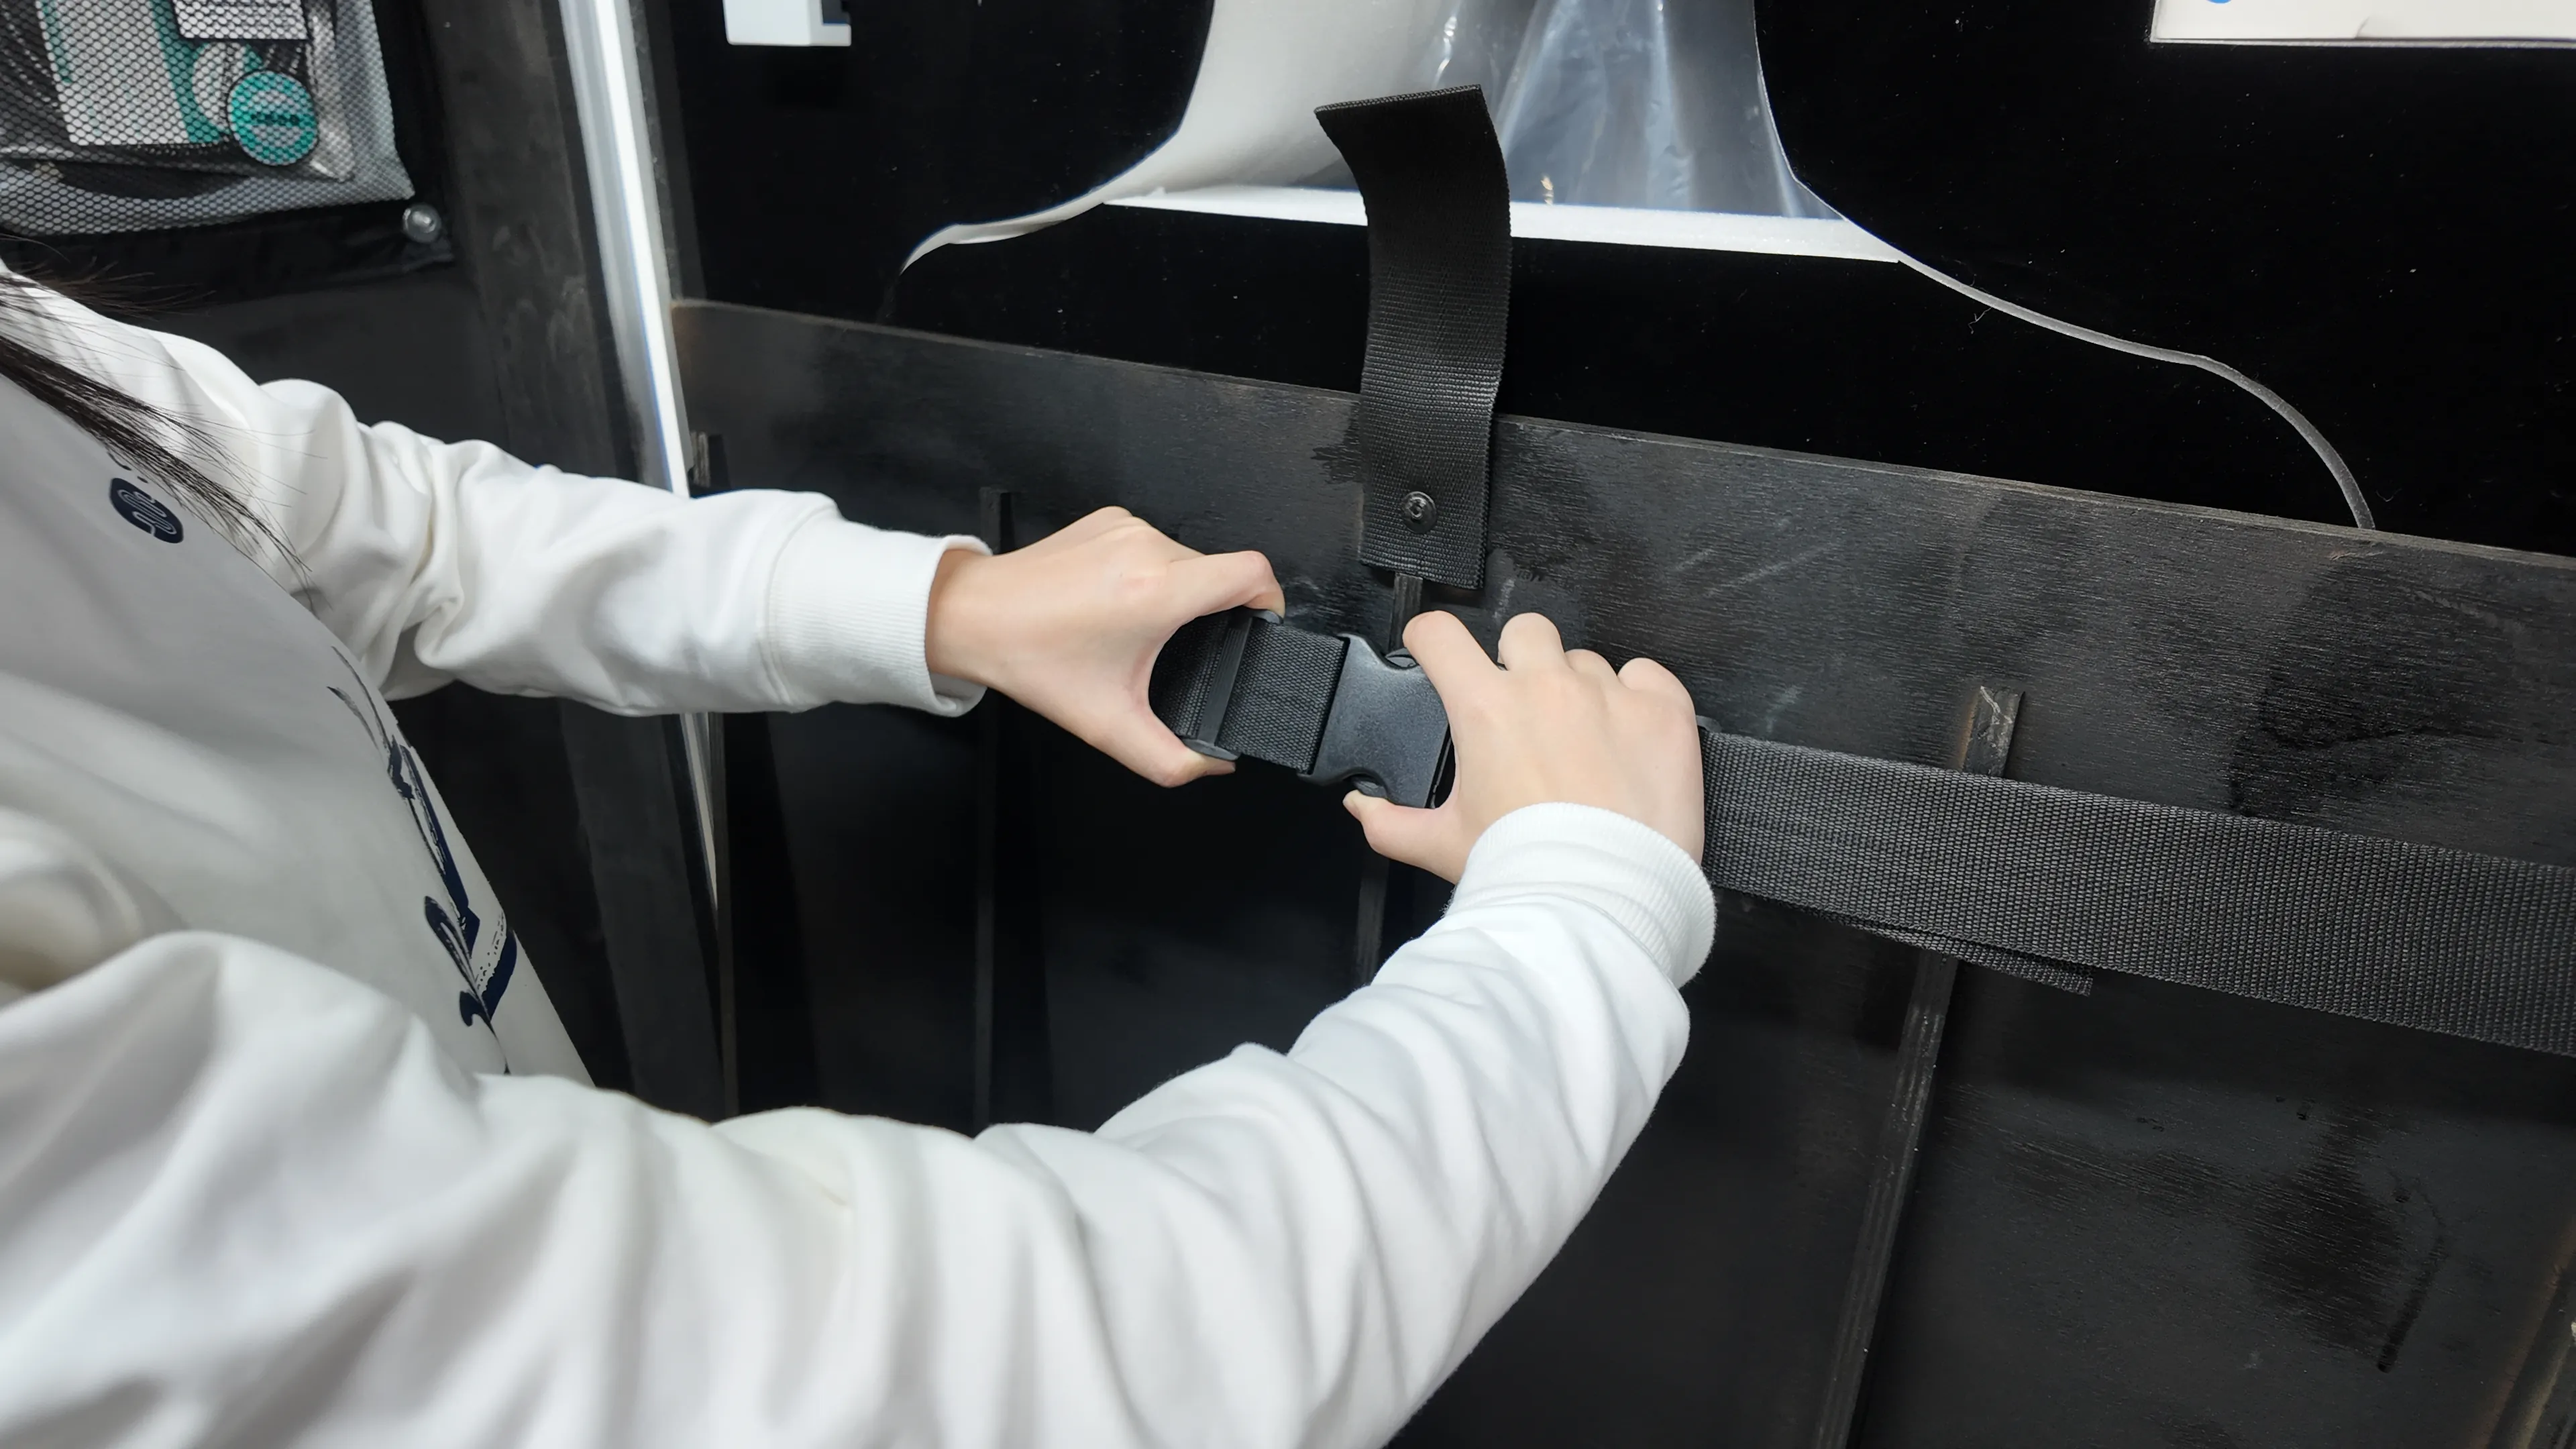 | 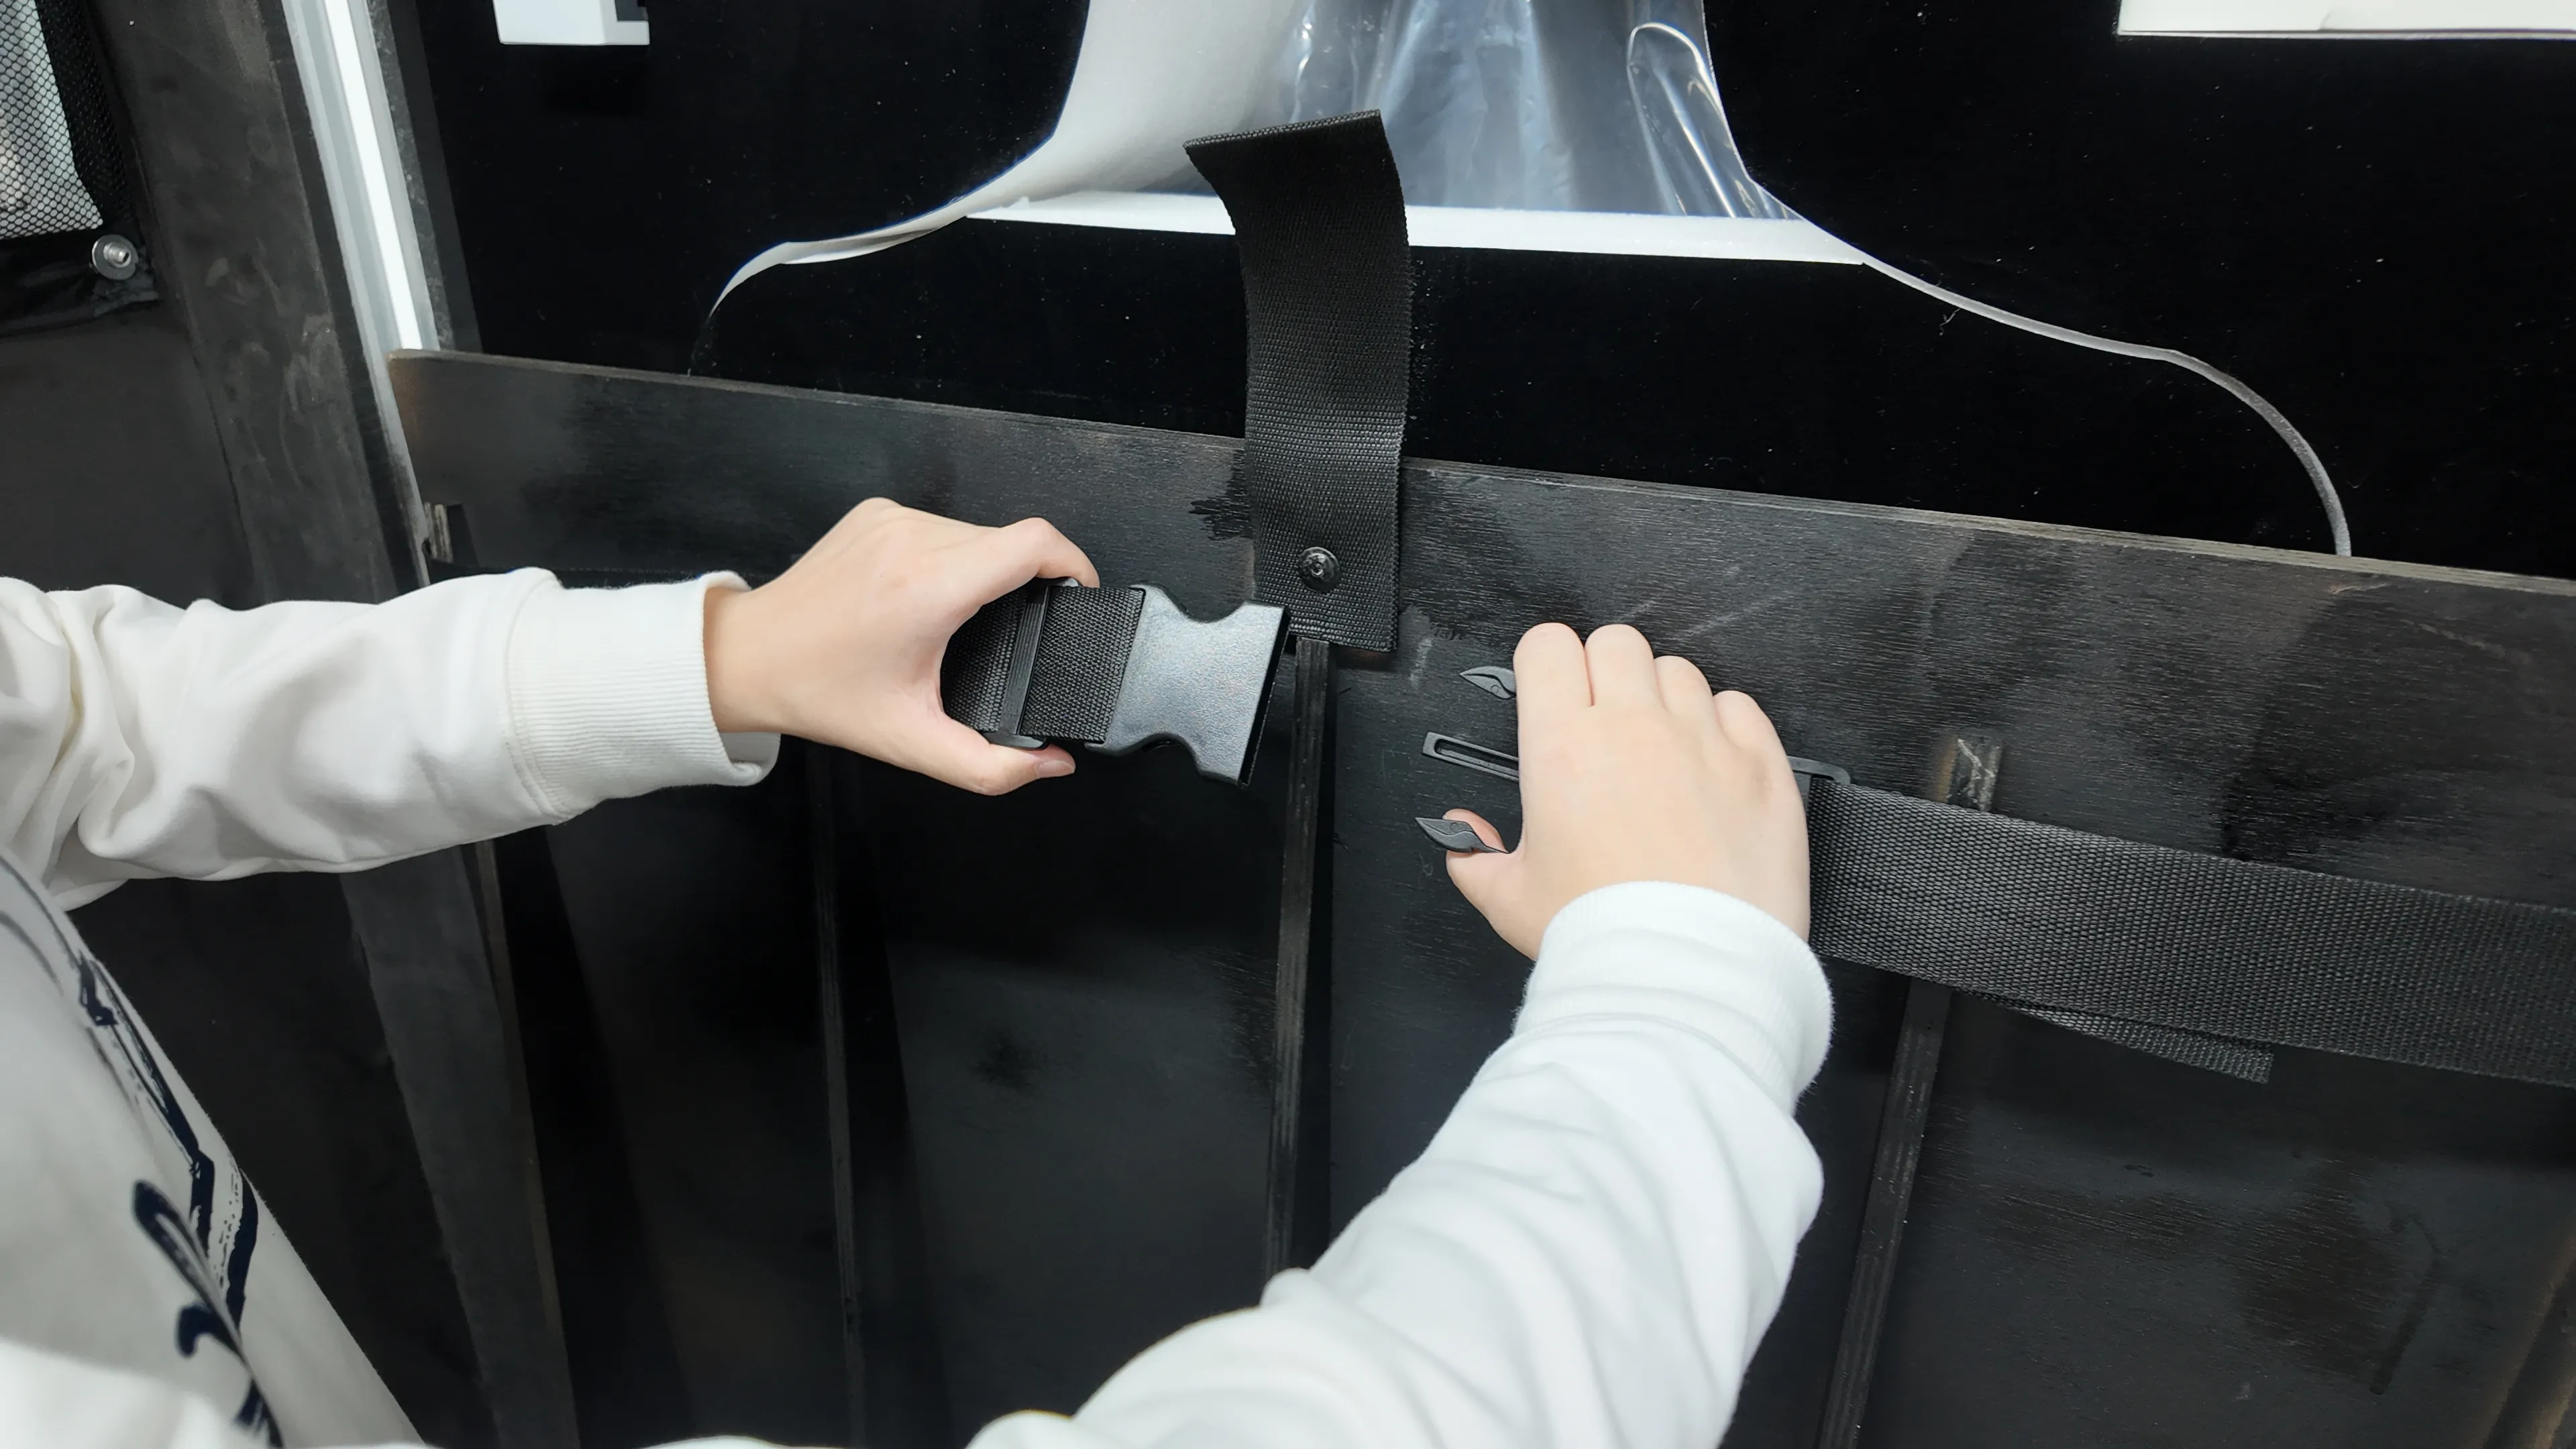 |
|---|
Step 6
After releasing the fixing buckles, use one hand to hold the ramp pull rope. Note that the ramp is heavy. Use the rope to guide the ramp down slowly until it fully contacts the ground.
 |  |  |
|---|
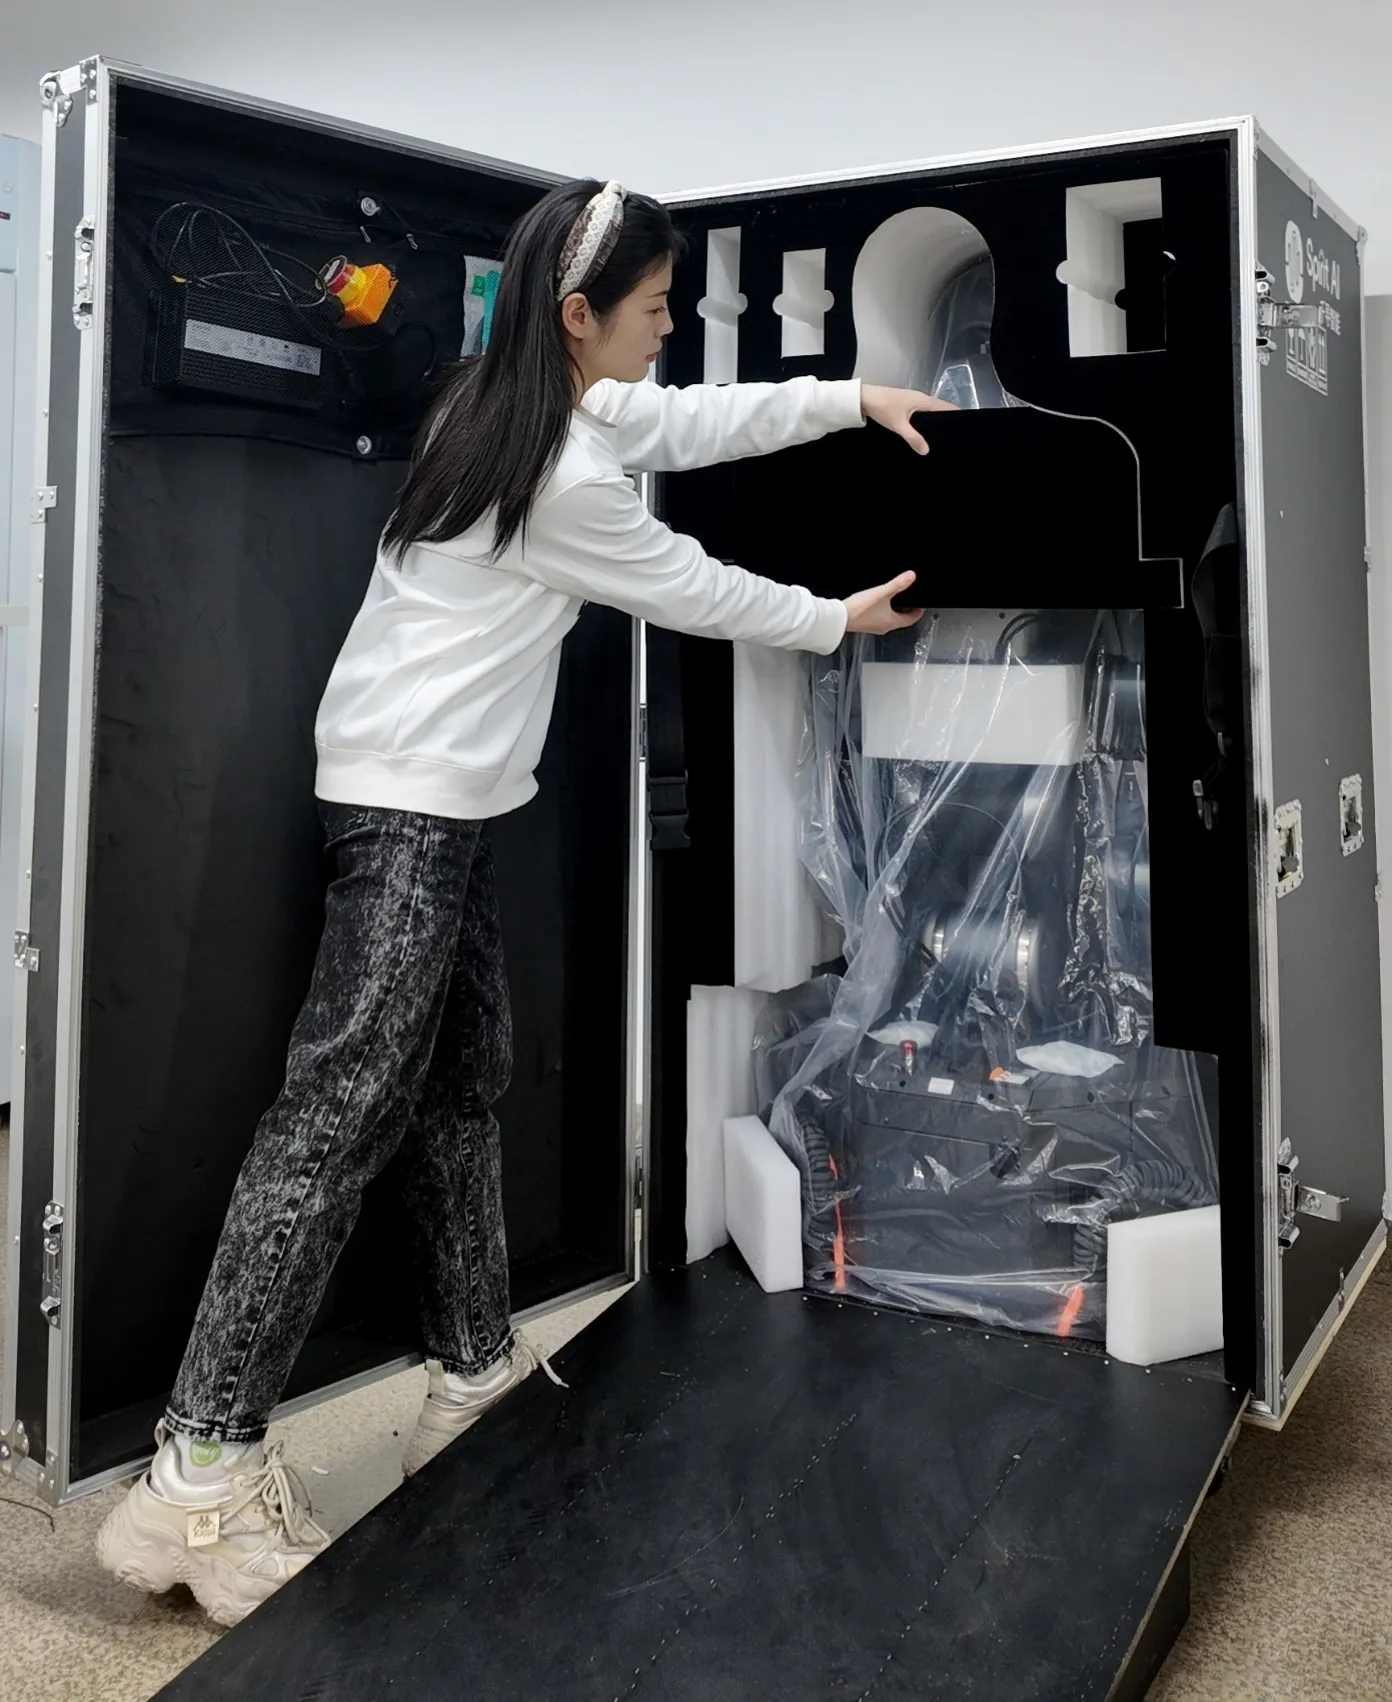
Step 7
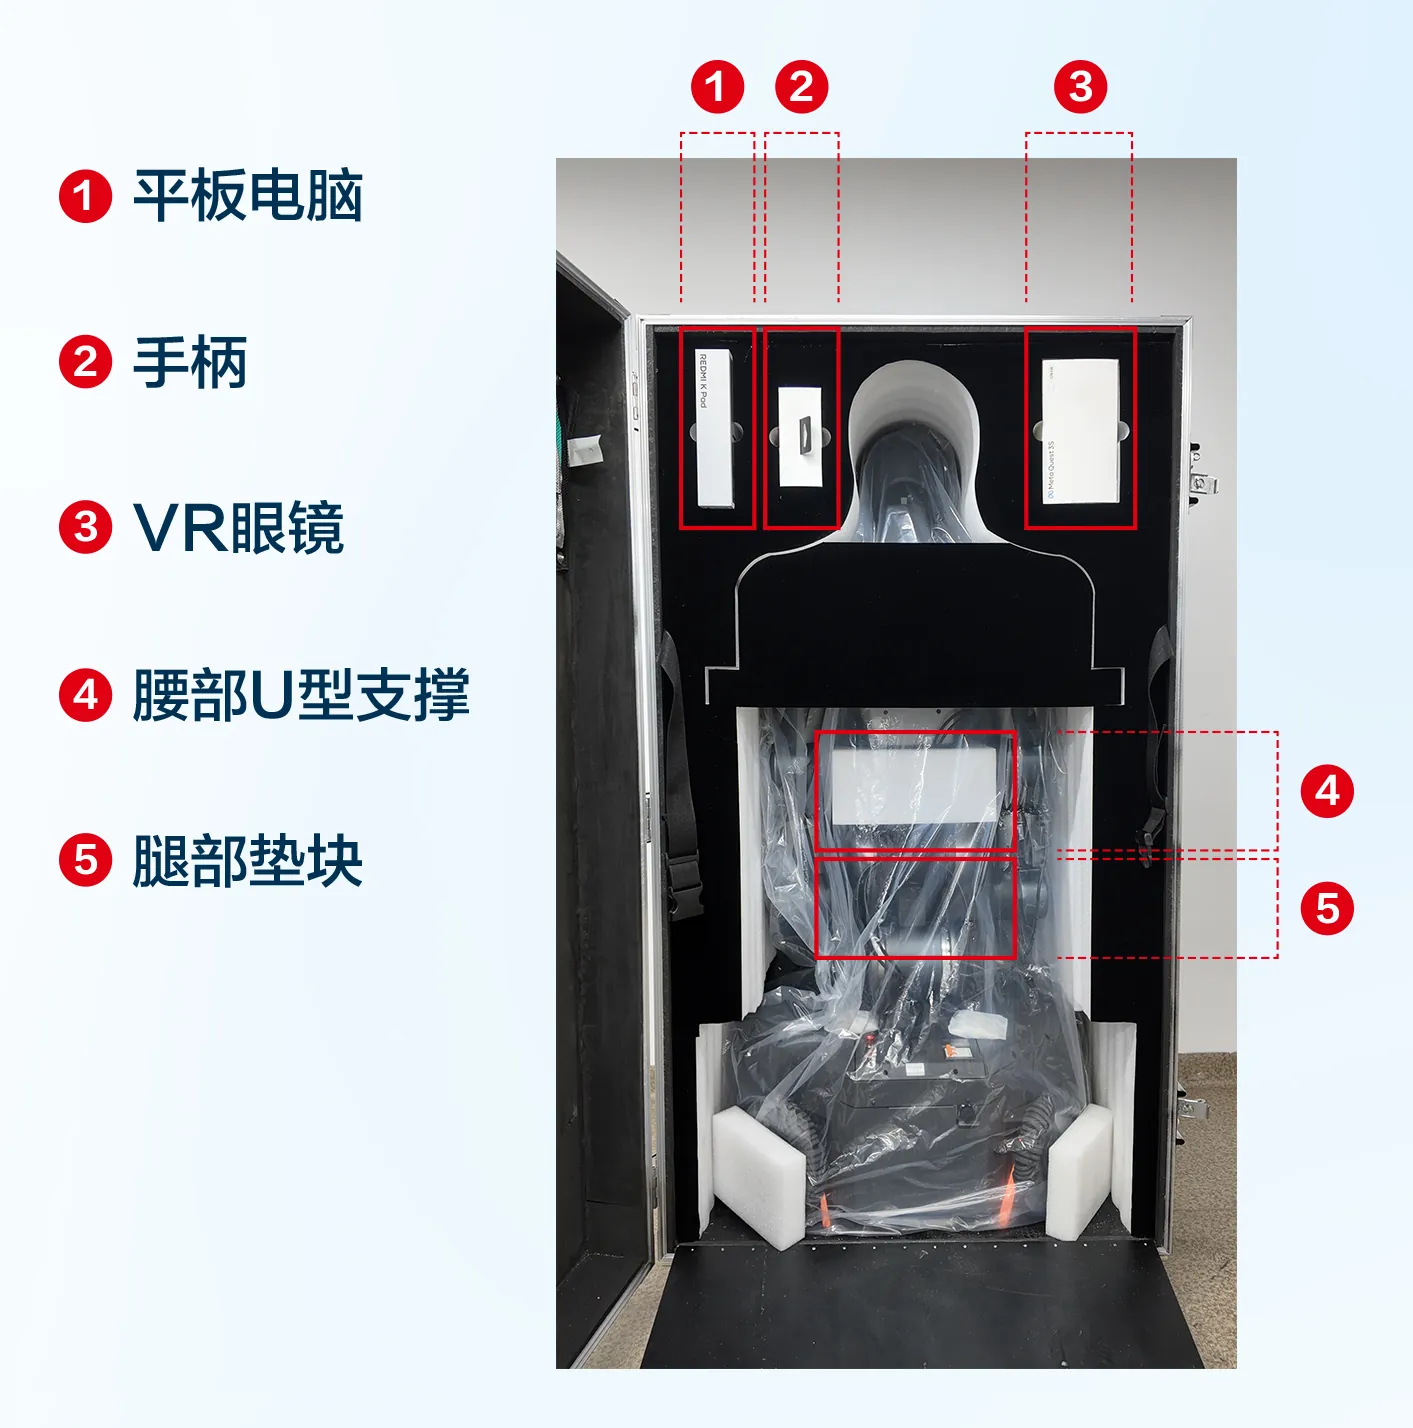
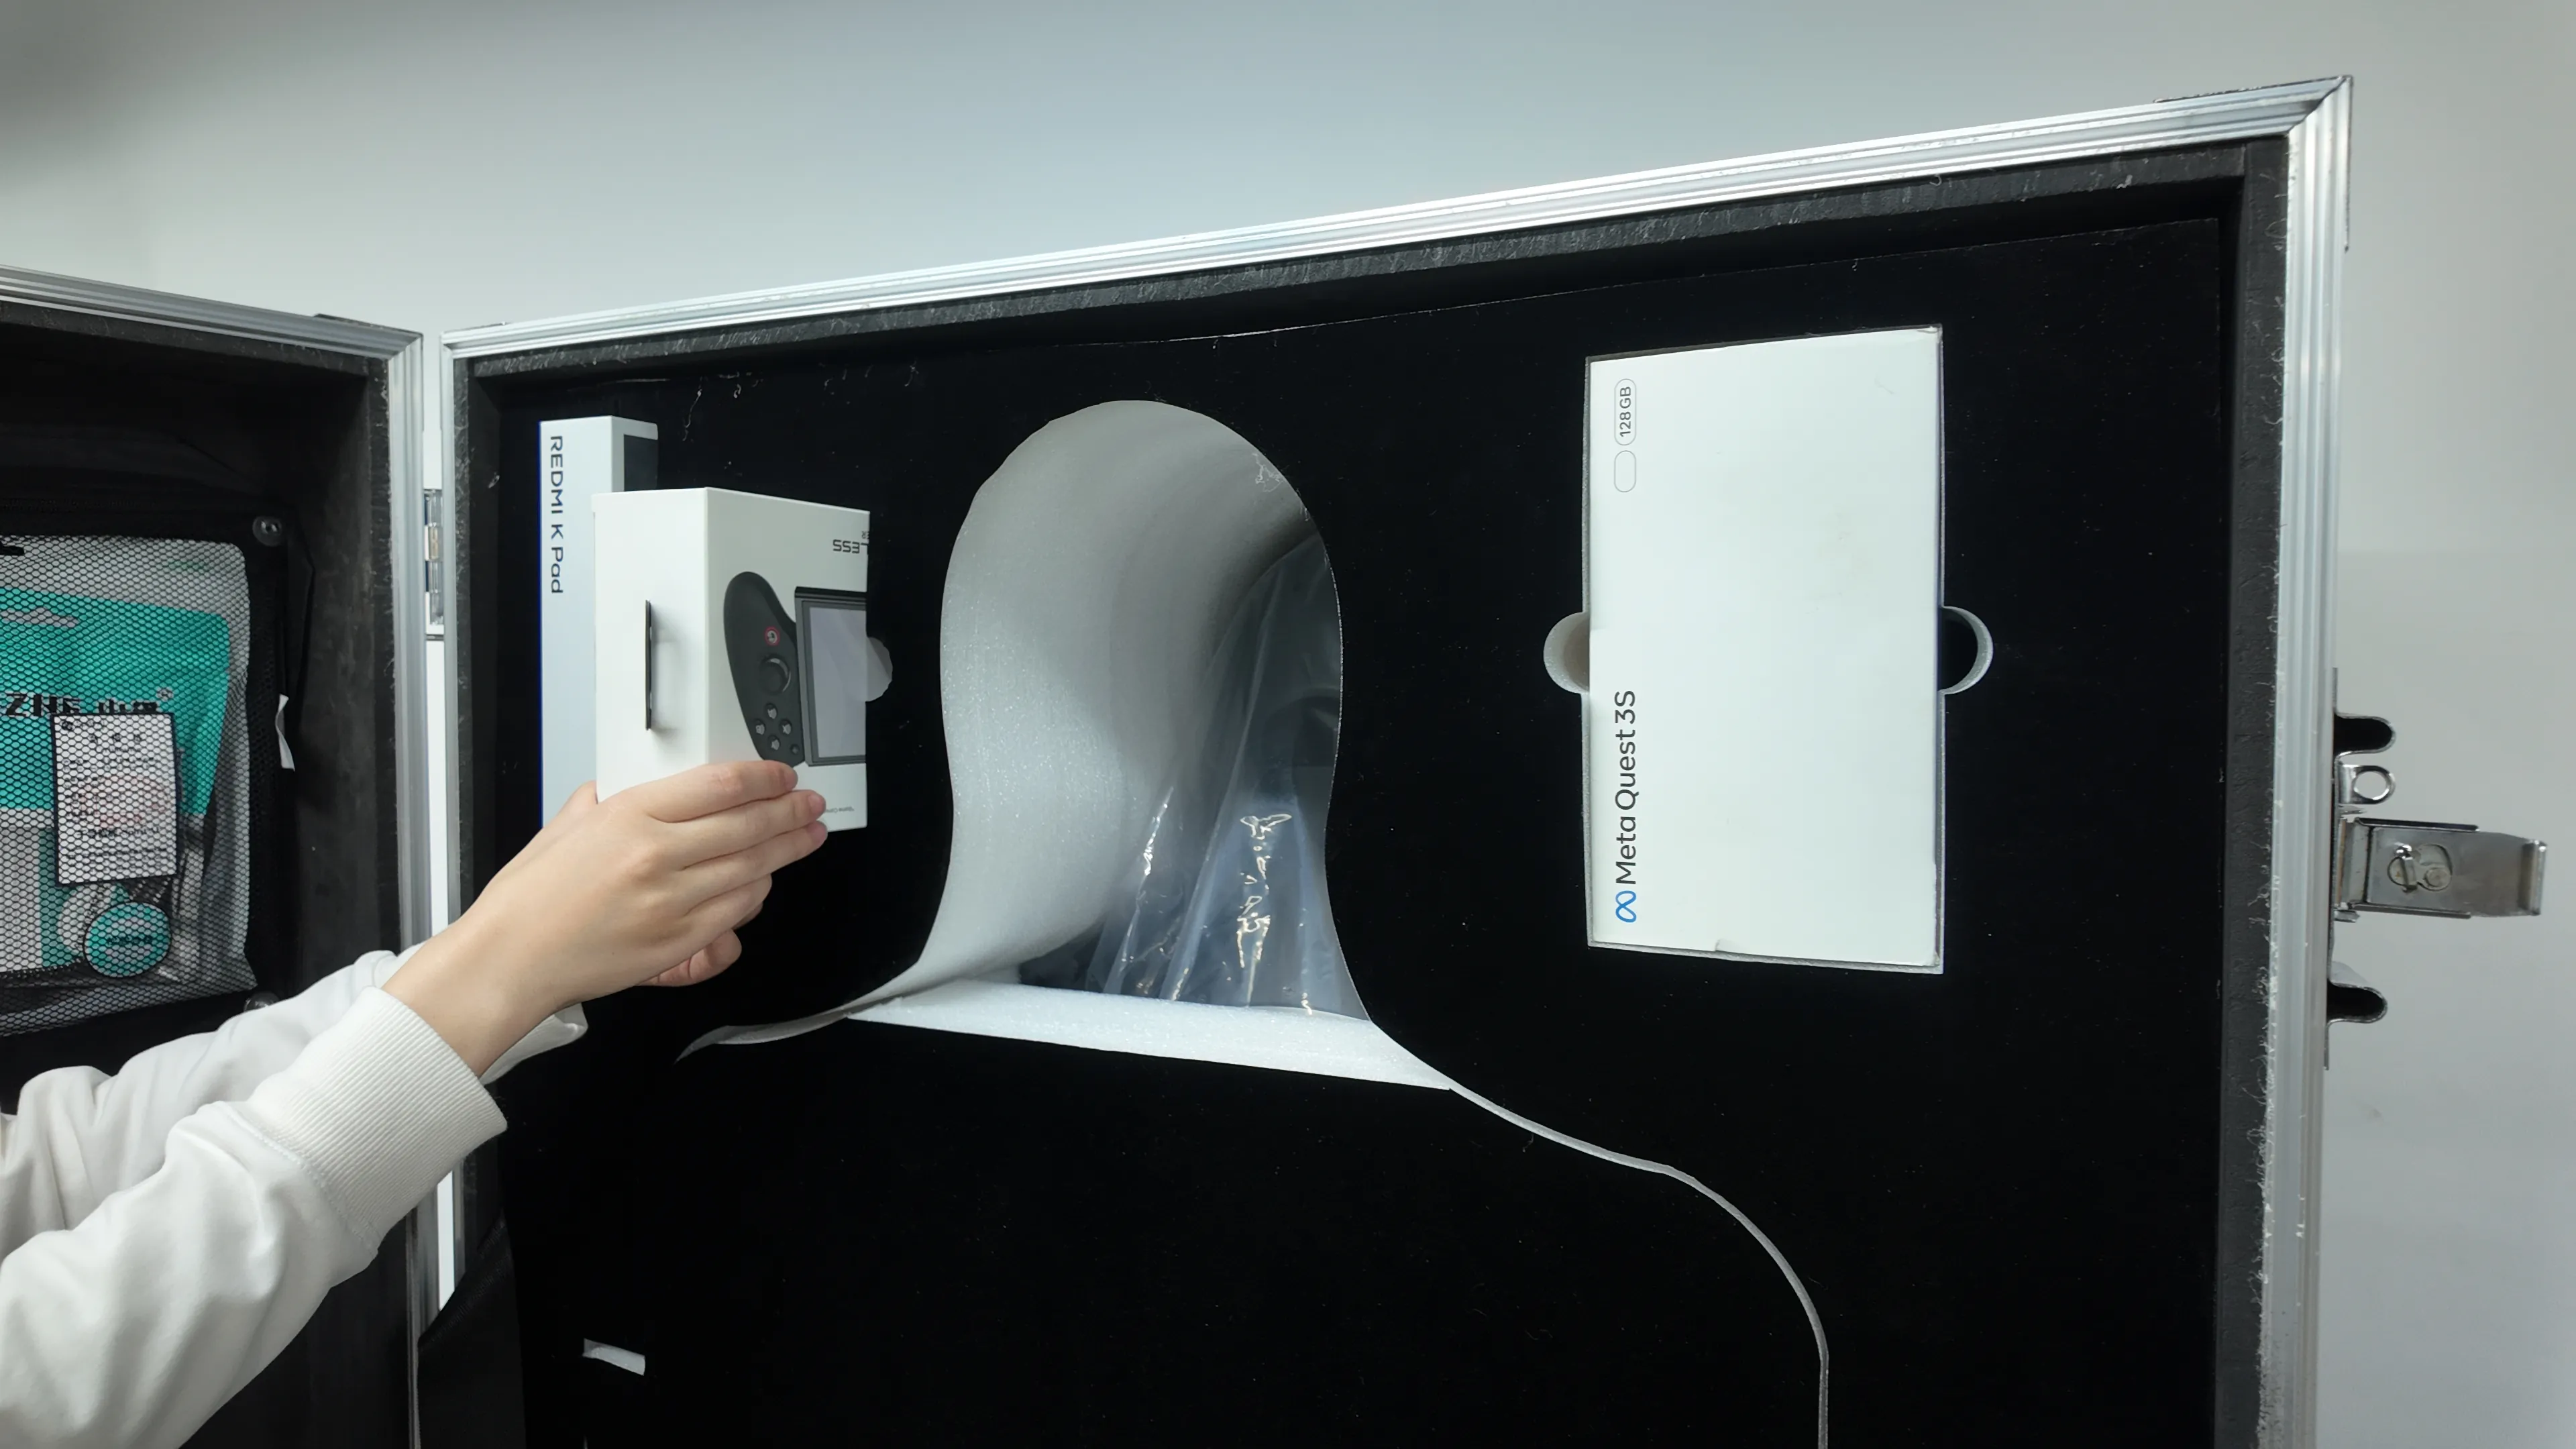
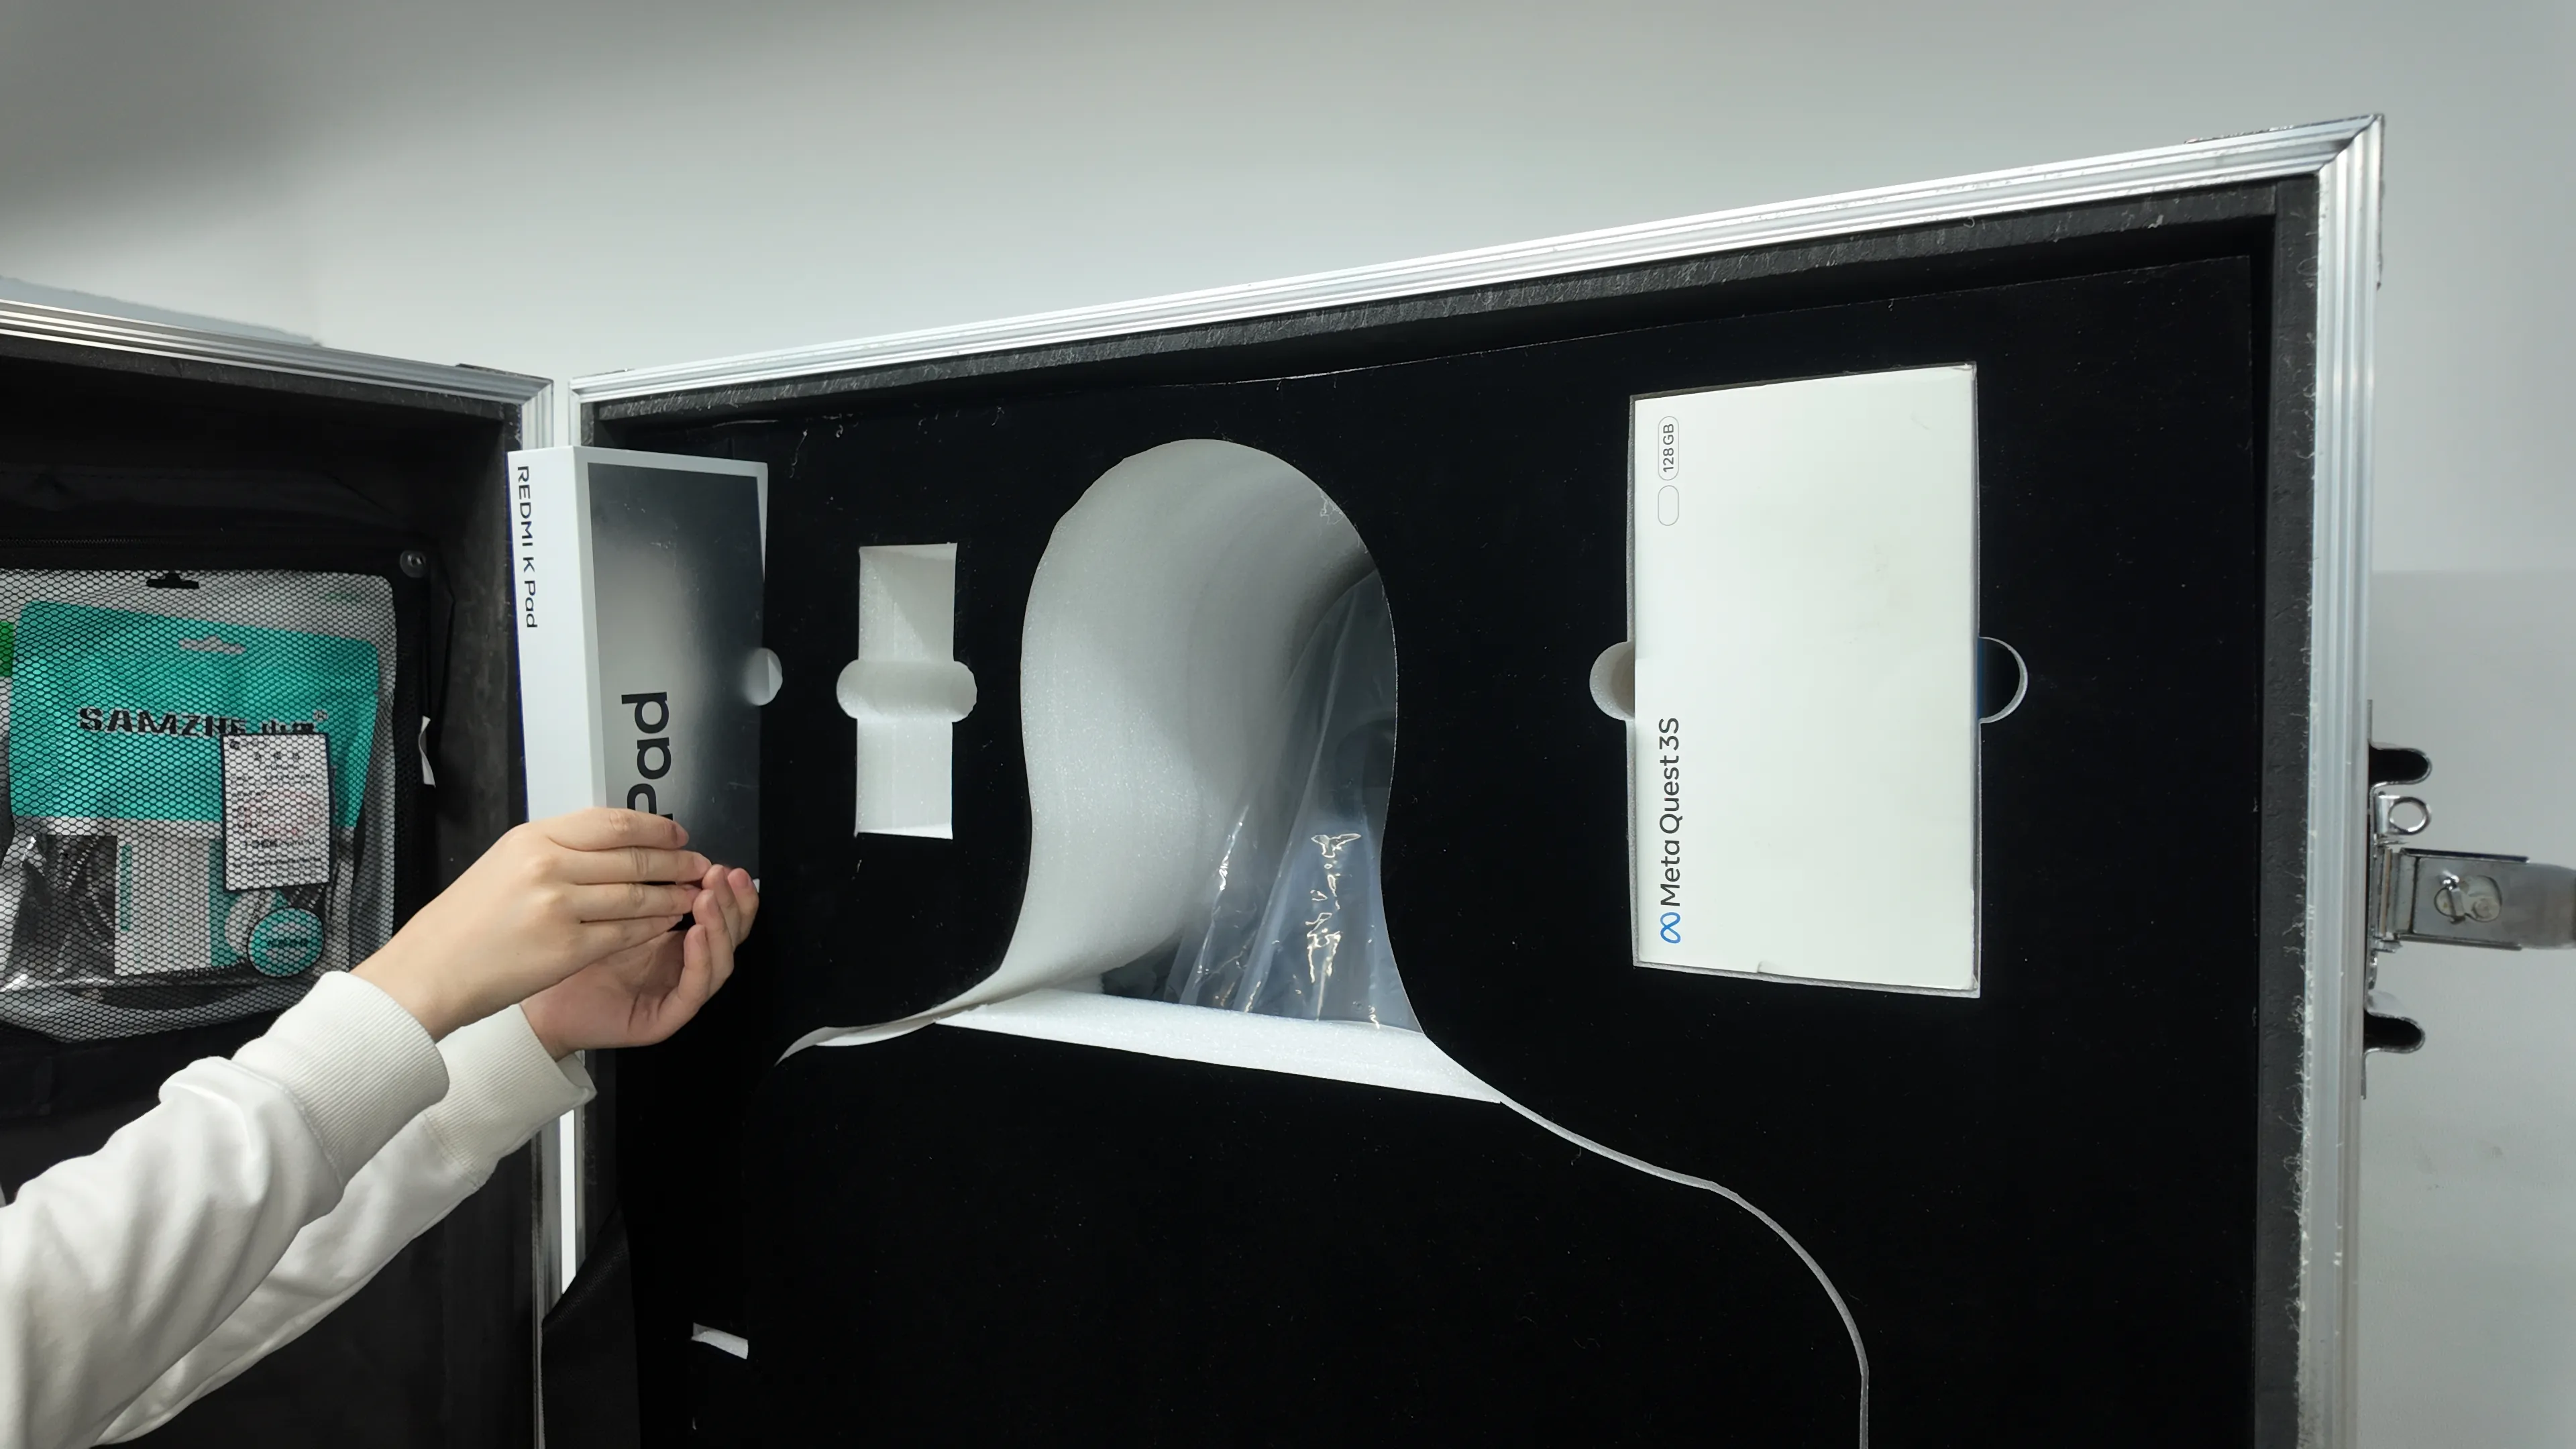
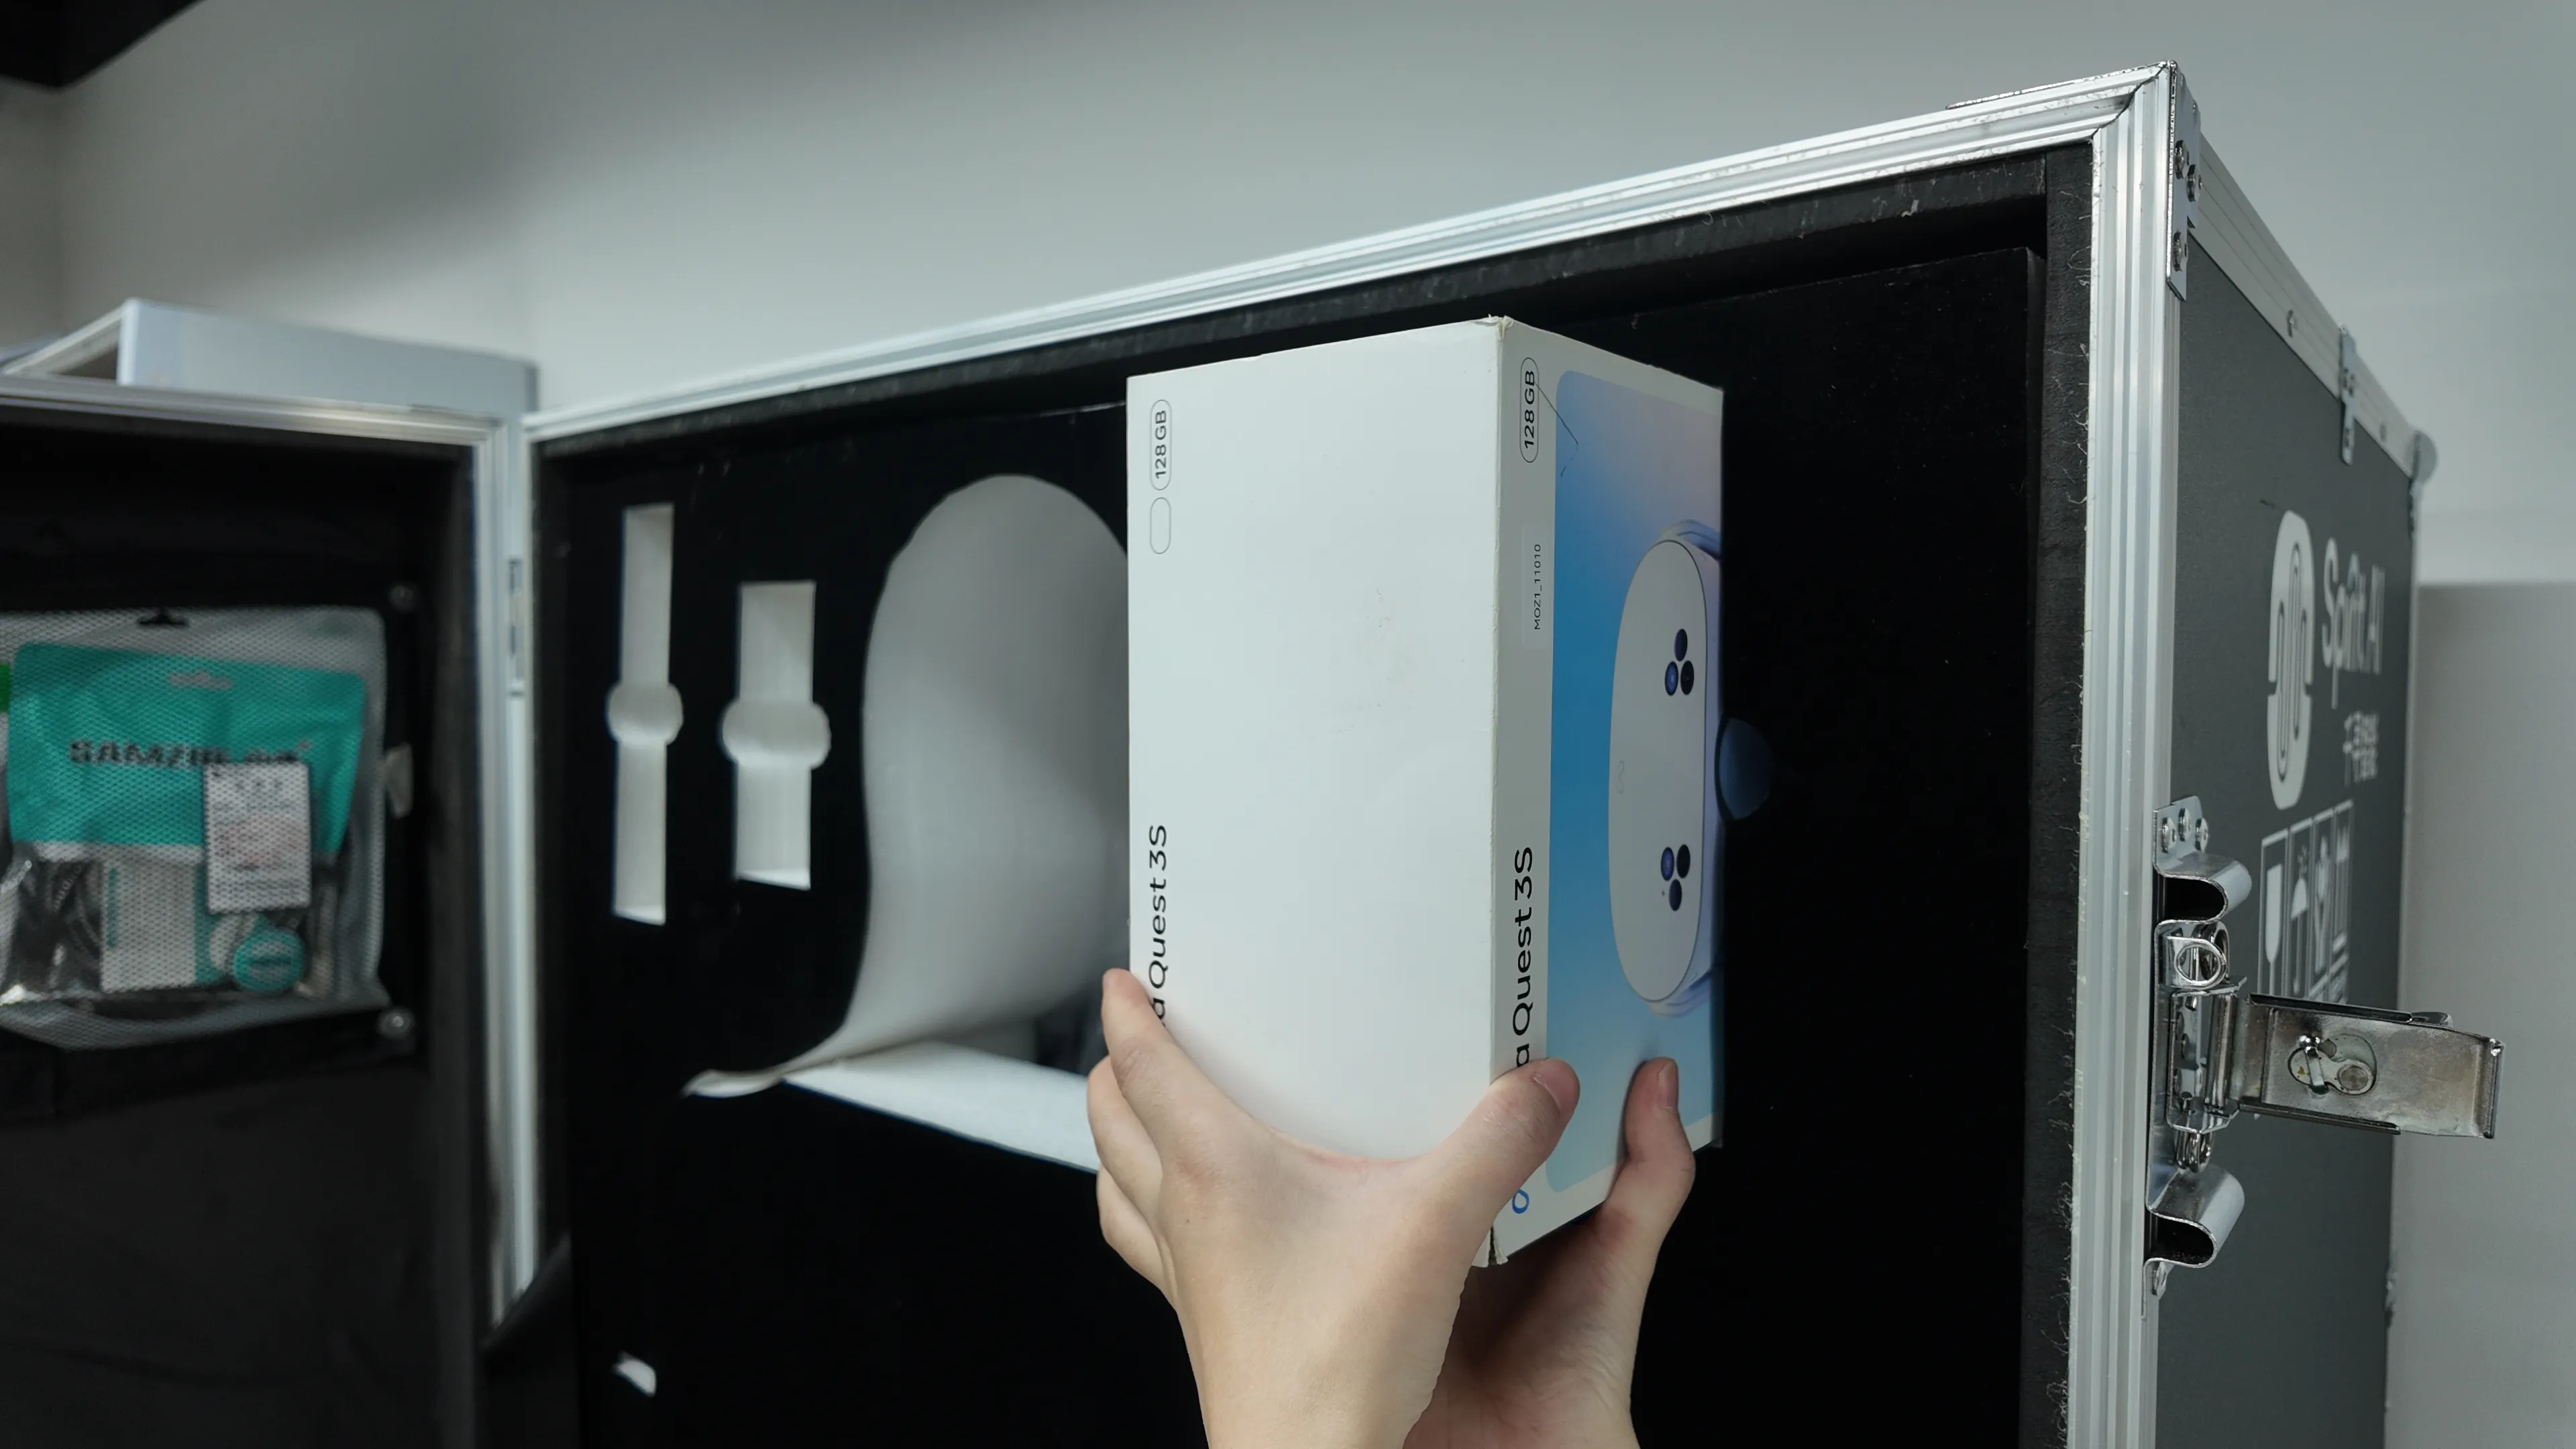
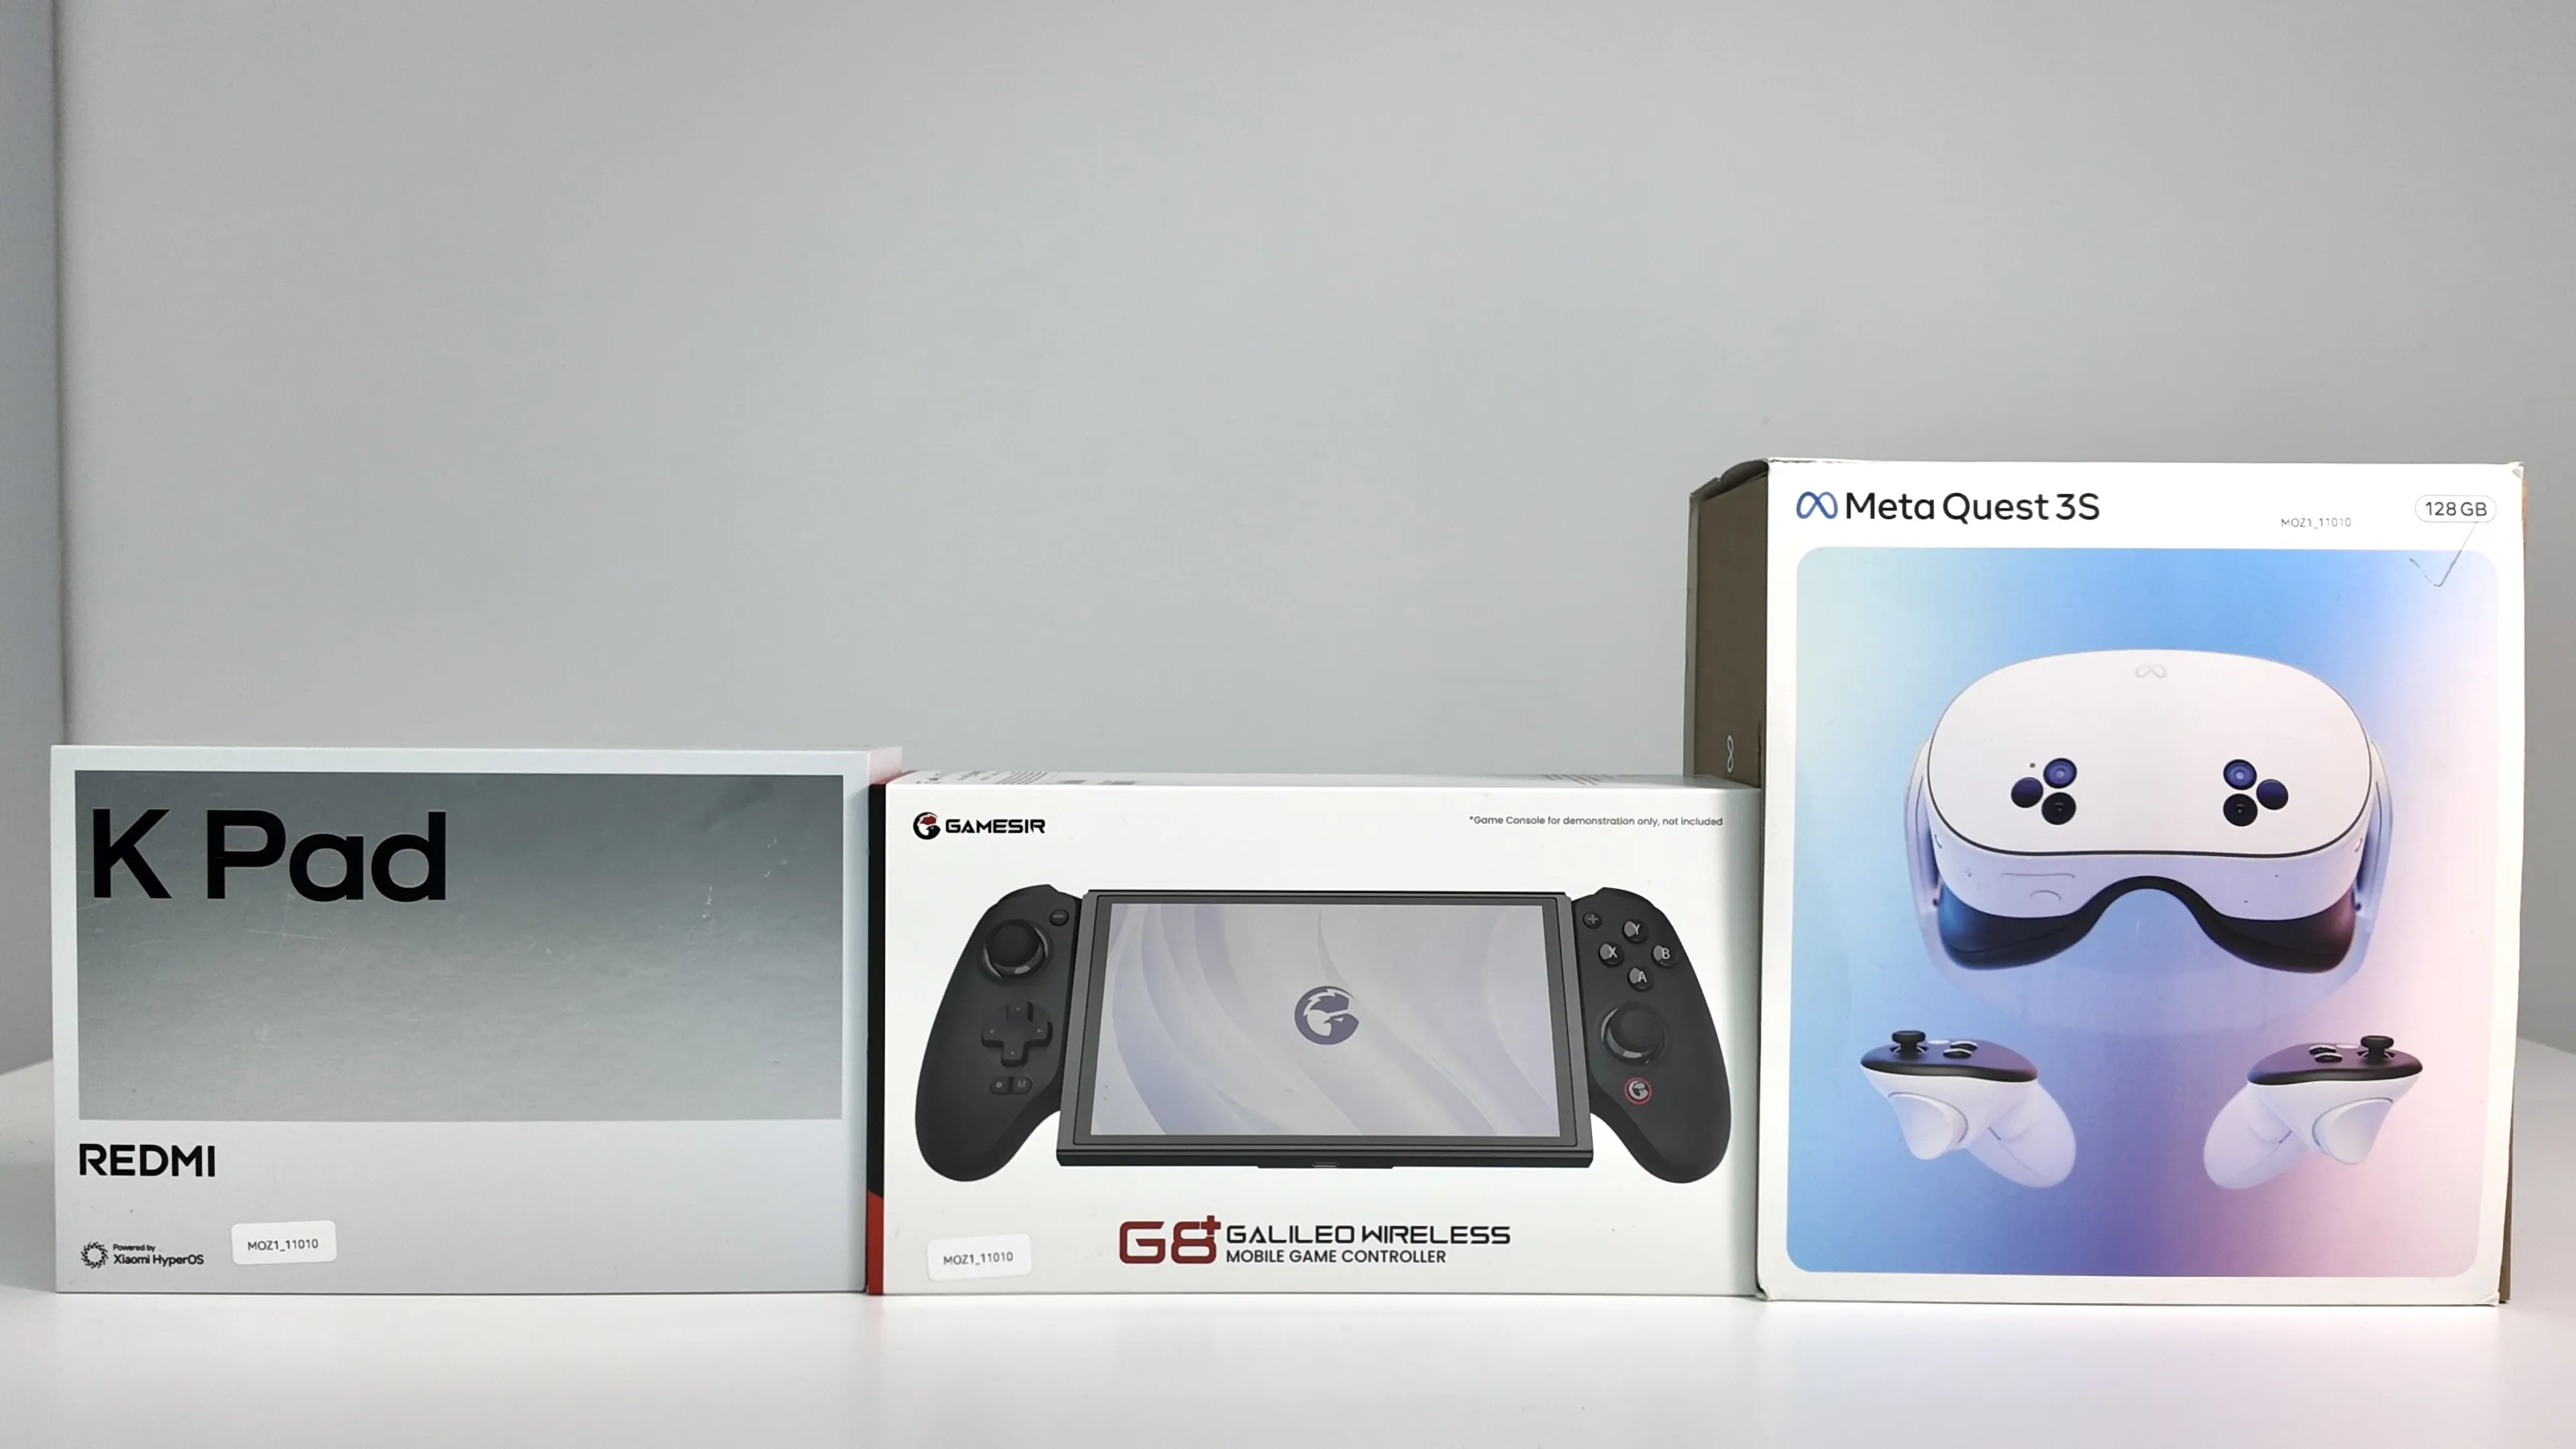
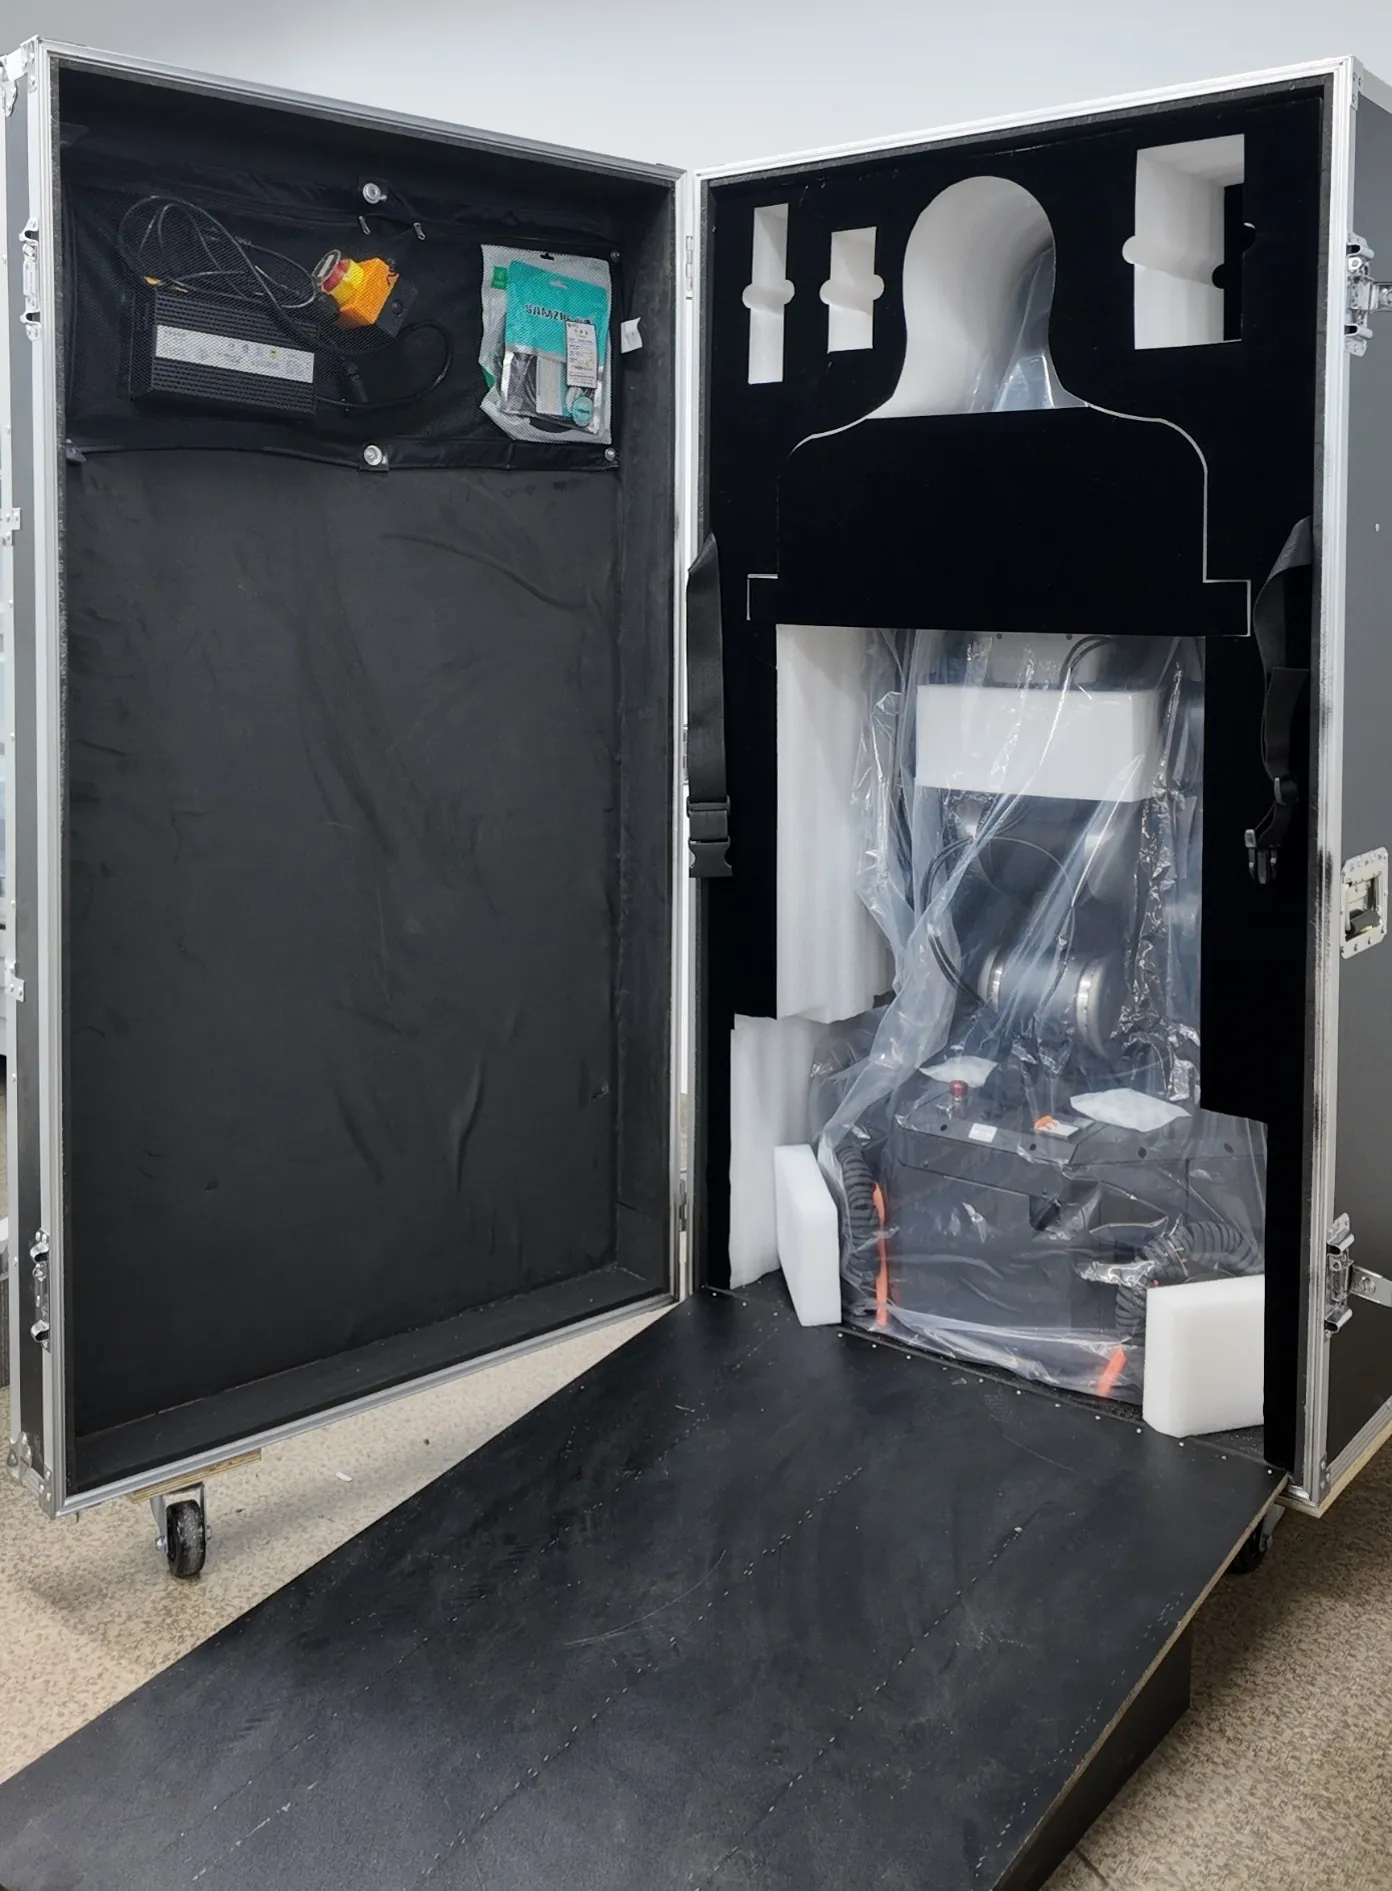
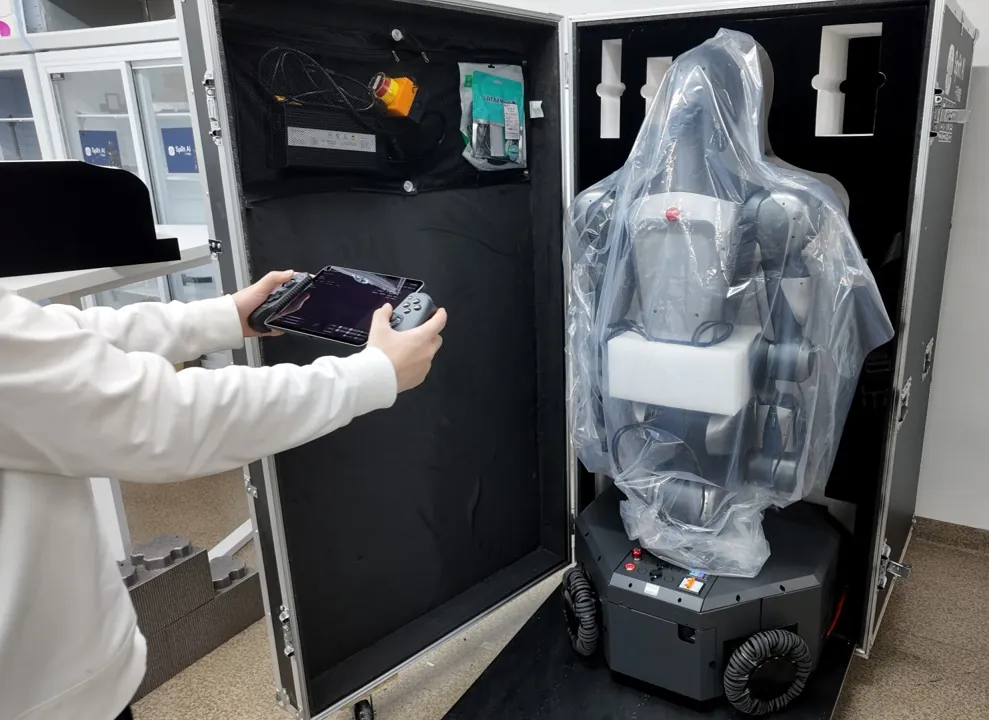
You can now see a full view inside the case (as shown). Remove the accessories from the case in sequence (VR headset, controllers, tablet, etc.).
 |
|---|
 |
 |
Step 8
Remove robot accessories from the woven mesh bag on the side door of the case, including but not limited to VR connection cables, robot charger, robot emergency stop switch, and paper manuals.
Step 9
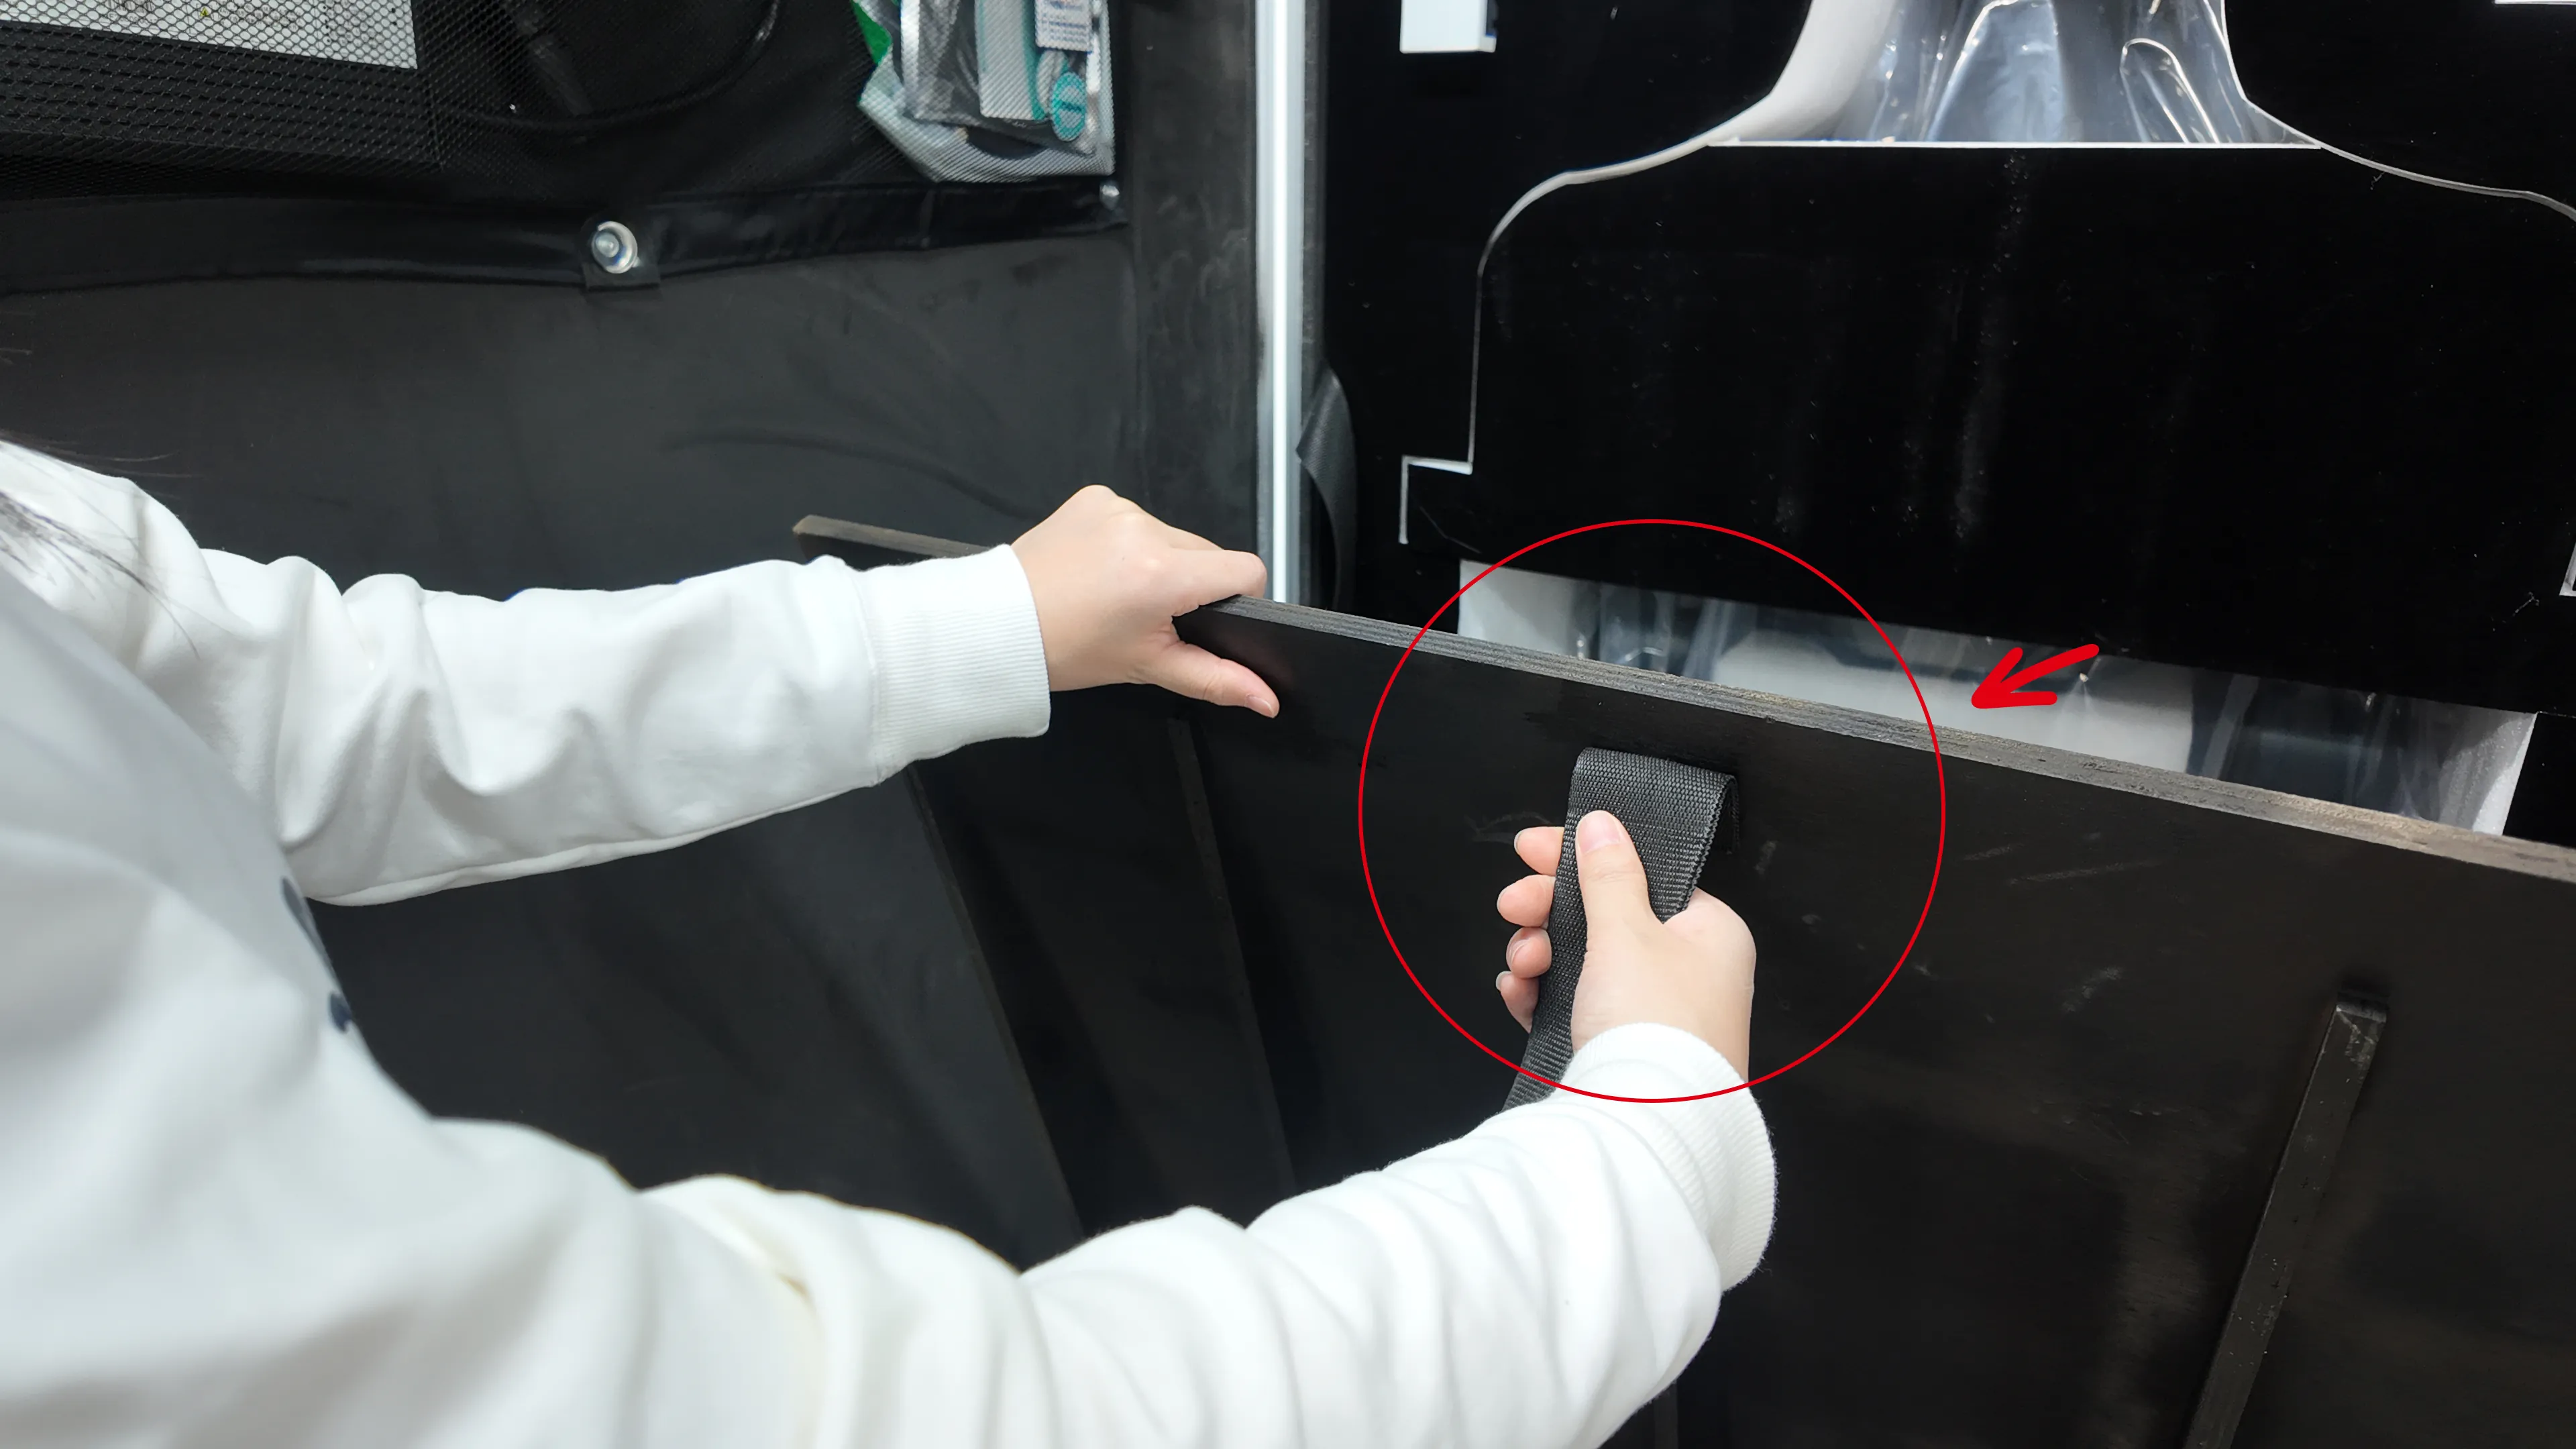
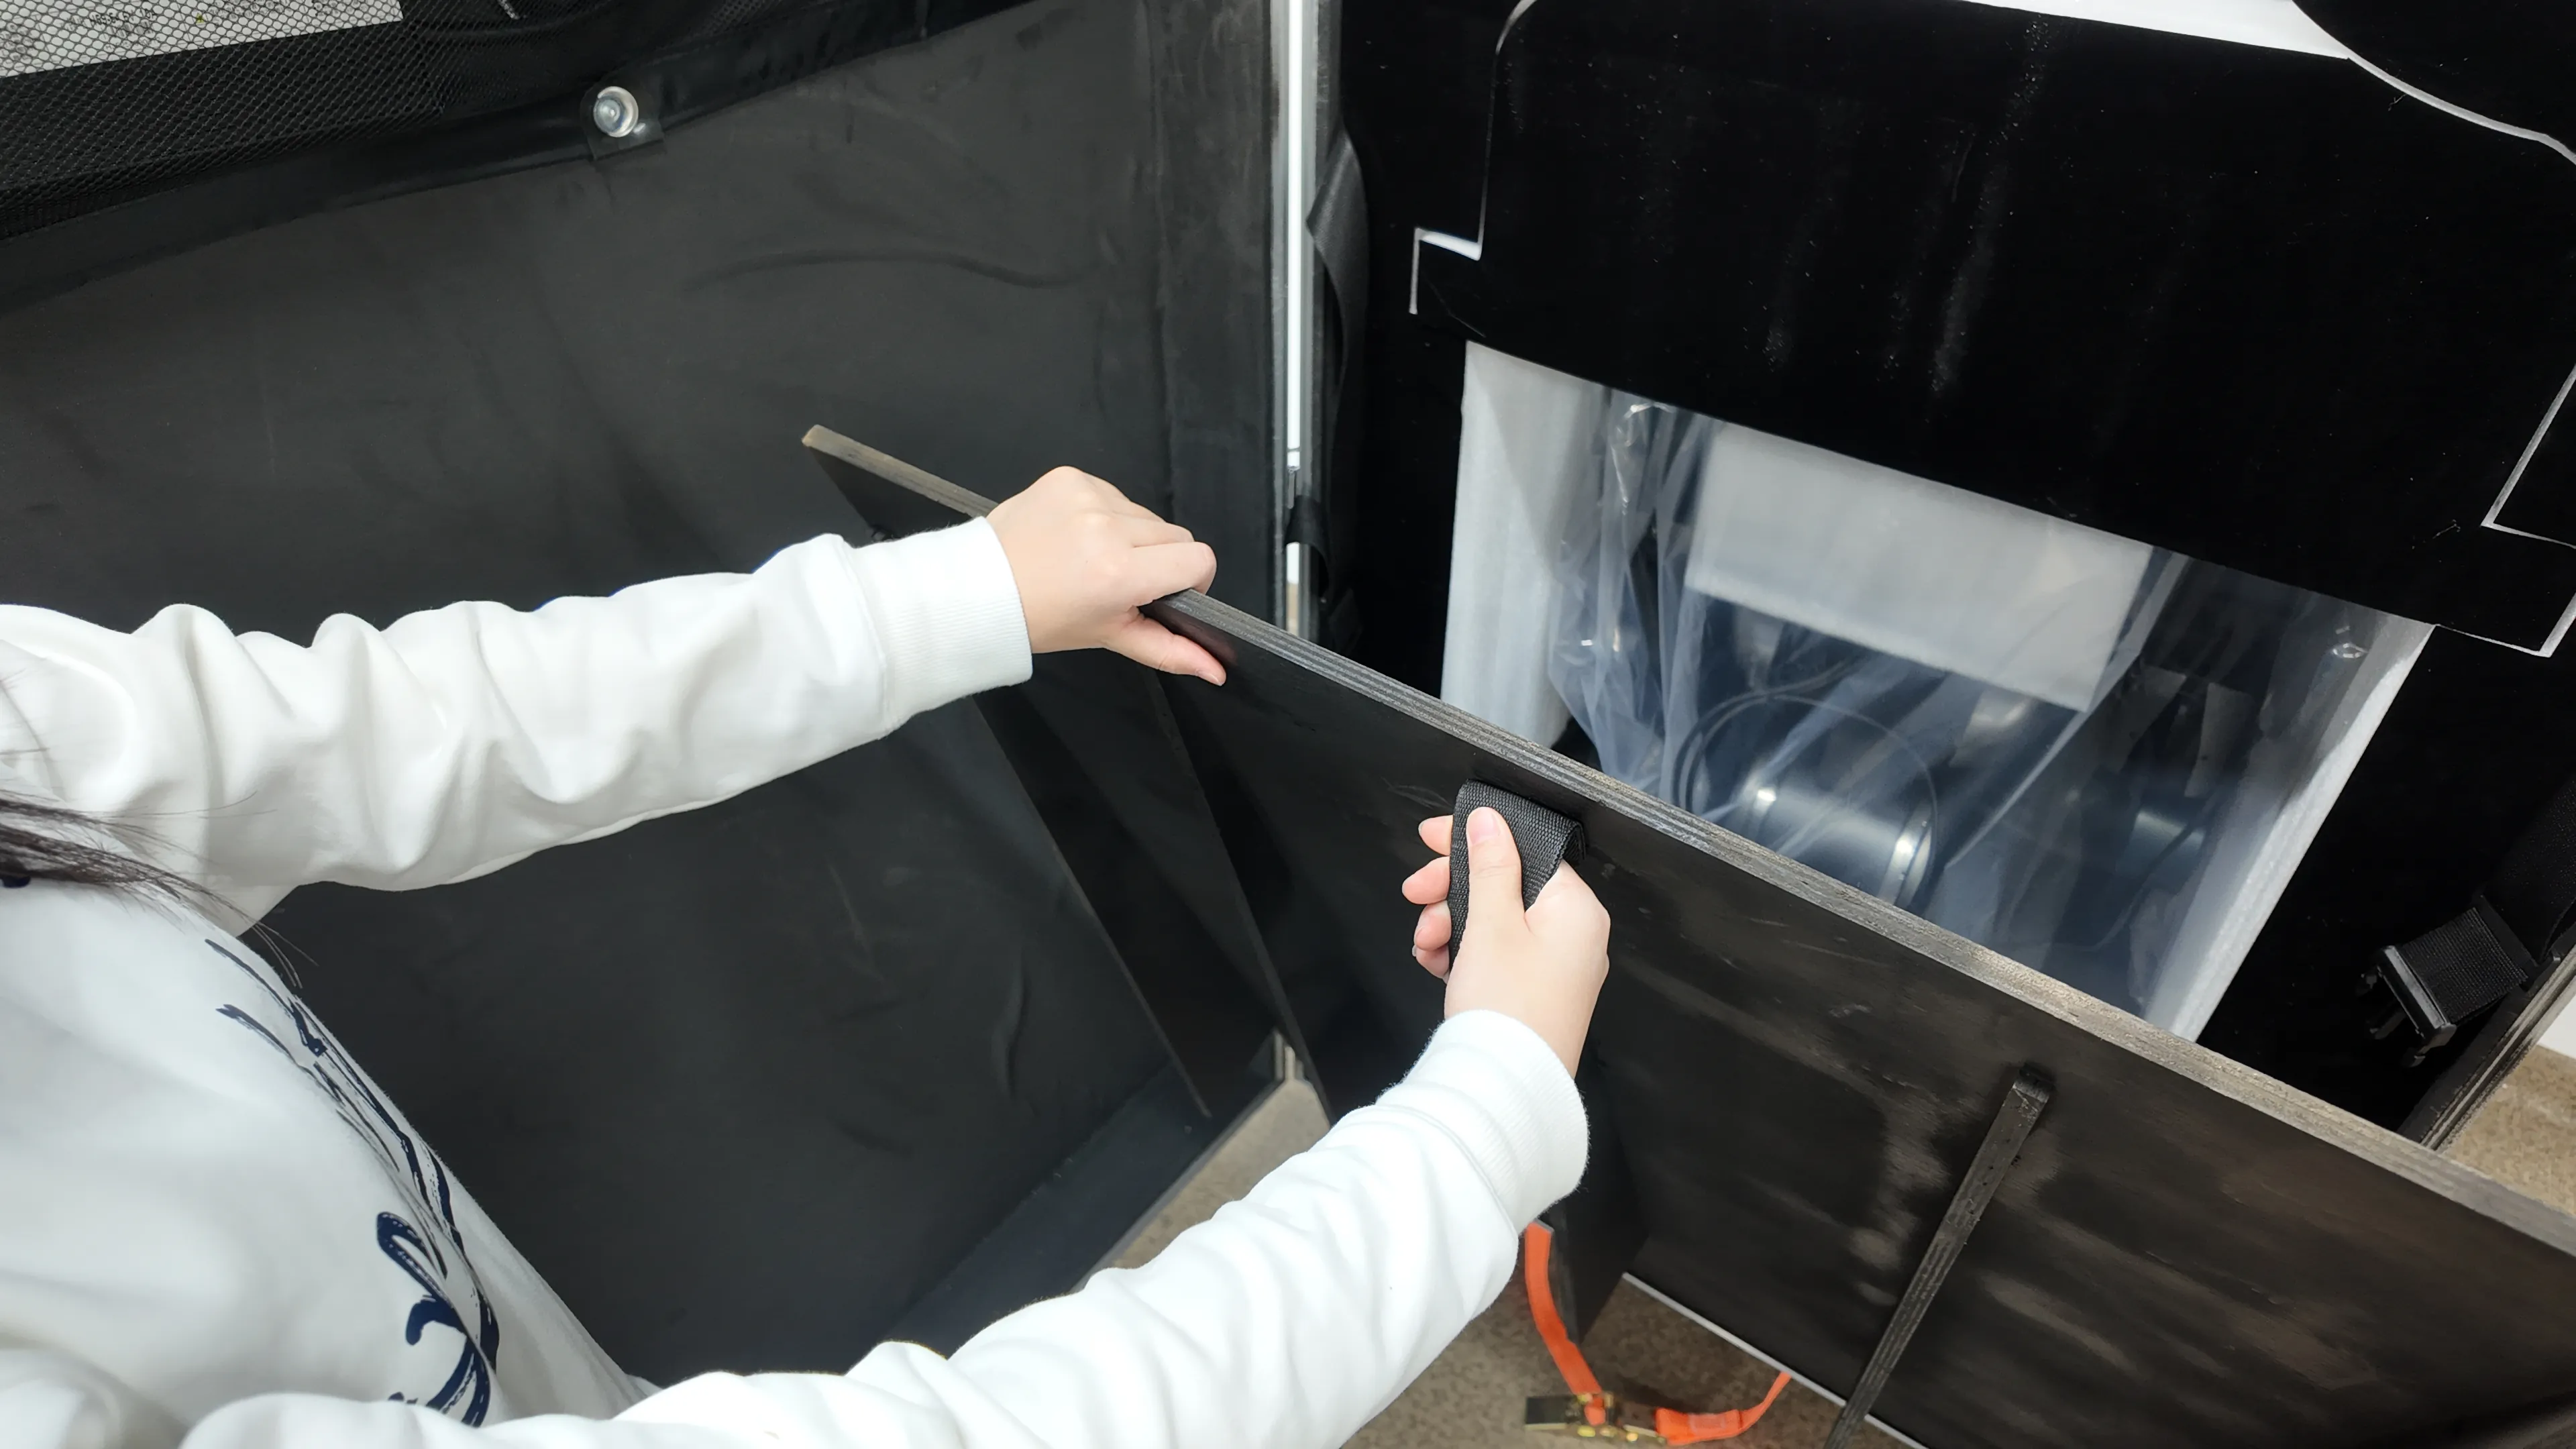
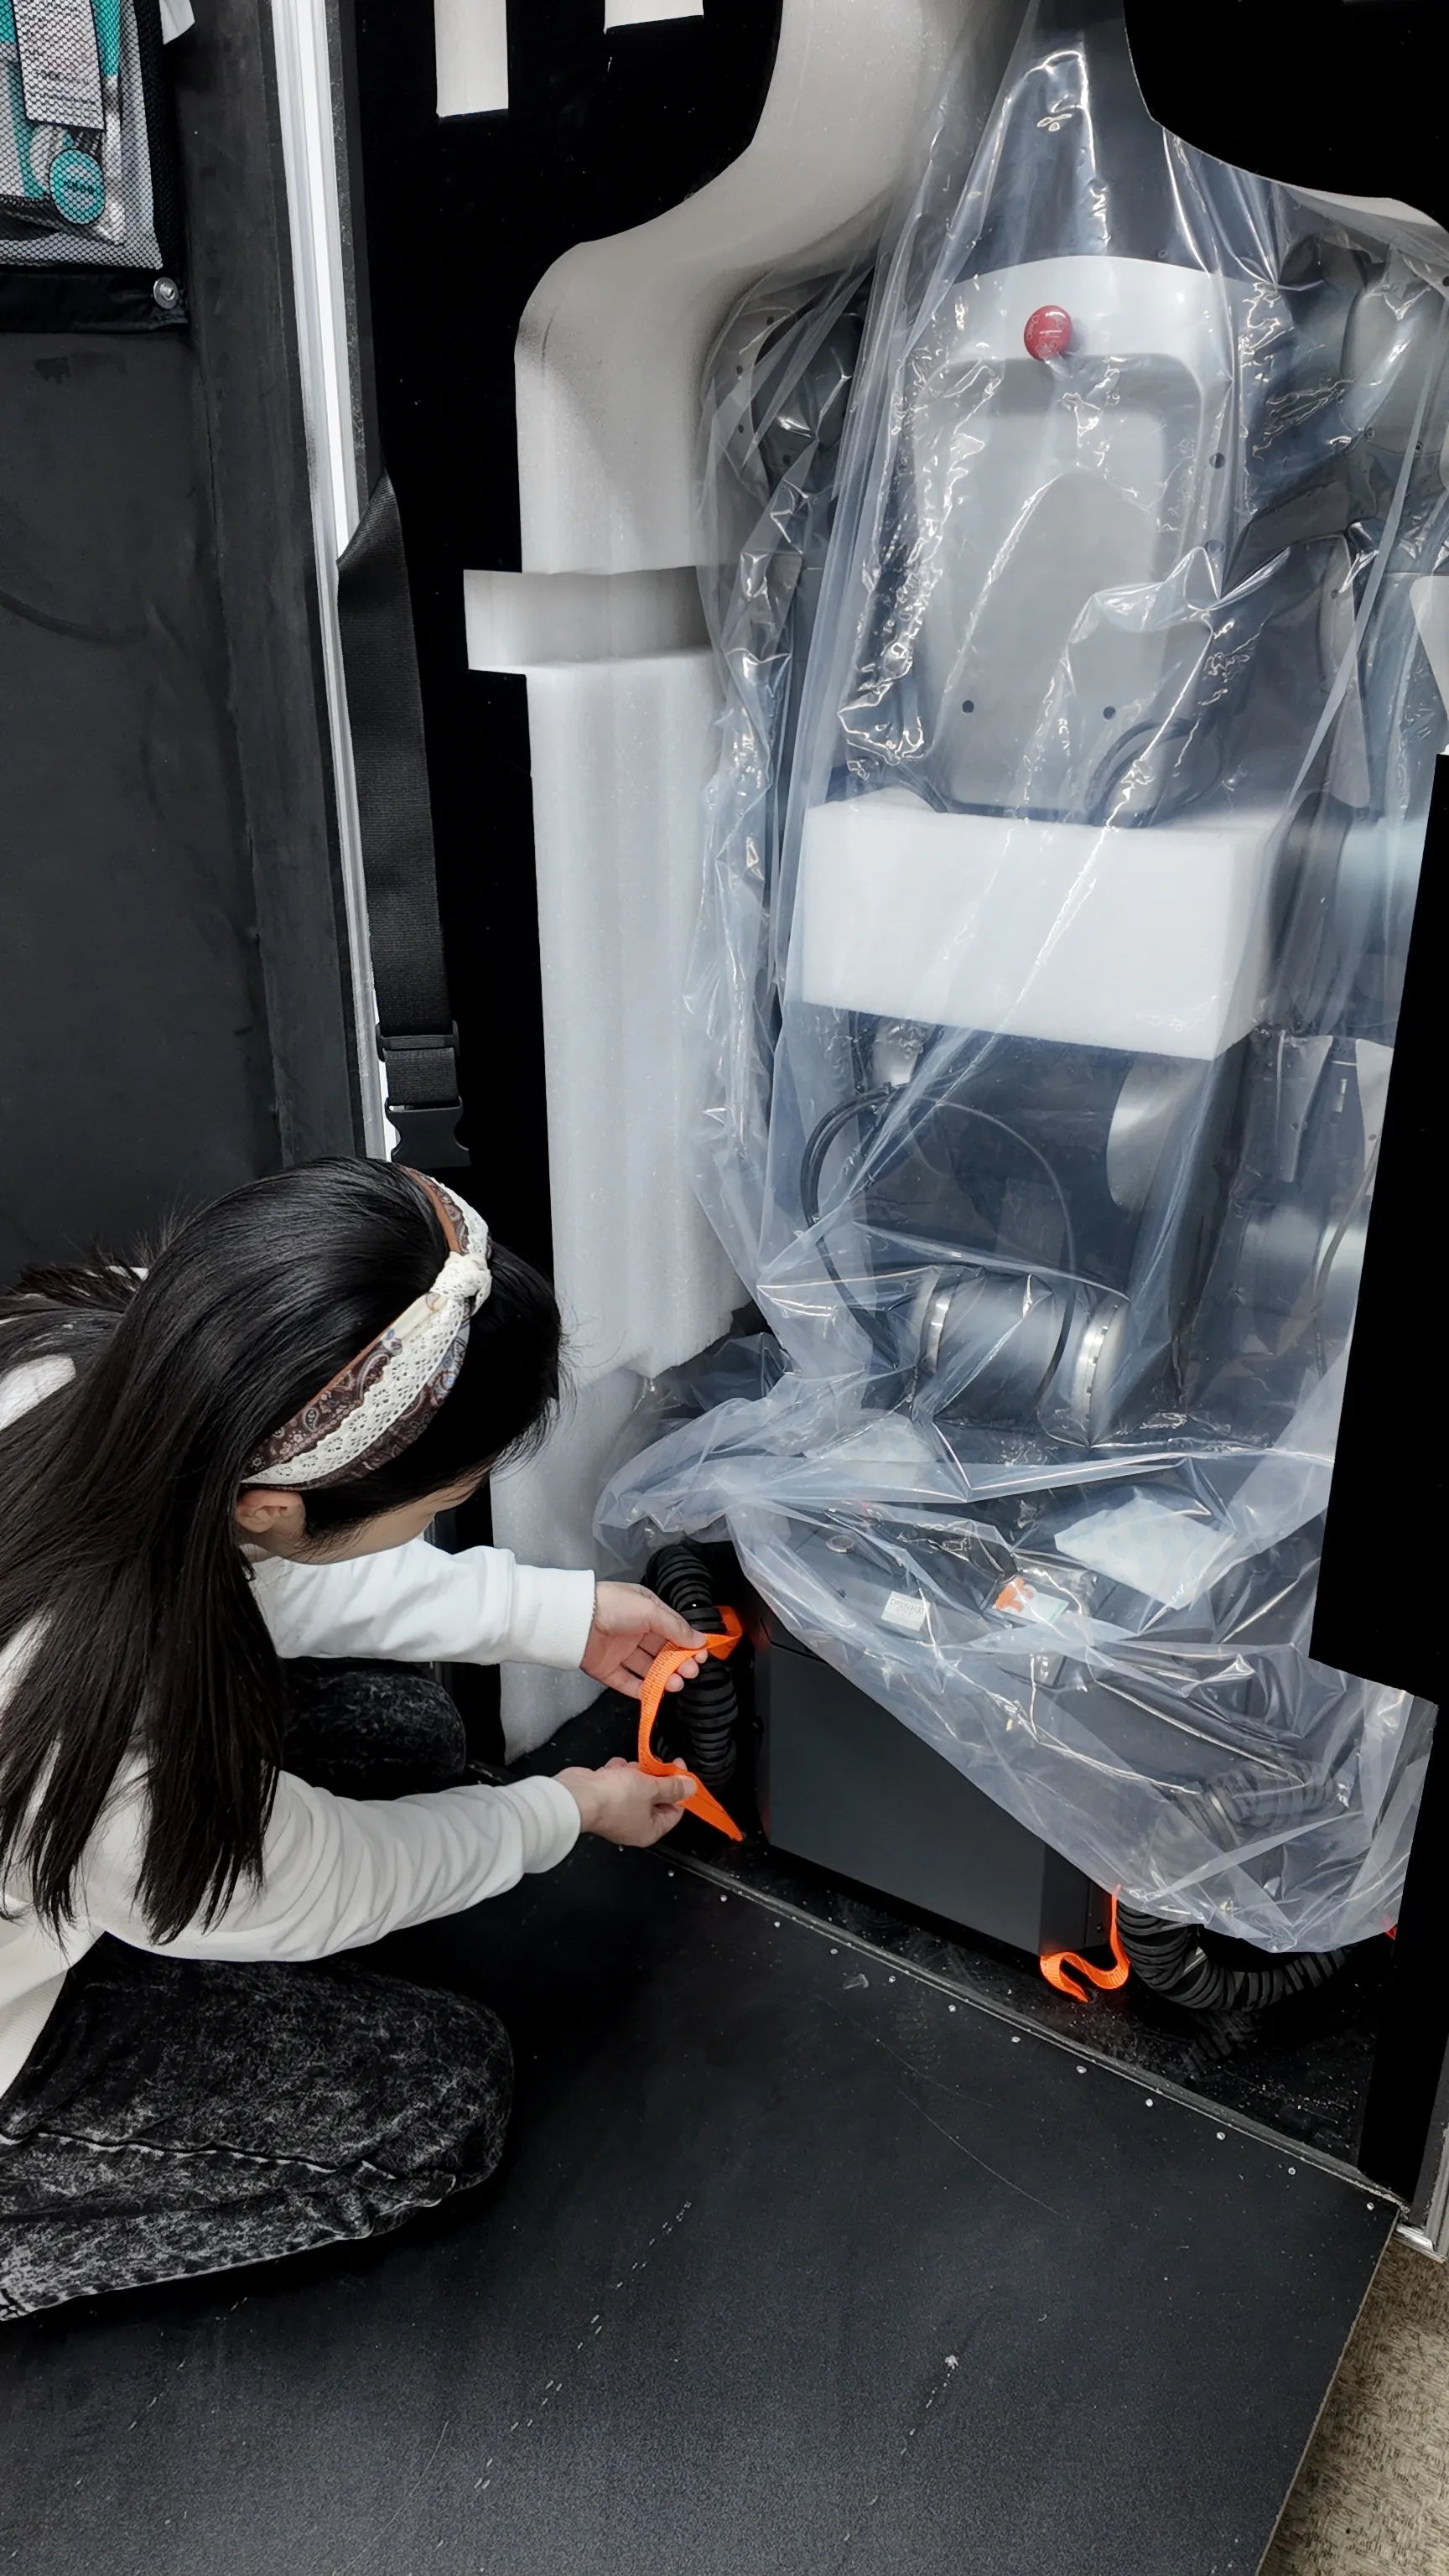
Remove the previously loosened straps from the inside of the wheels and lay them flat on the outside to avoid affecting the drive wheels.
 |  |
|---|
Step 10
Remove the foam buffer block from the back of the robot.
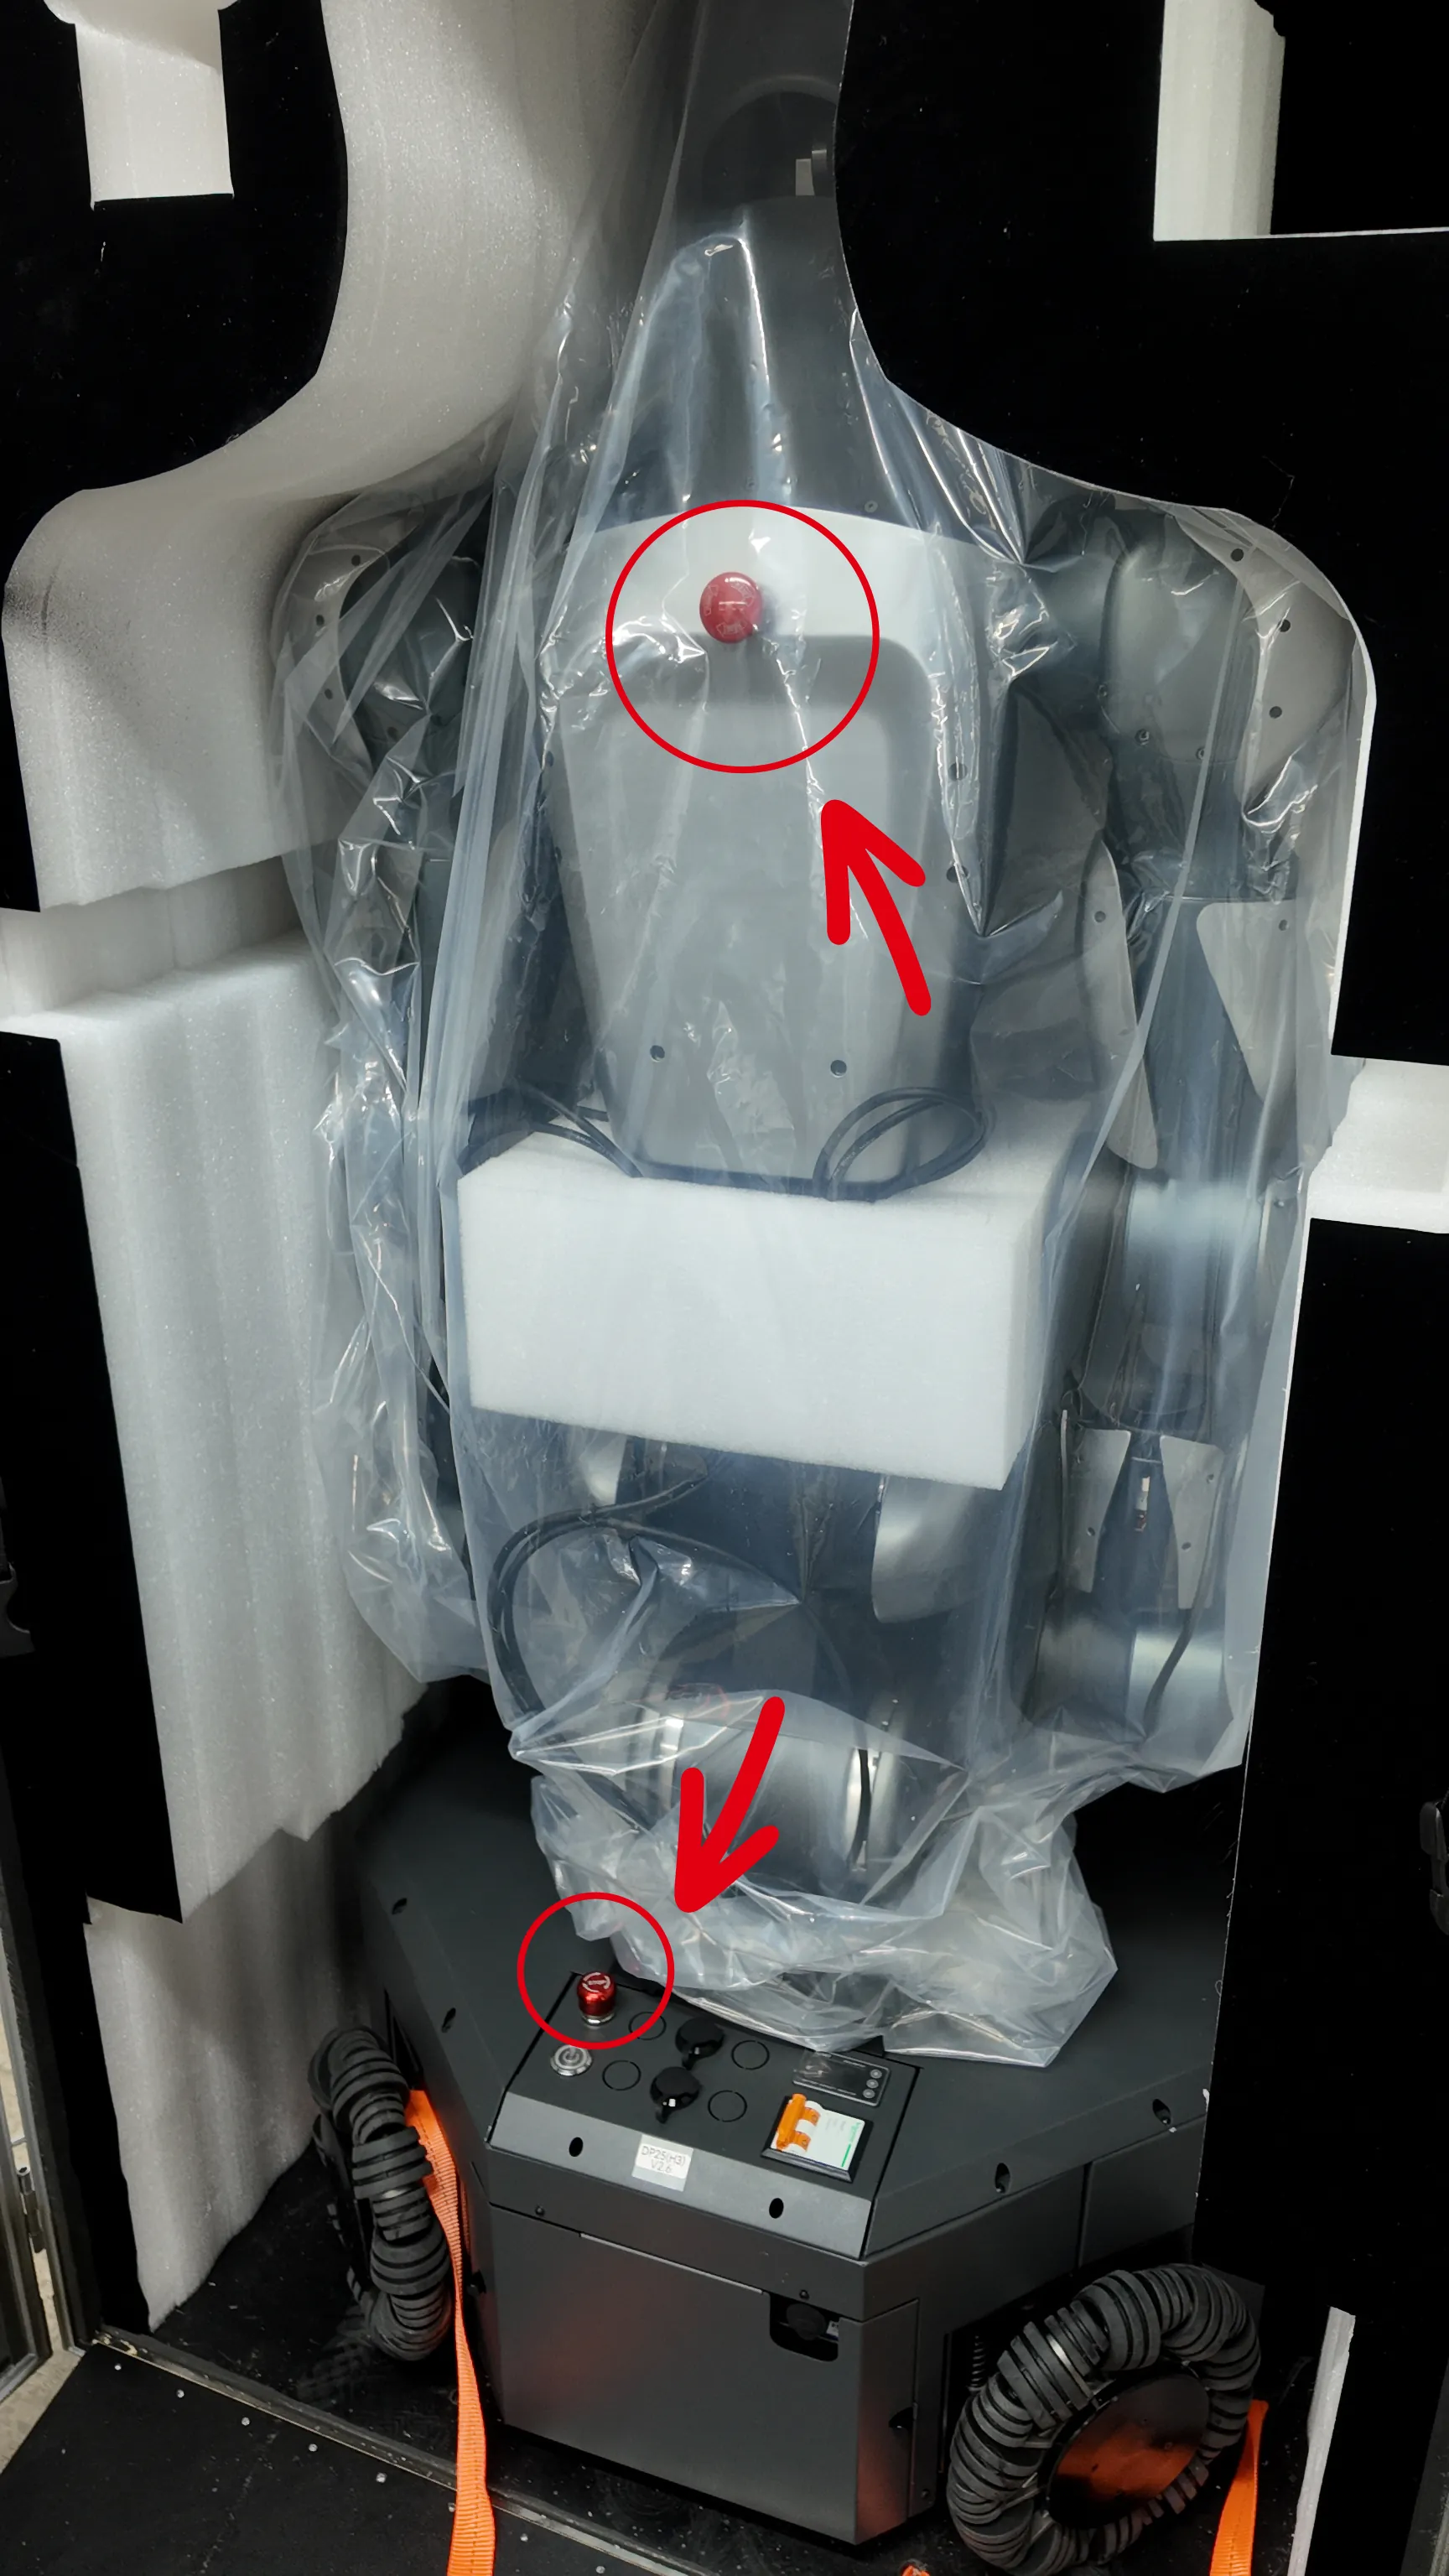
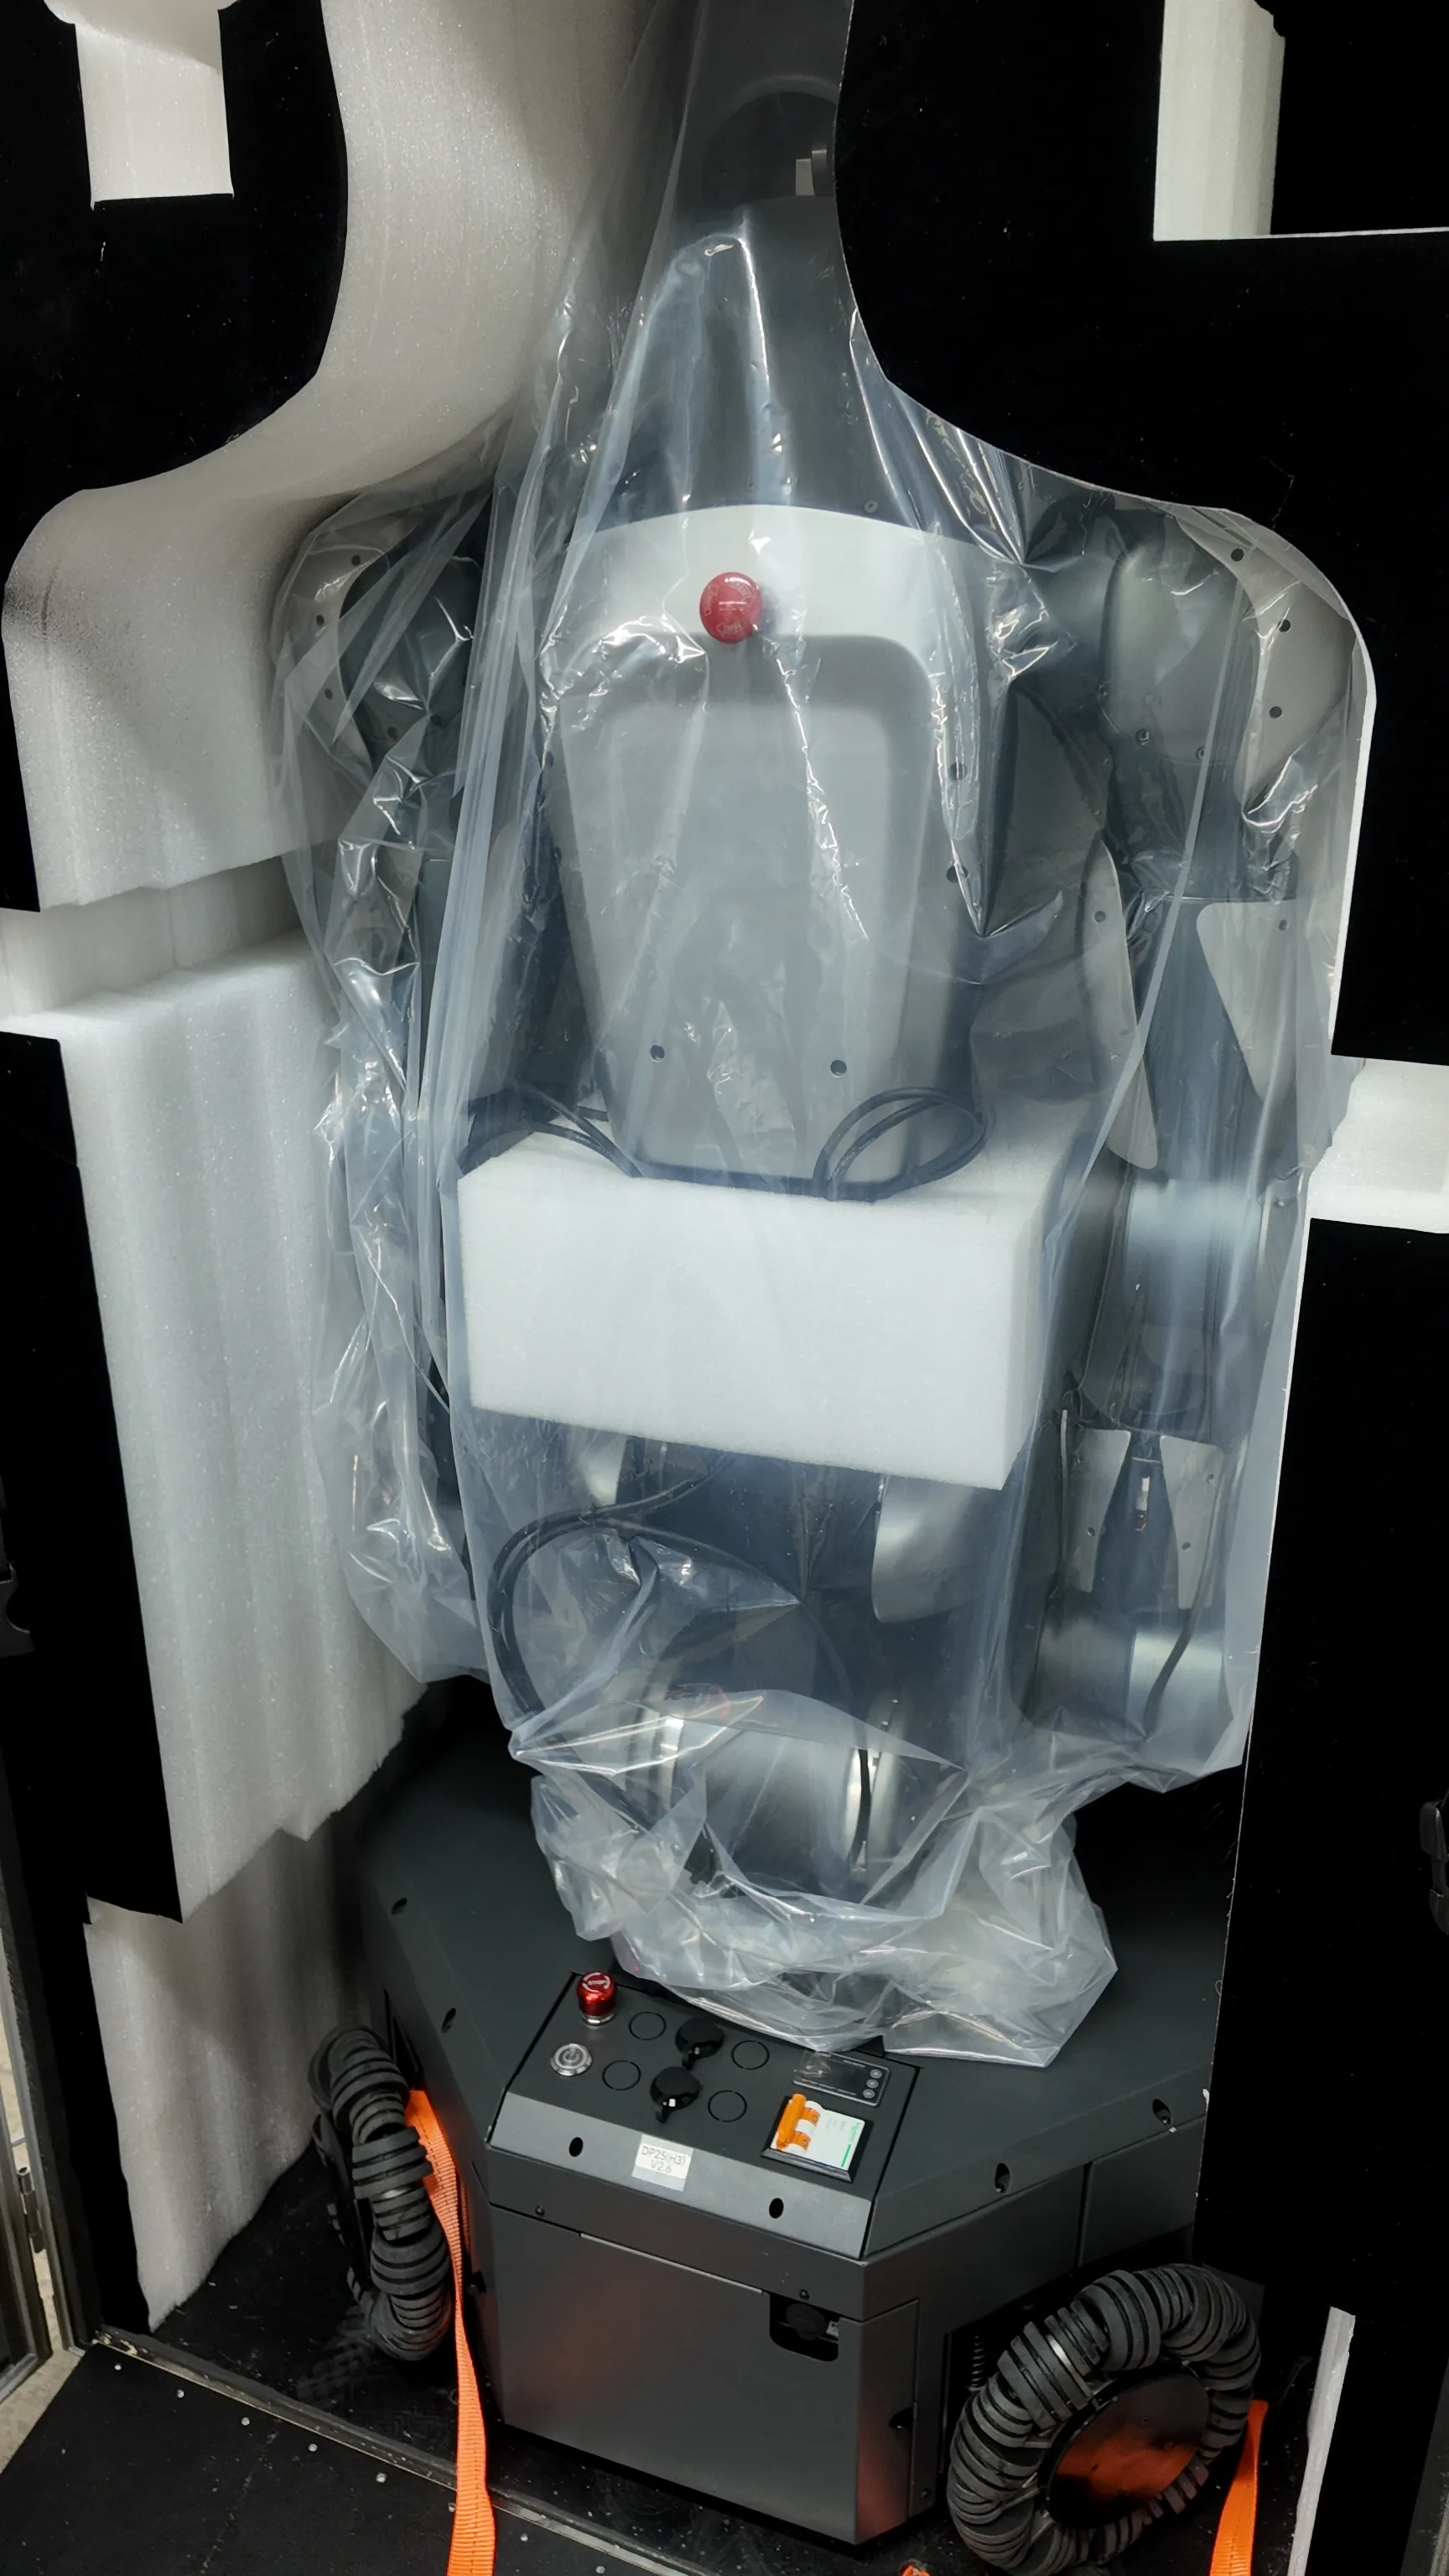
Step 11
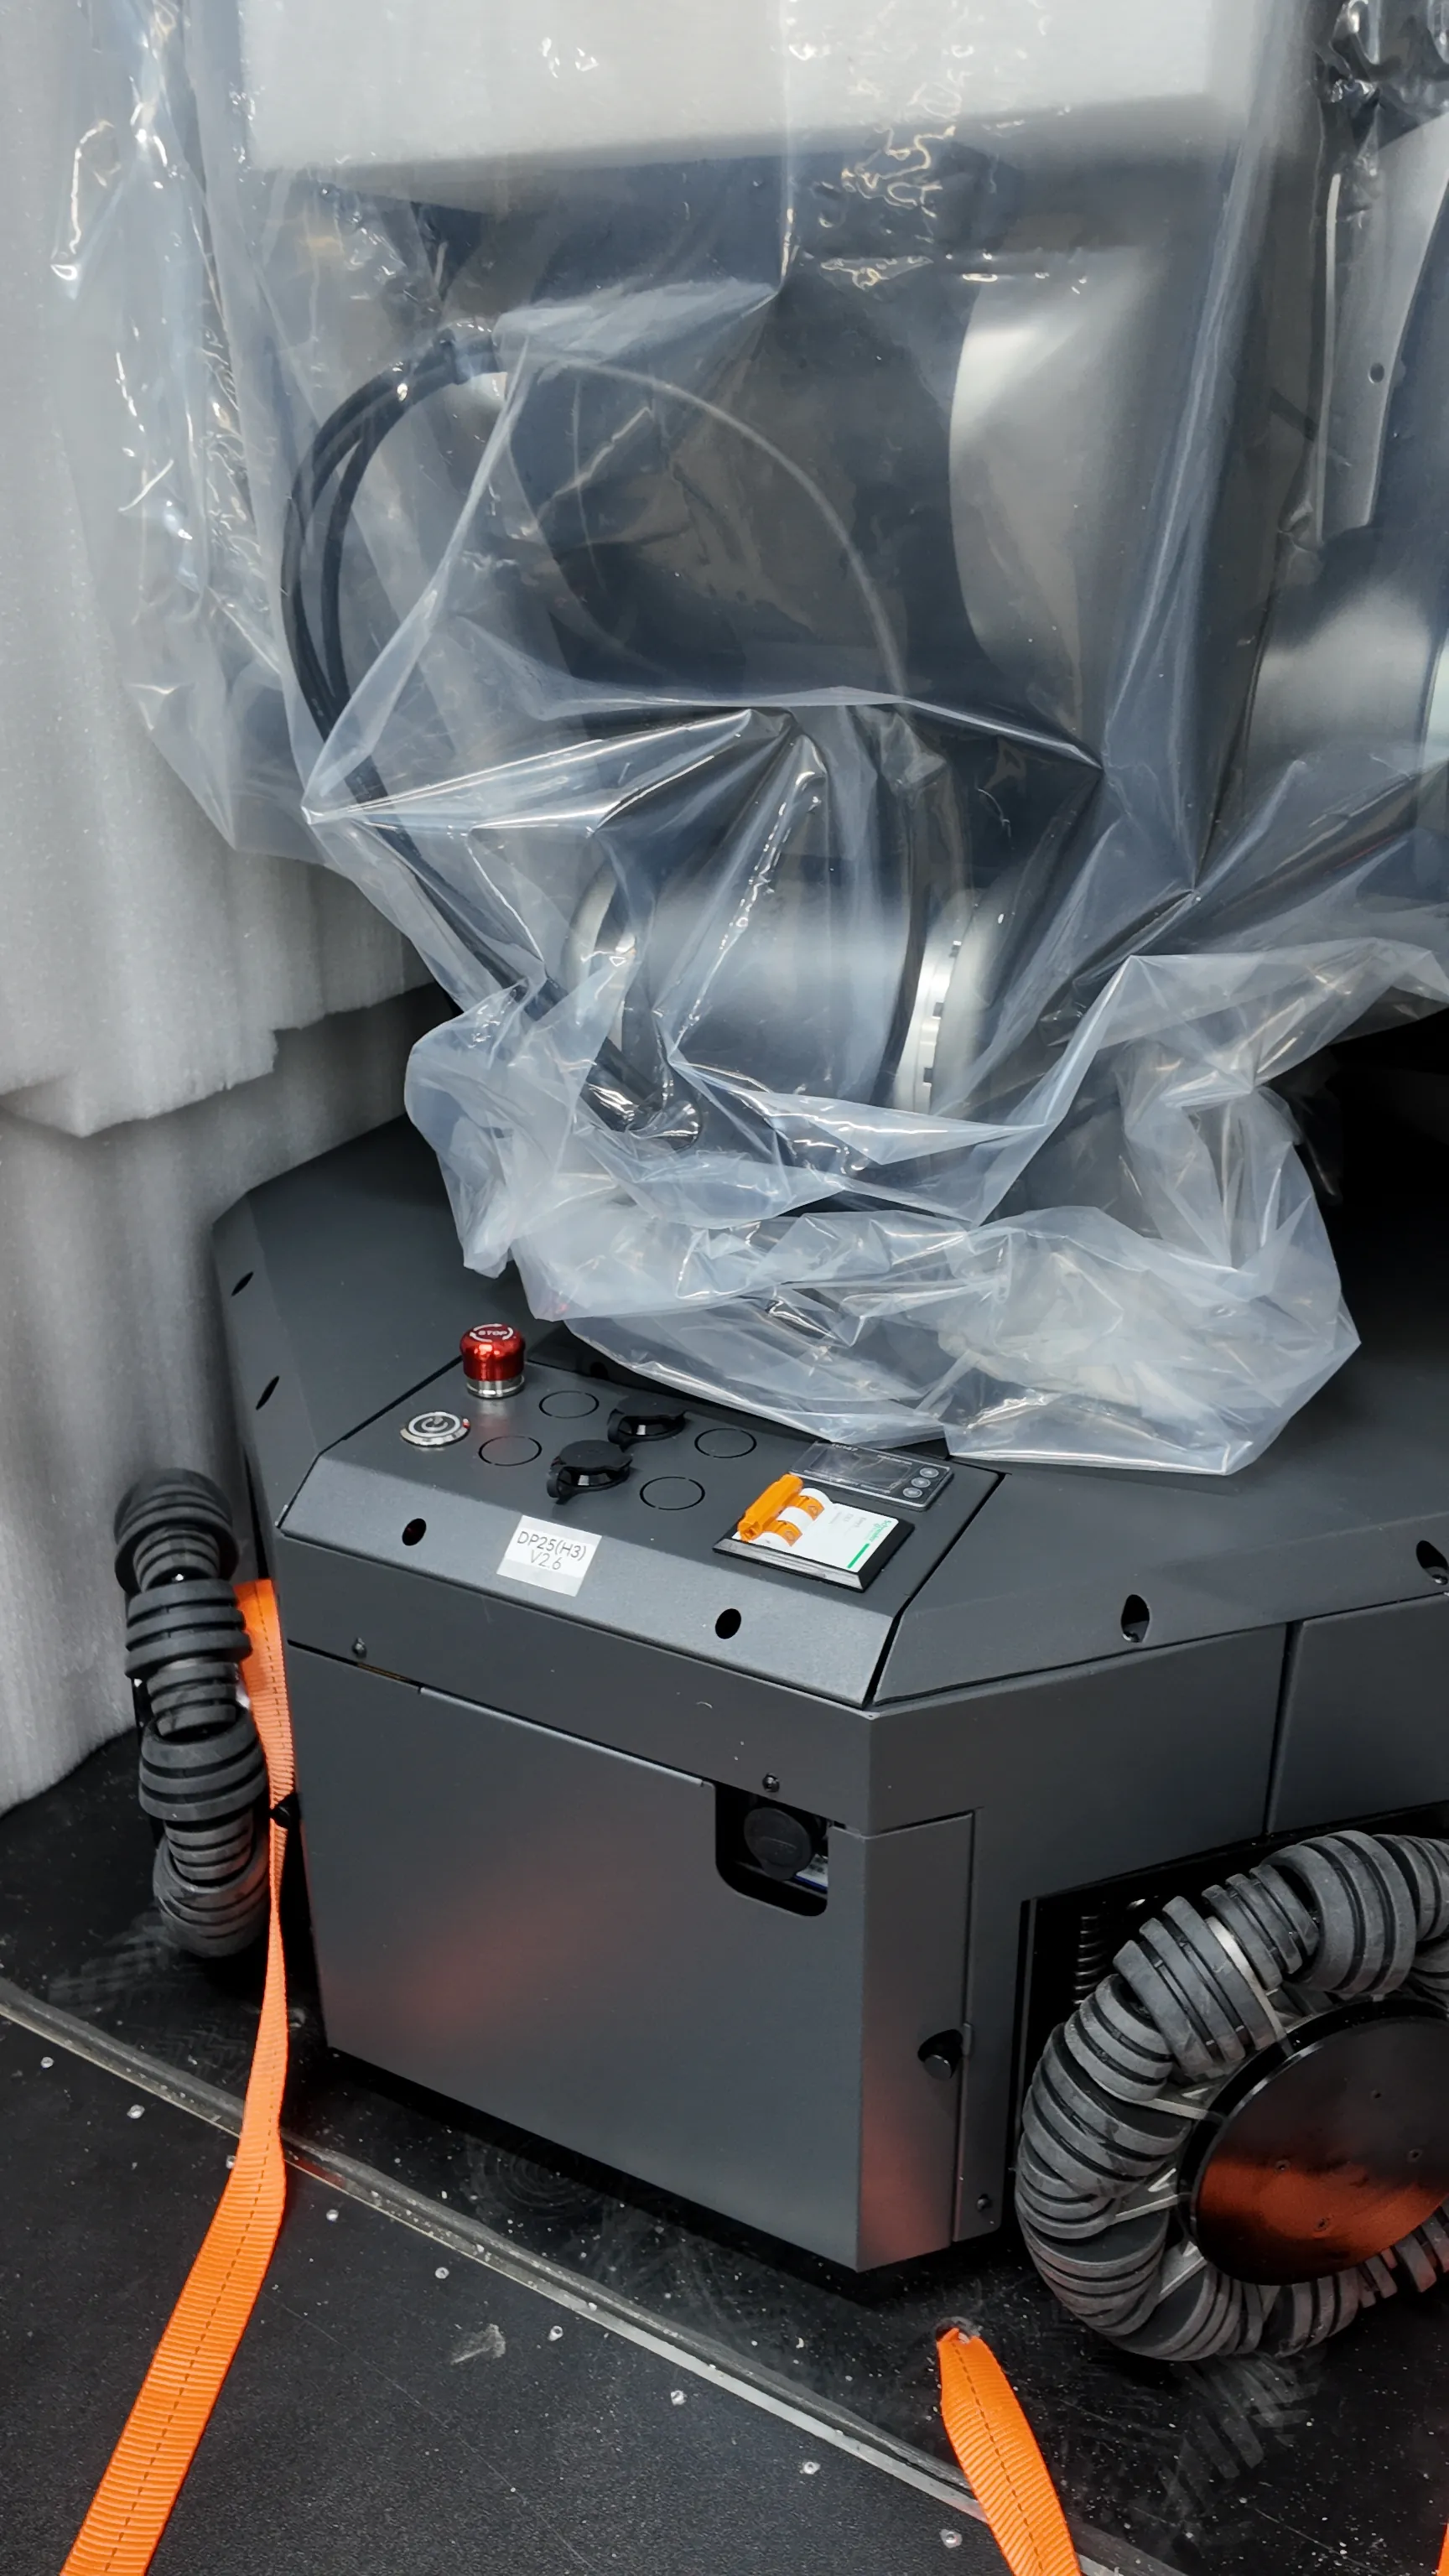
Check whether the emergency stop switches on the robot’s back and at the rear of the chassis are pressed. If pressed, rotate the emergency stop switches to release them.
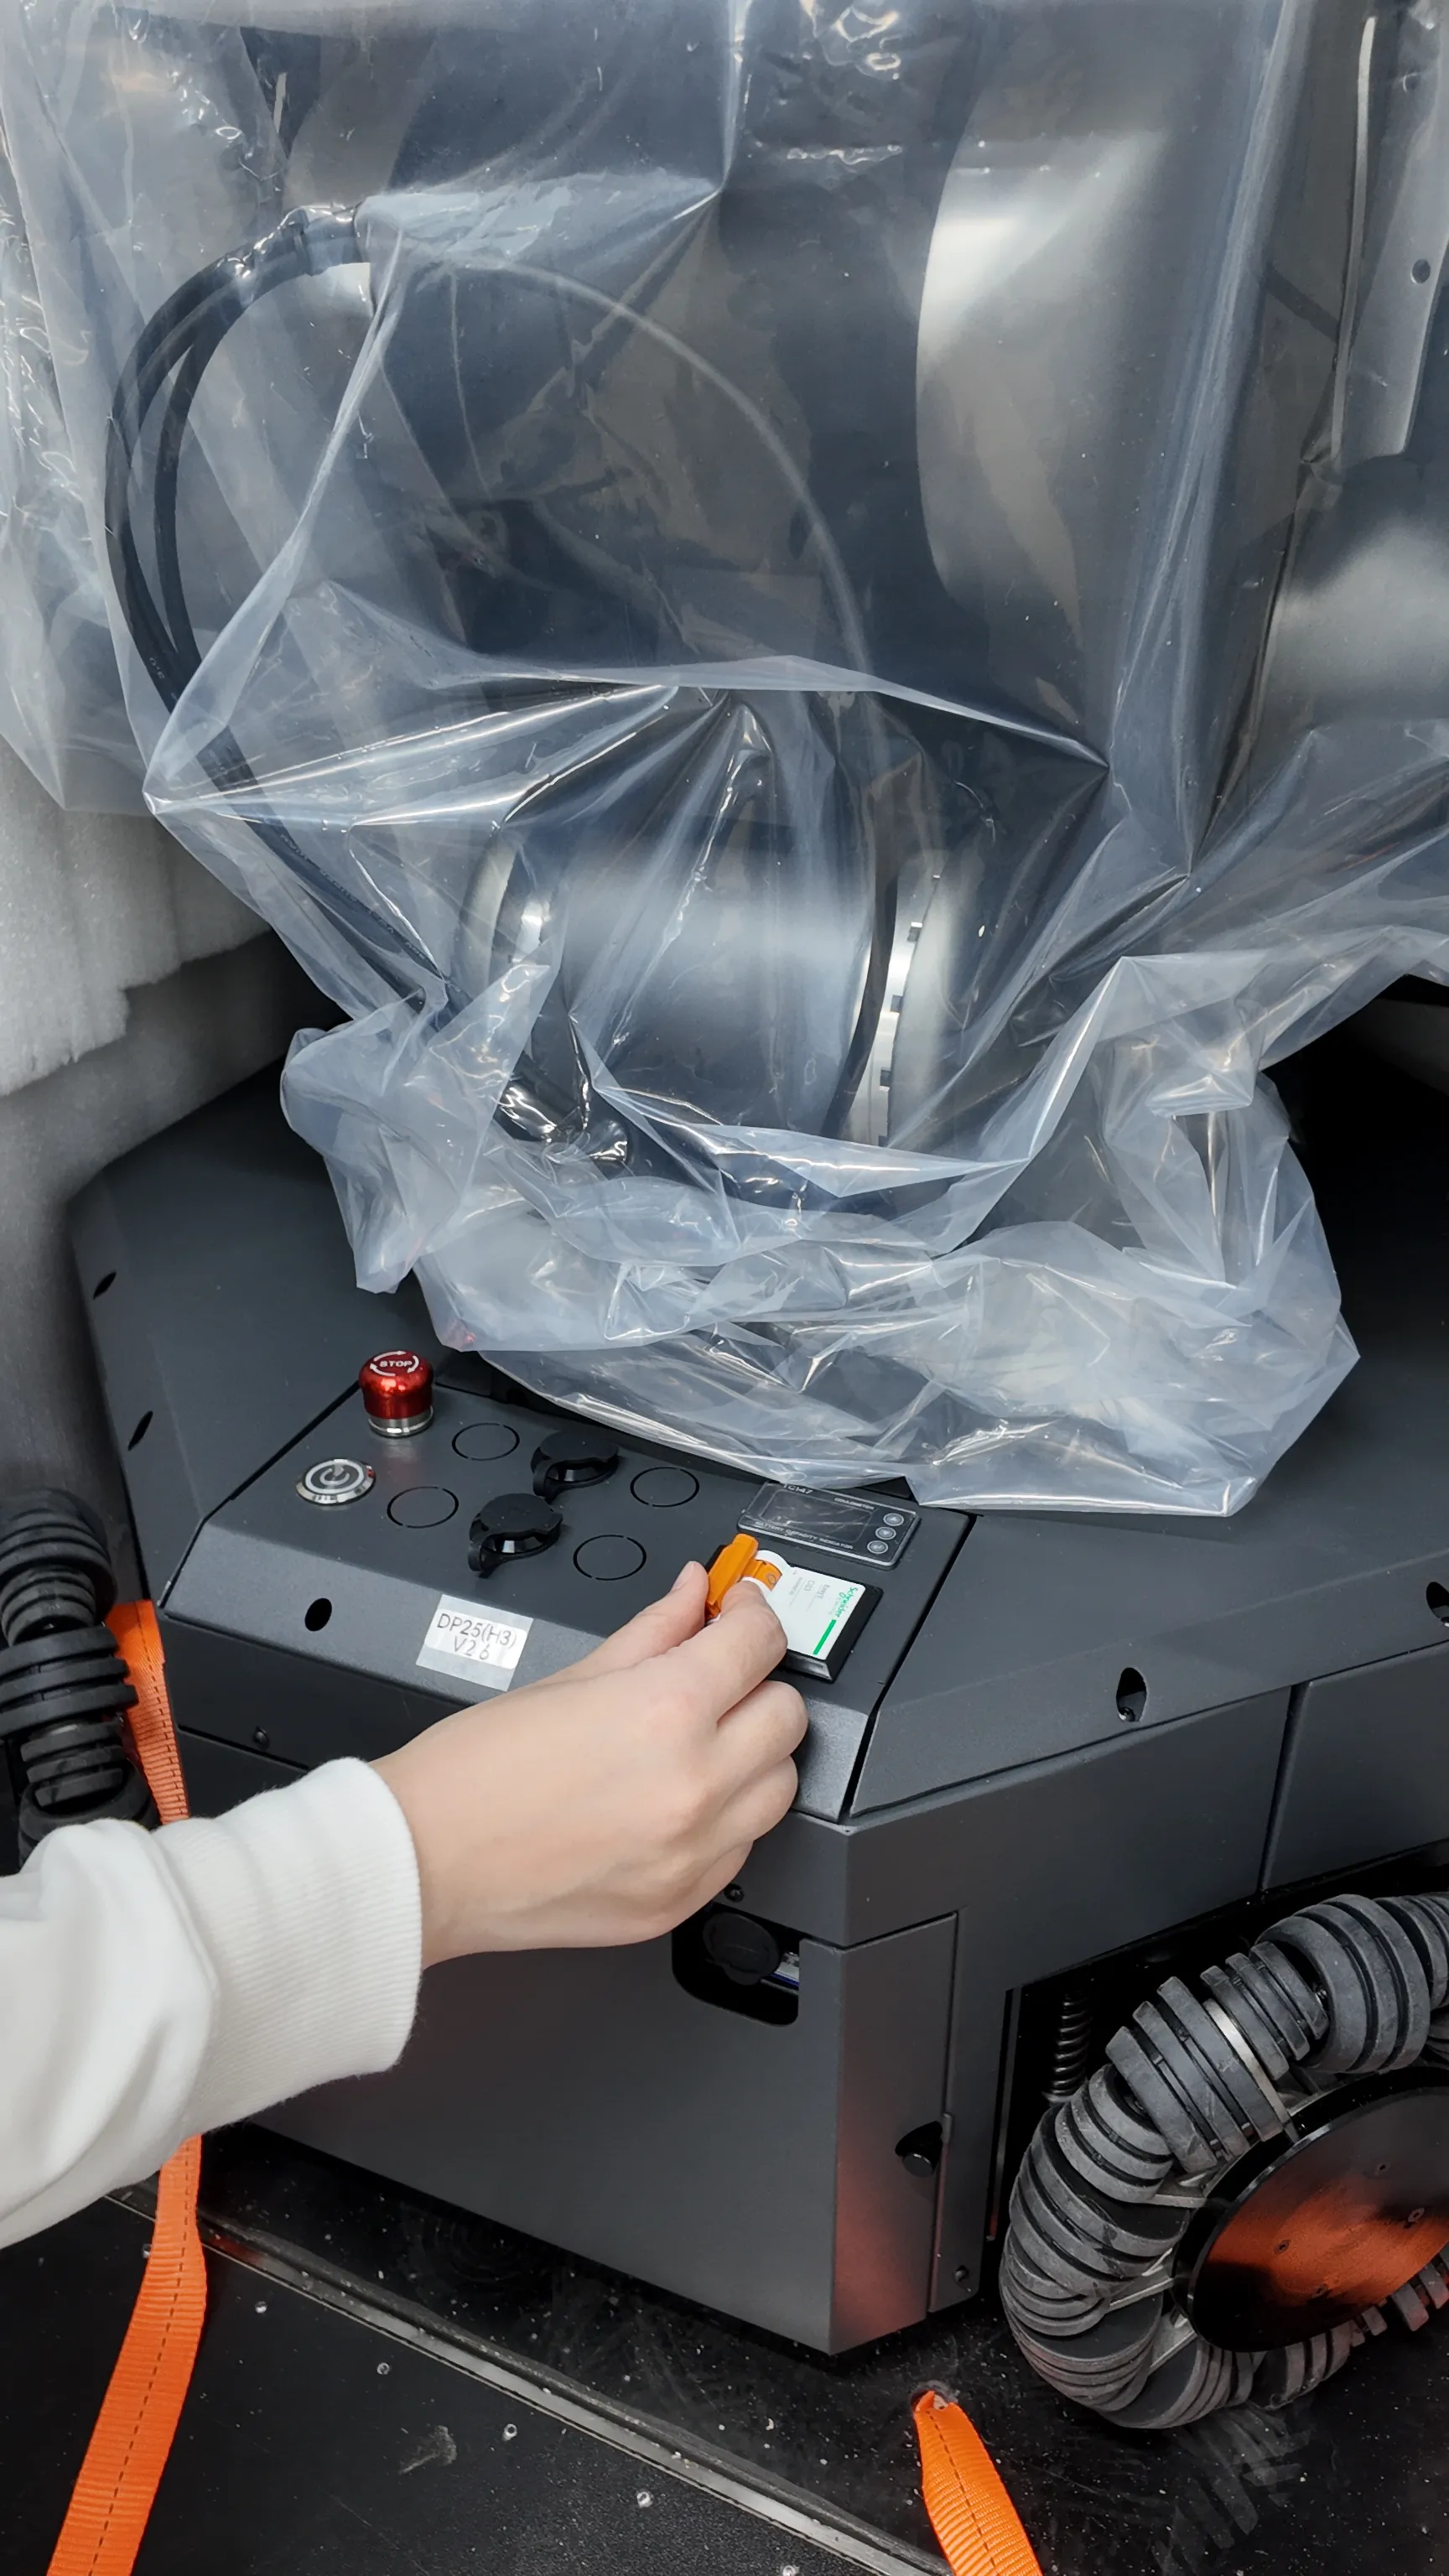
Step 12
After confirming the emergency stop switches are released, toggle the main power switch at the rear of the chassis to power on the robot. The power indicator will light up. Wait for the robot to complete startup.
 |  |
|---|
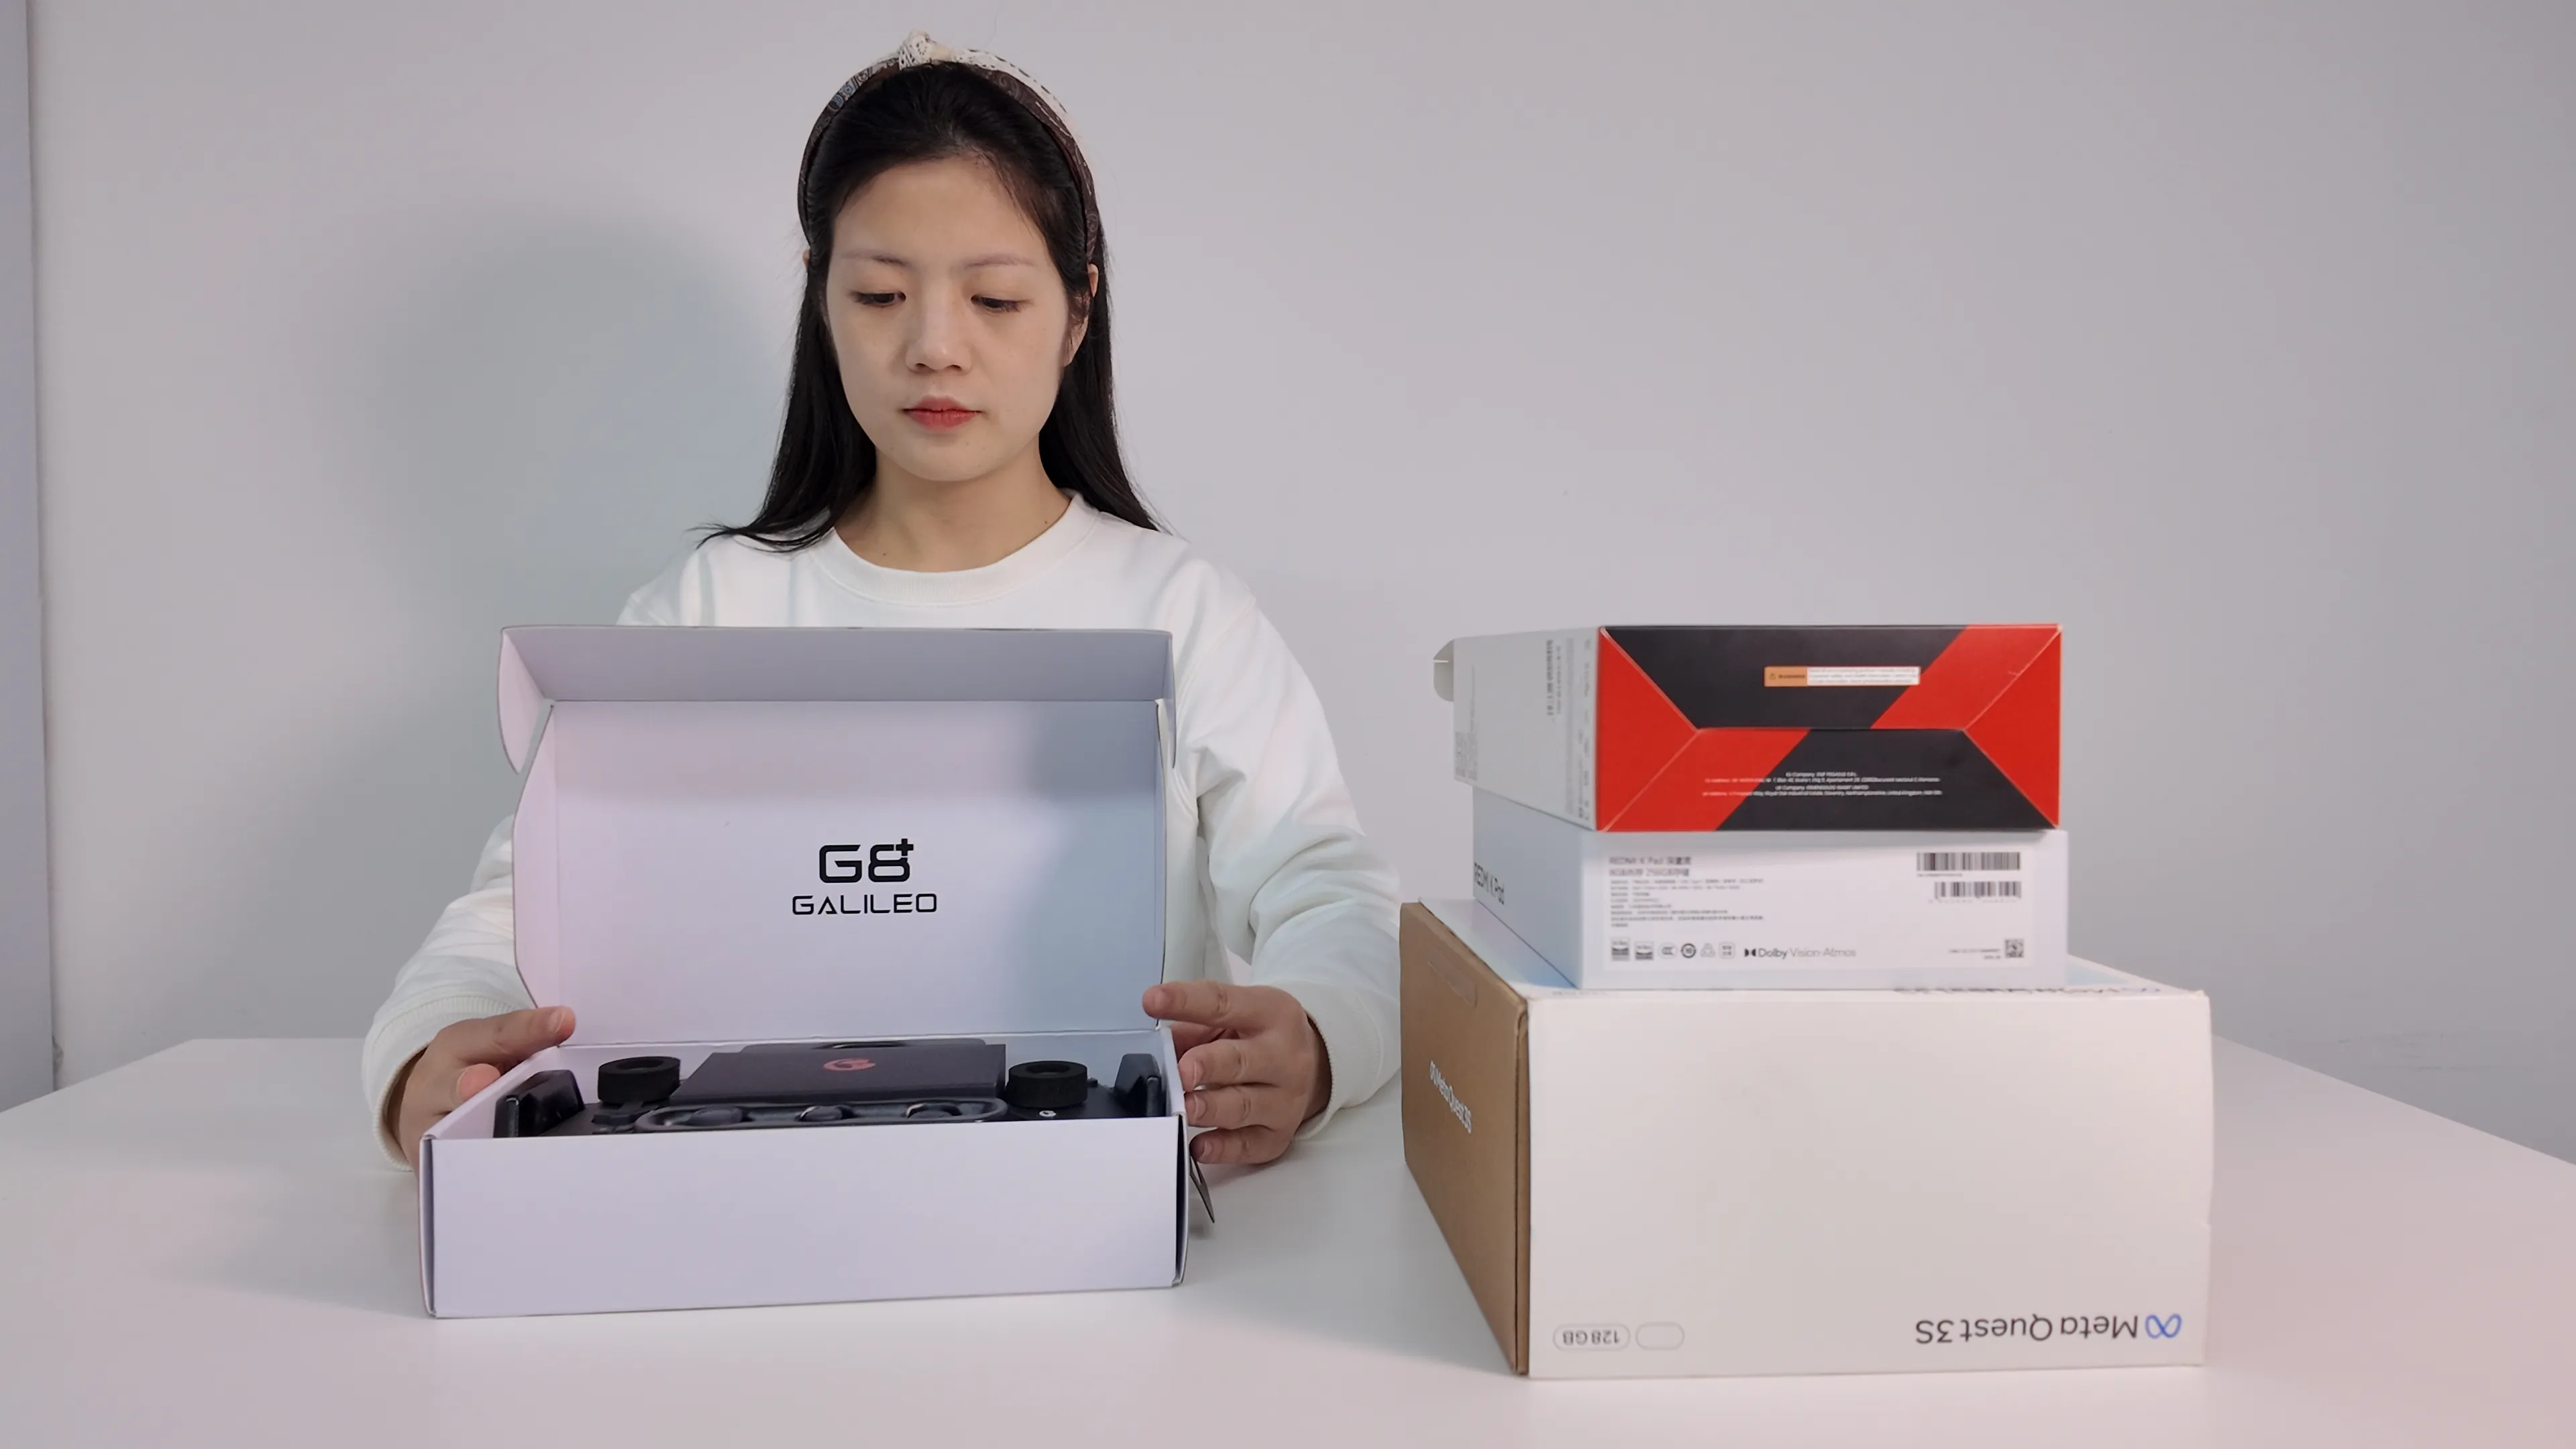
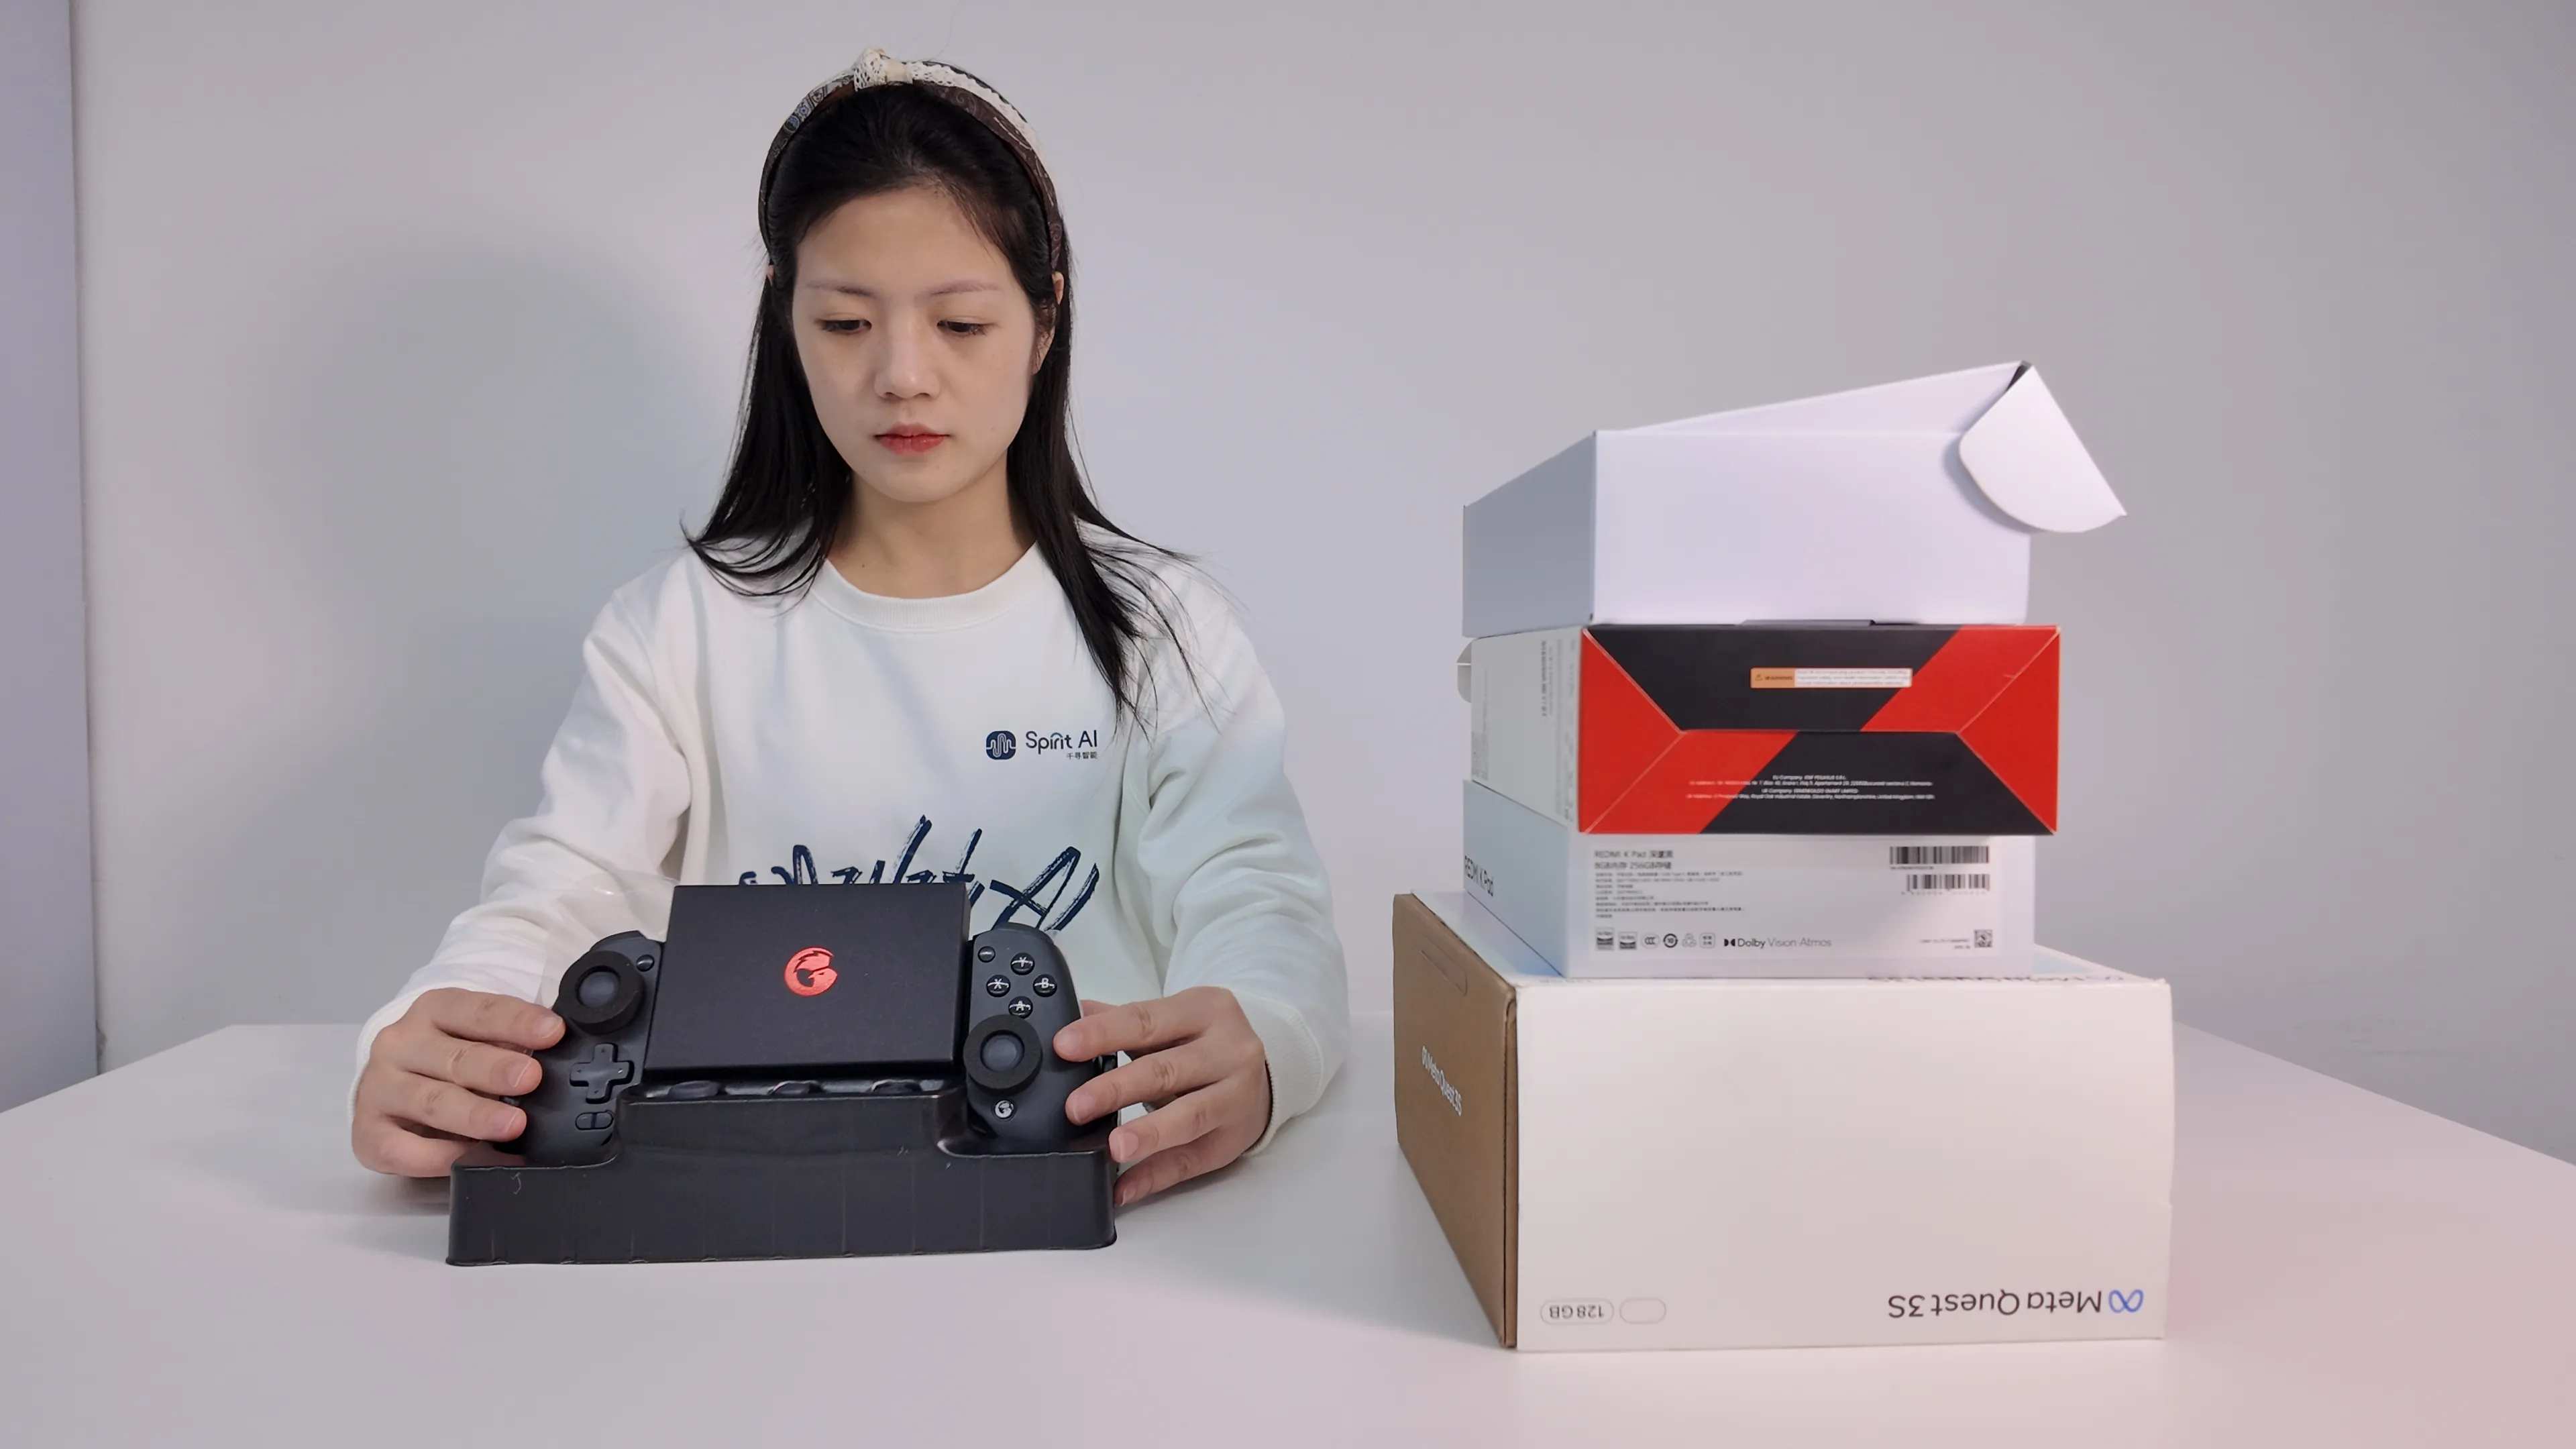
Step 13
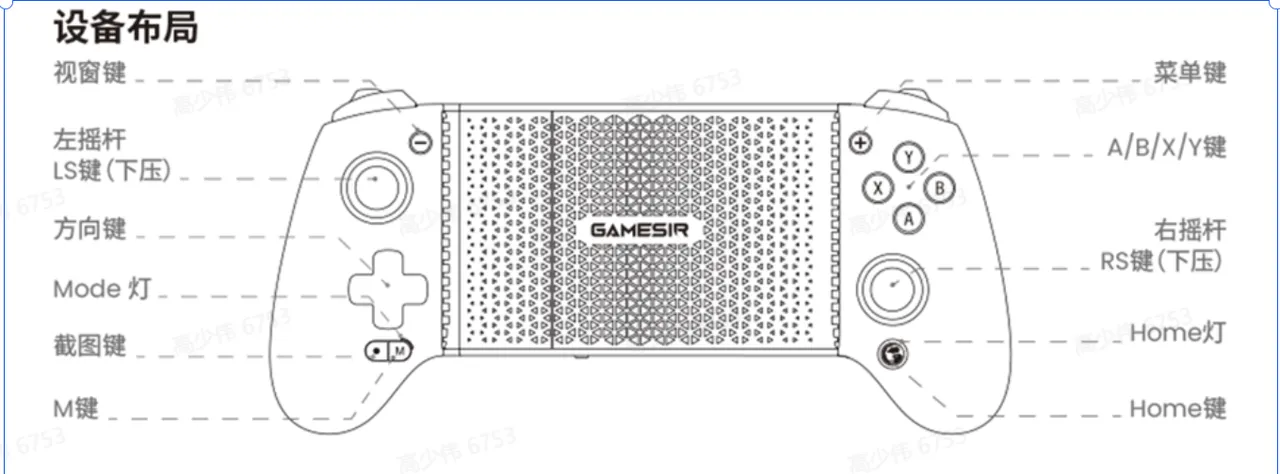
Open the controller package, take out the controller, and place it on the table for later use.
 |  |
|---|
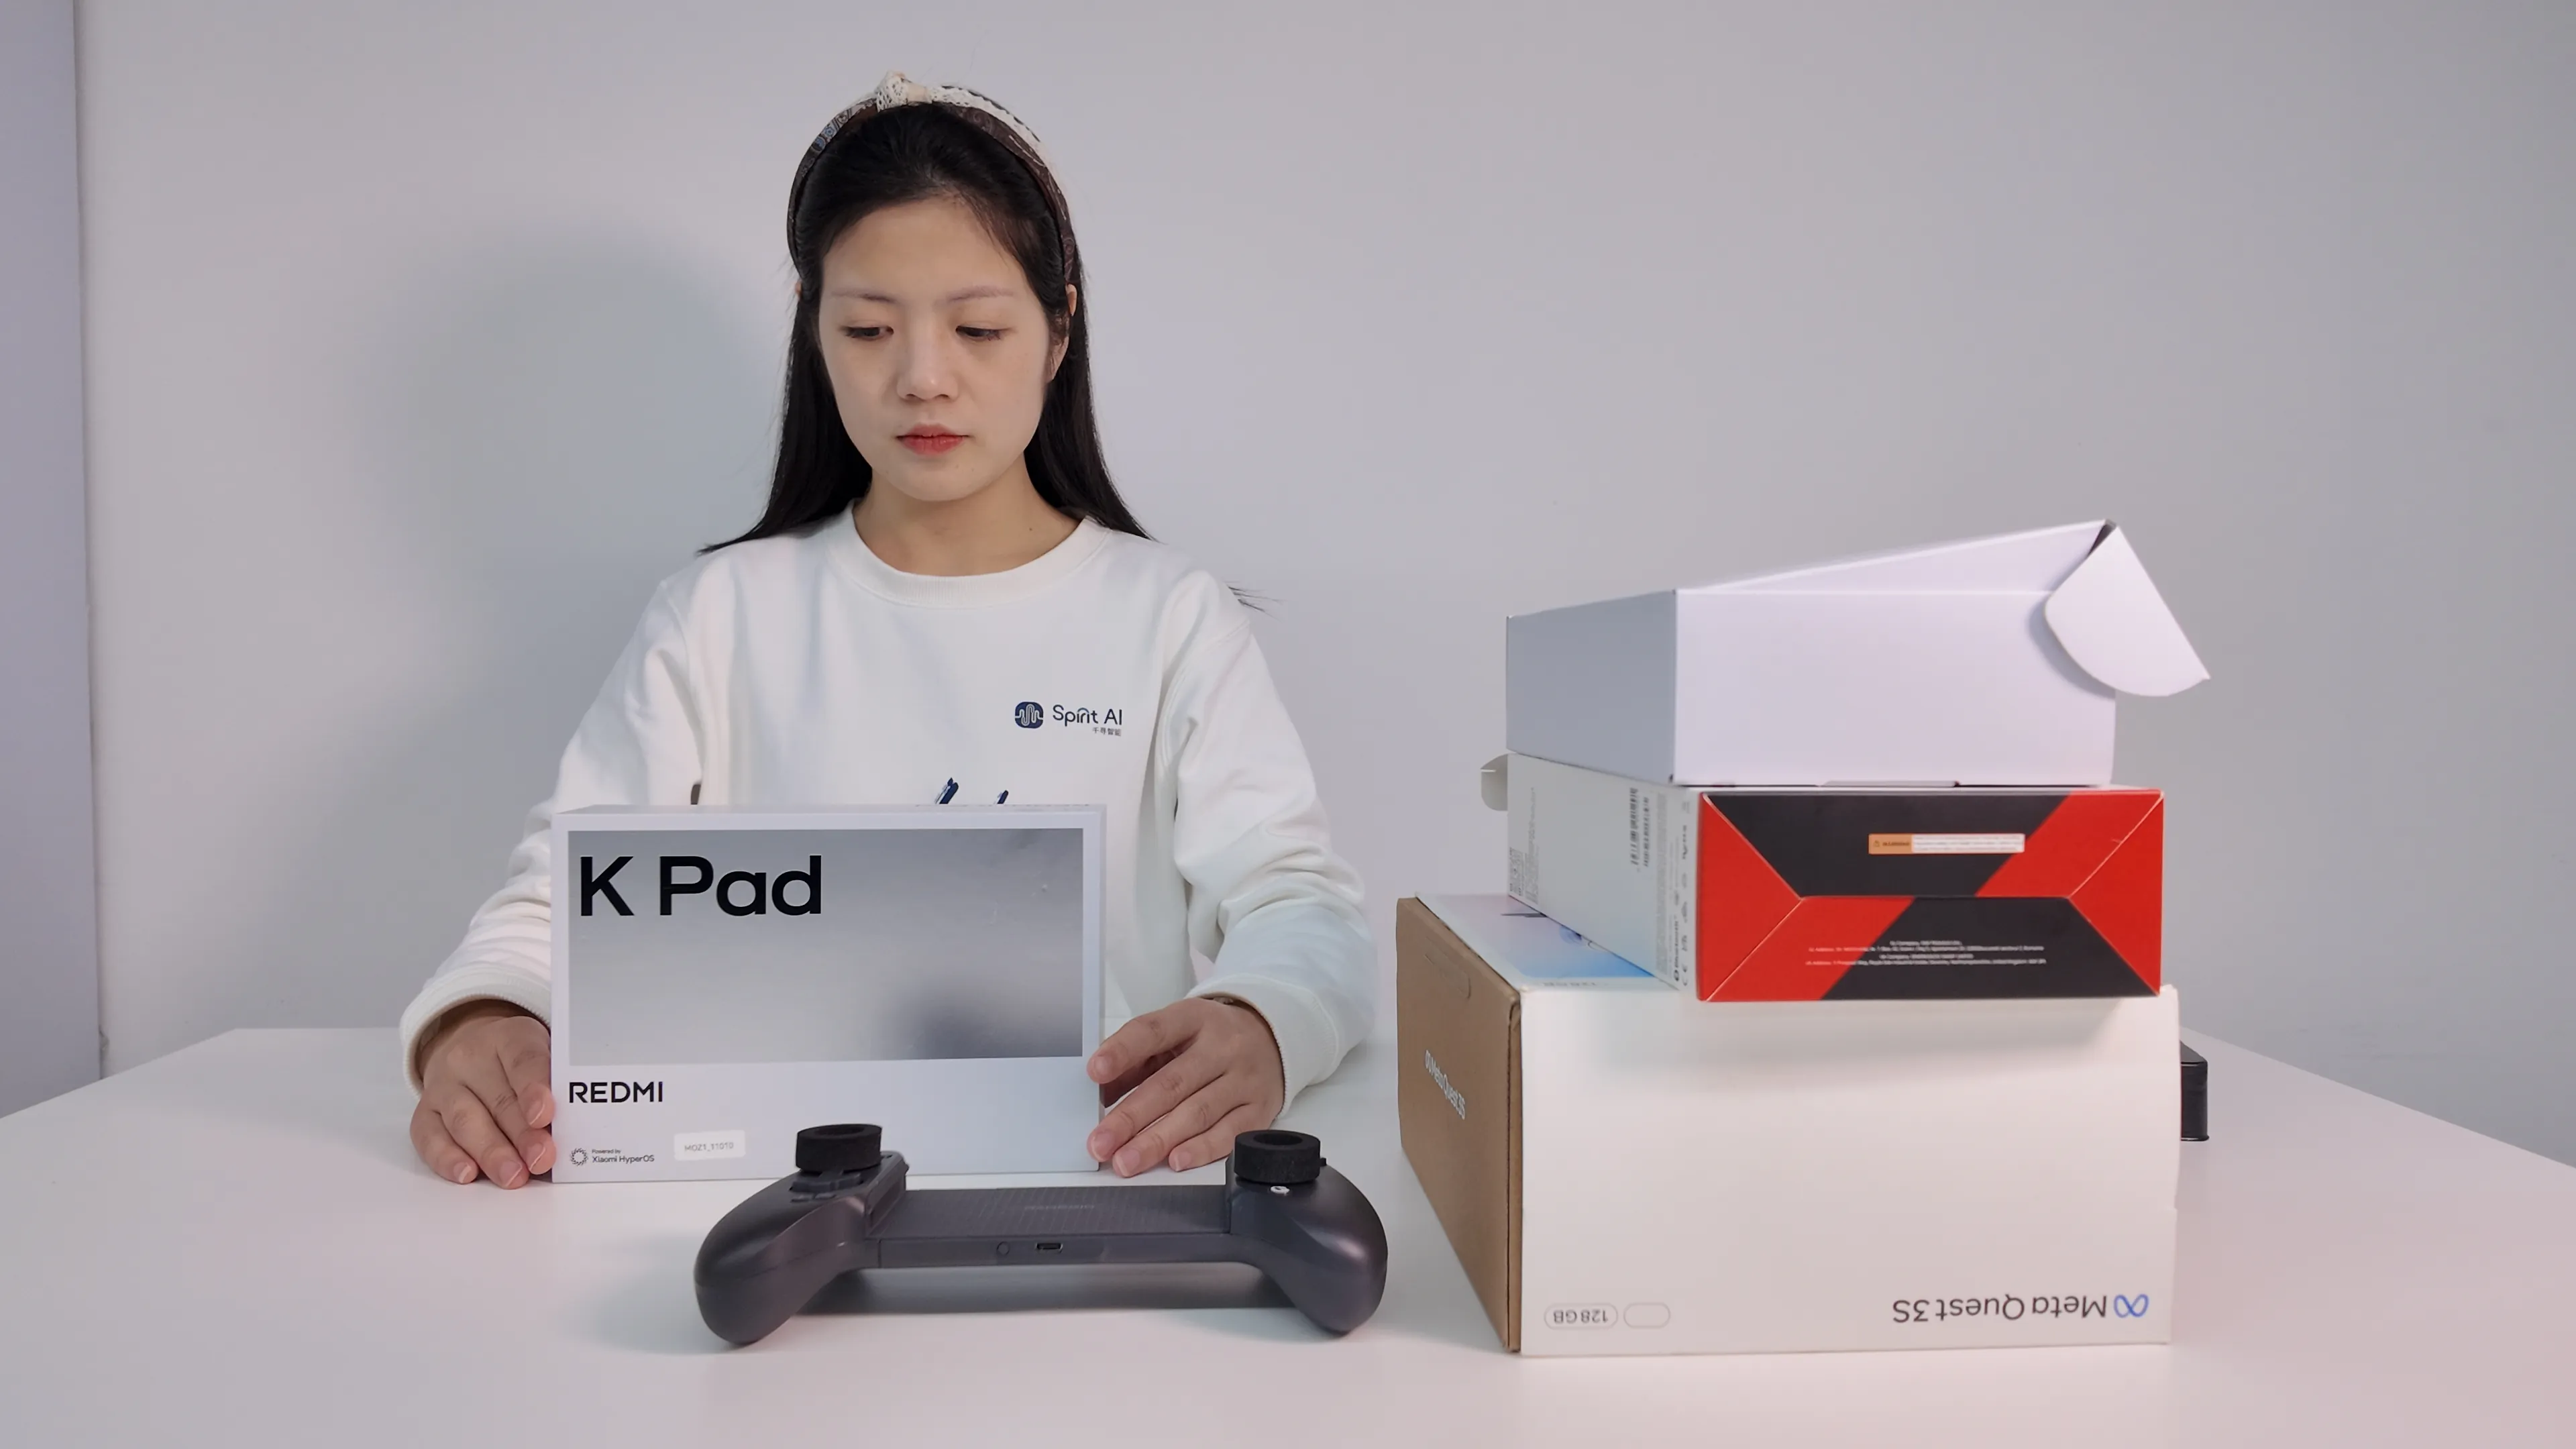
Step 14
Open the tablet package, take out the tablet, and power it on.
 |  |
|---|
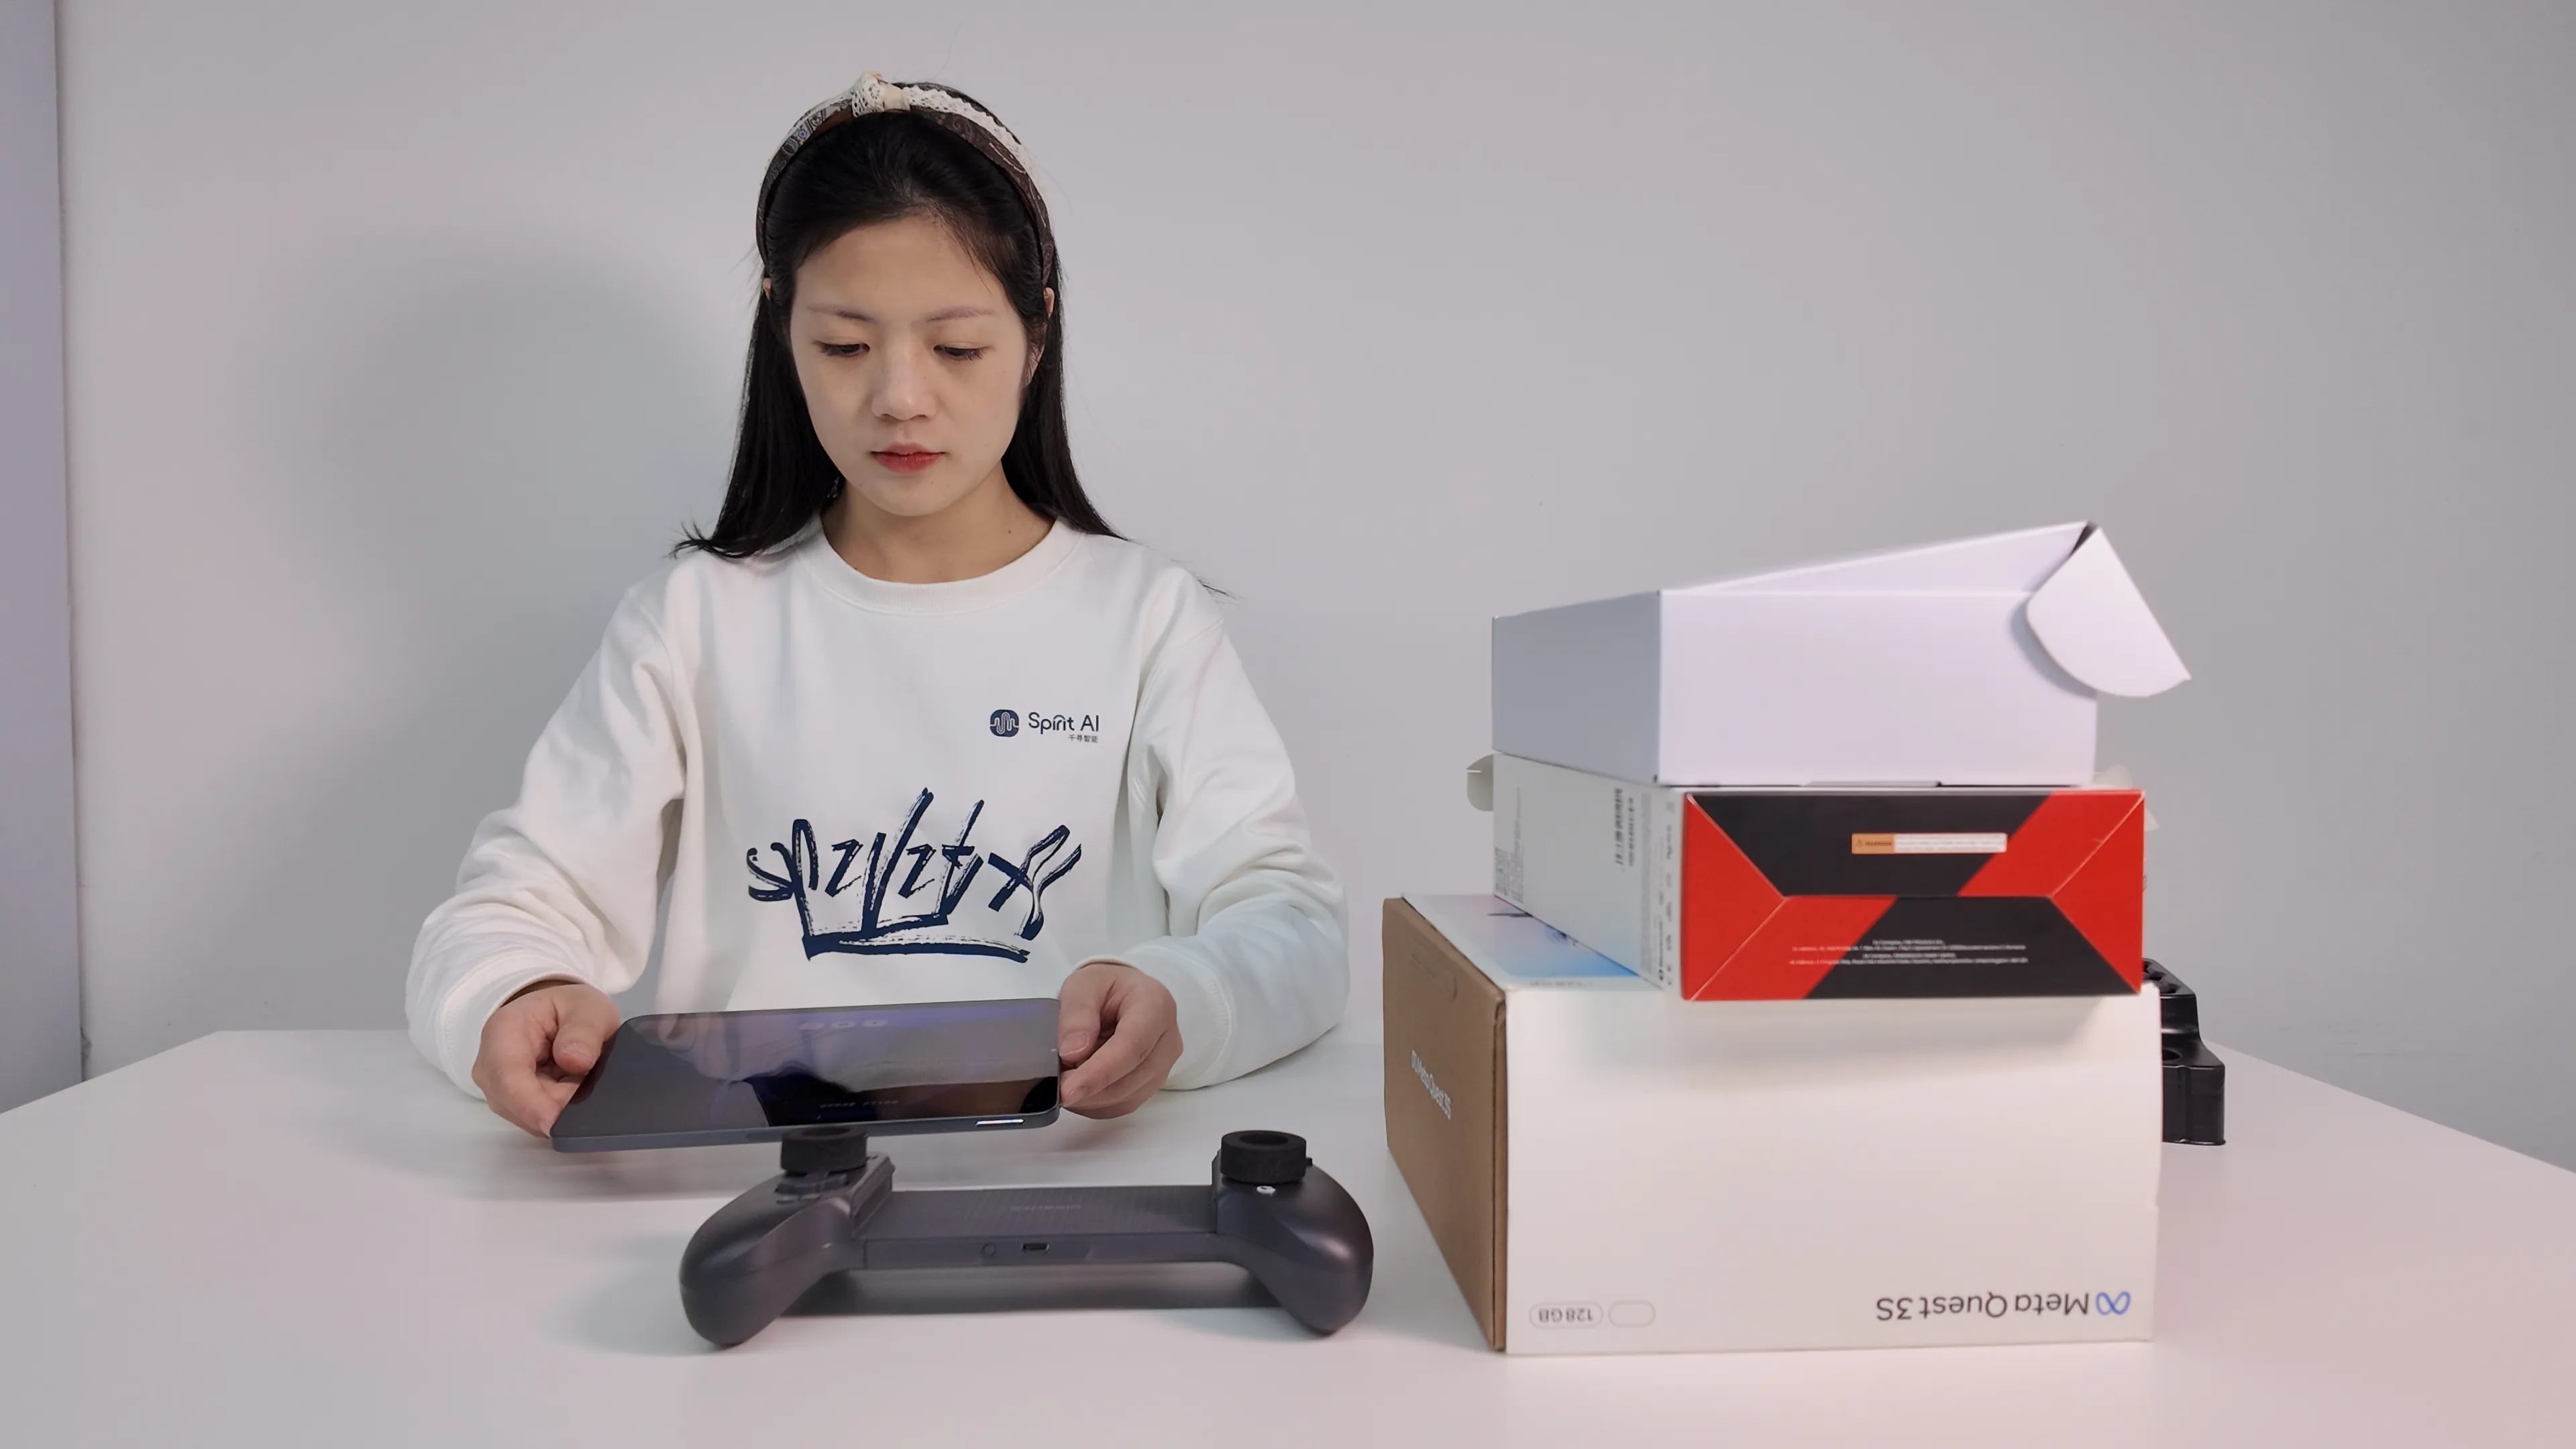
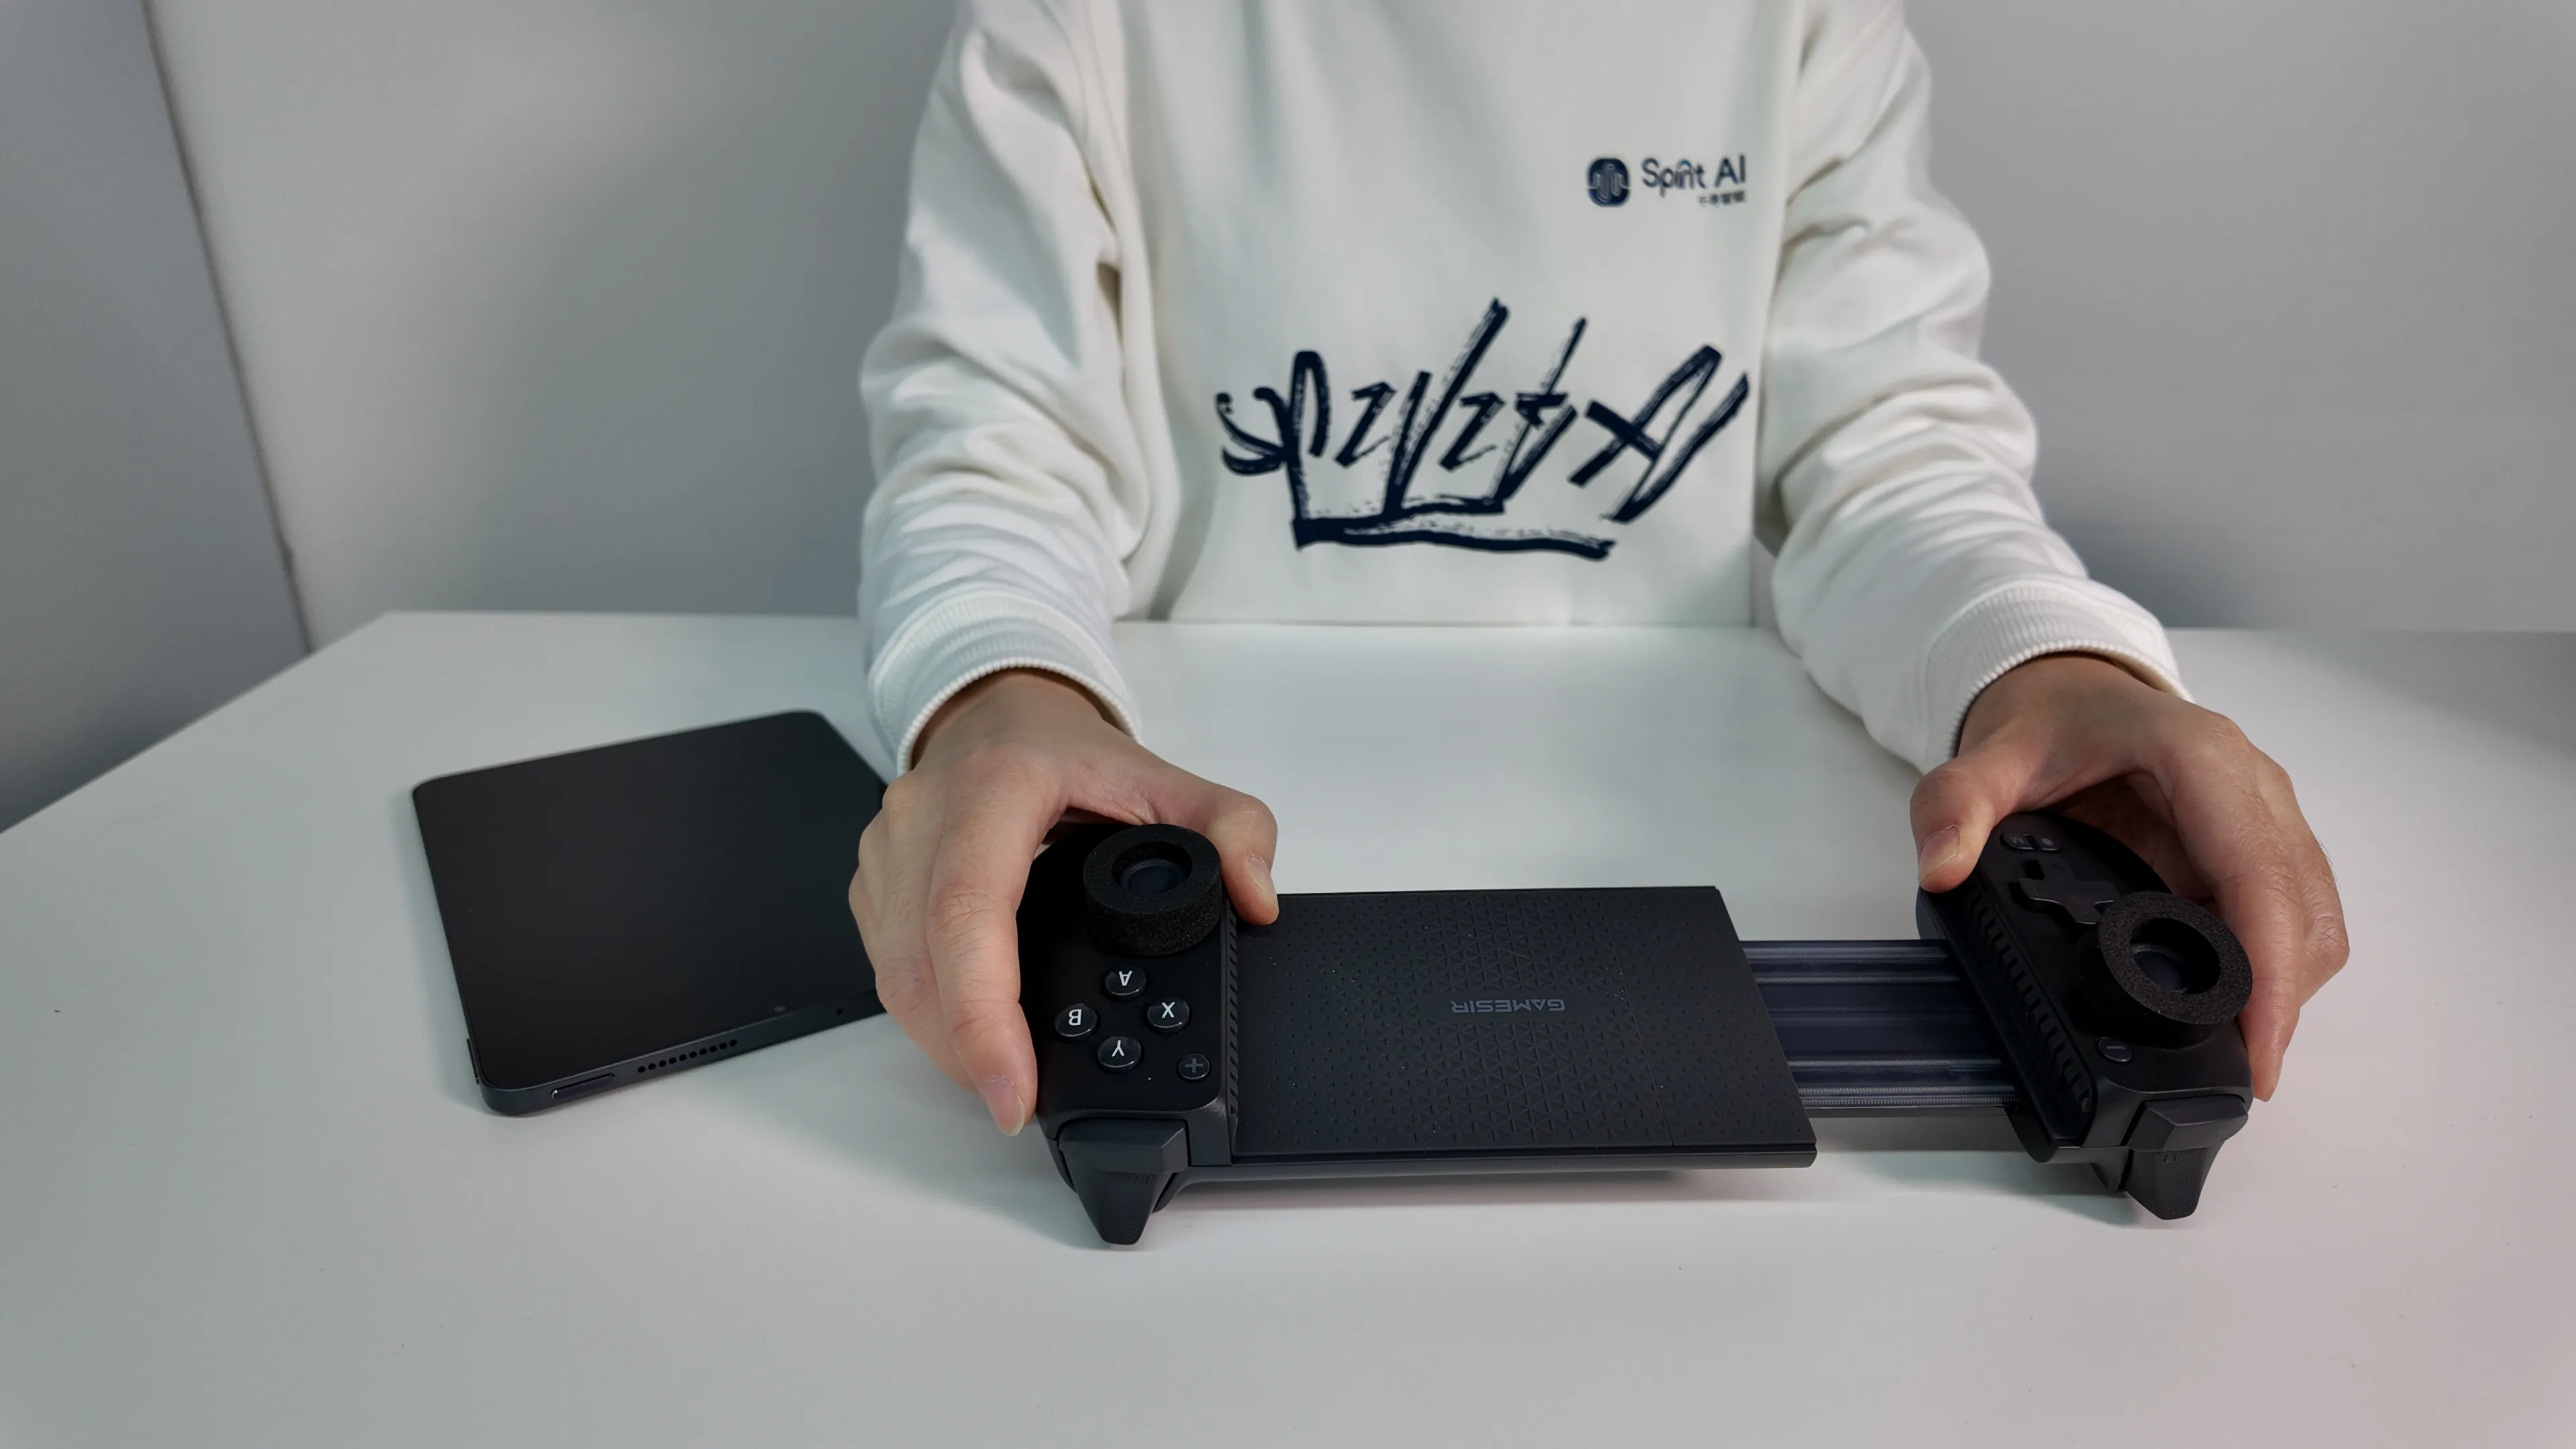
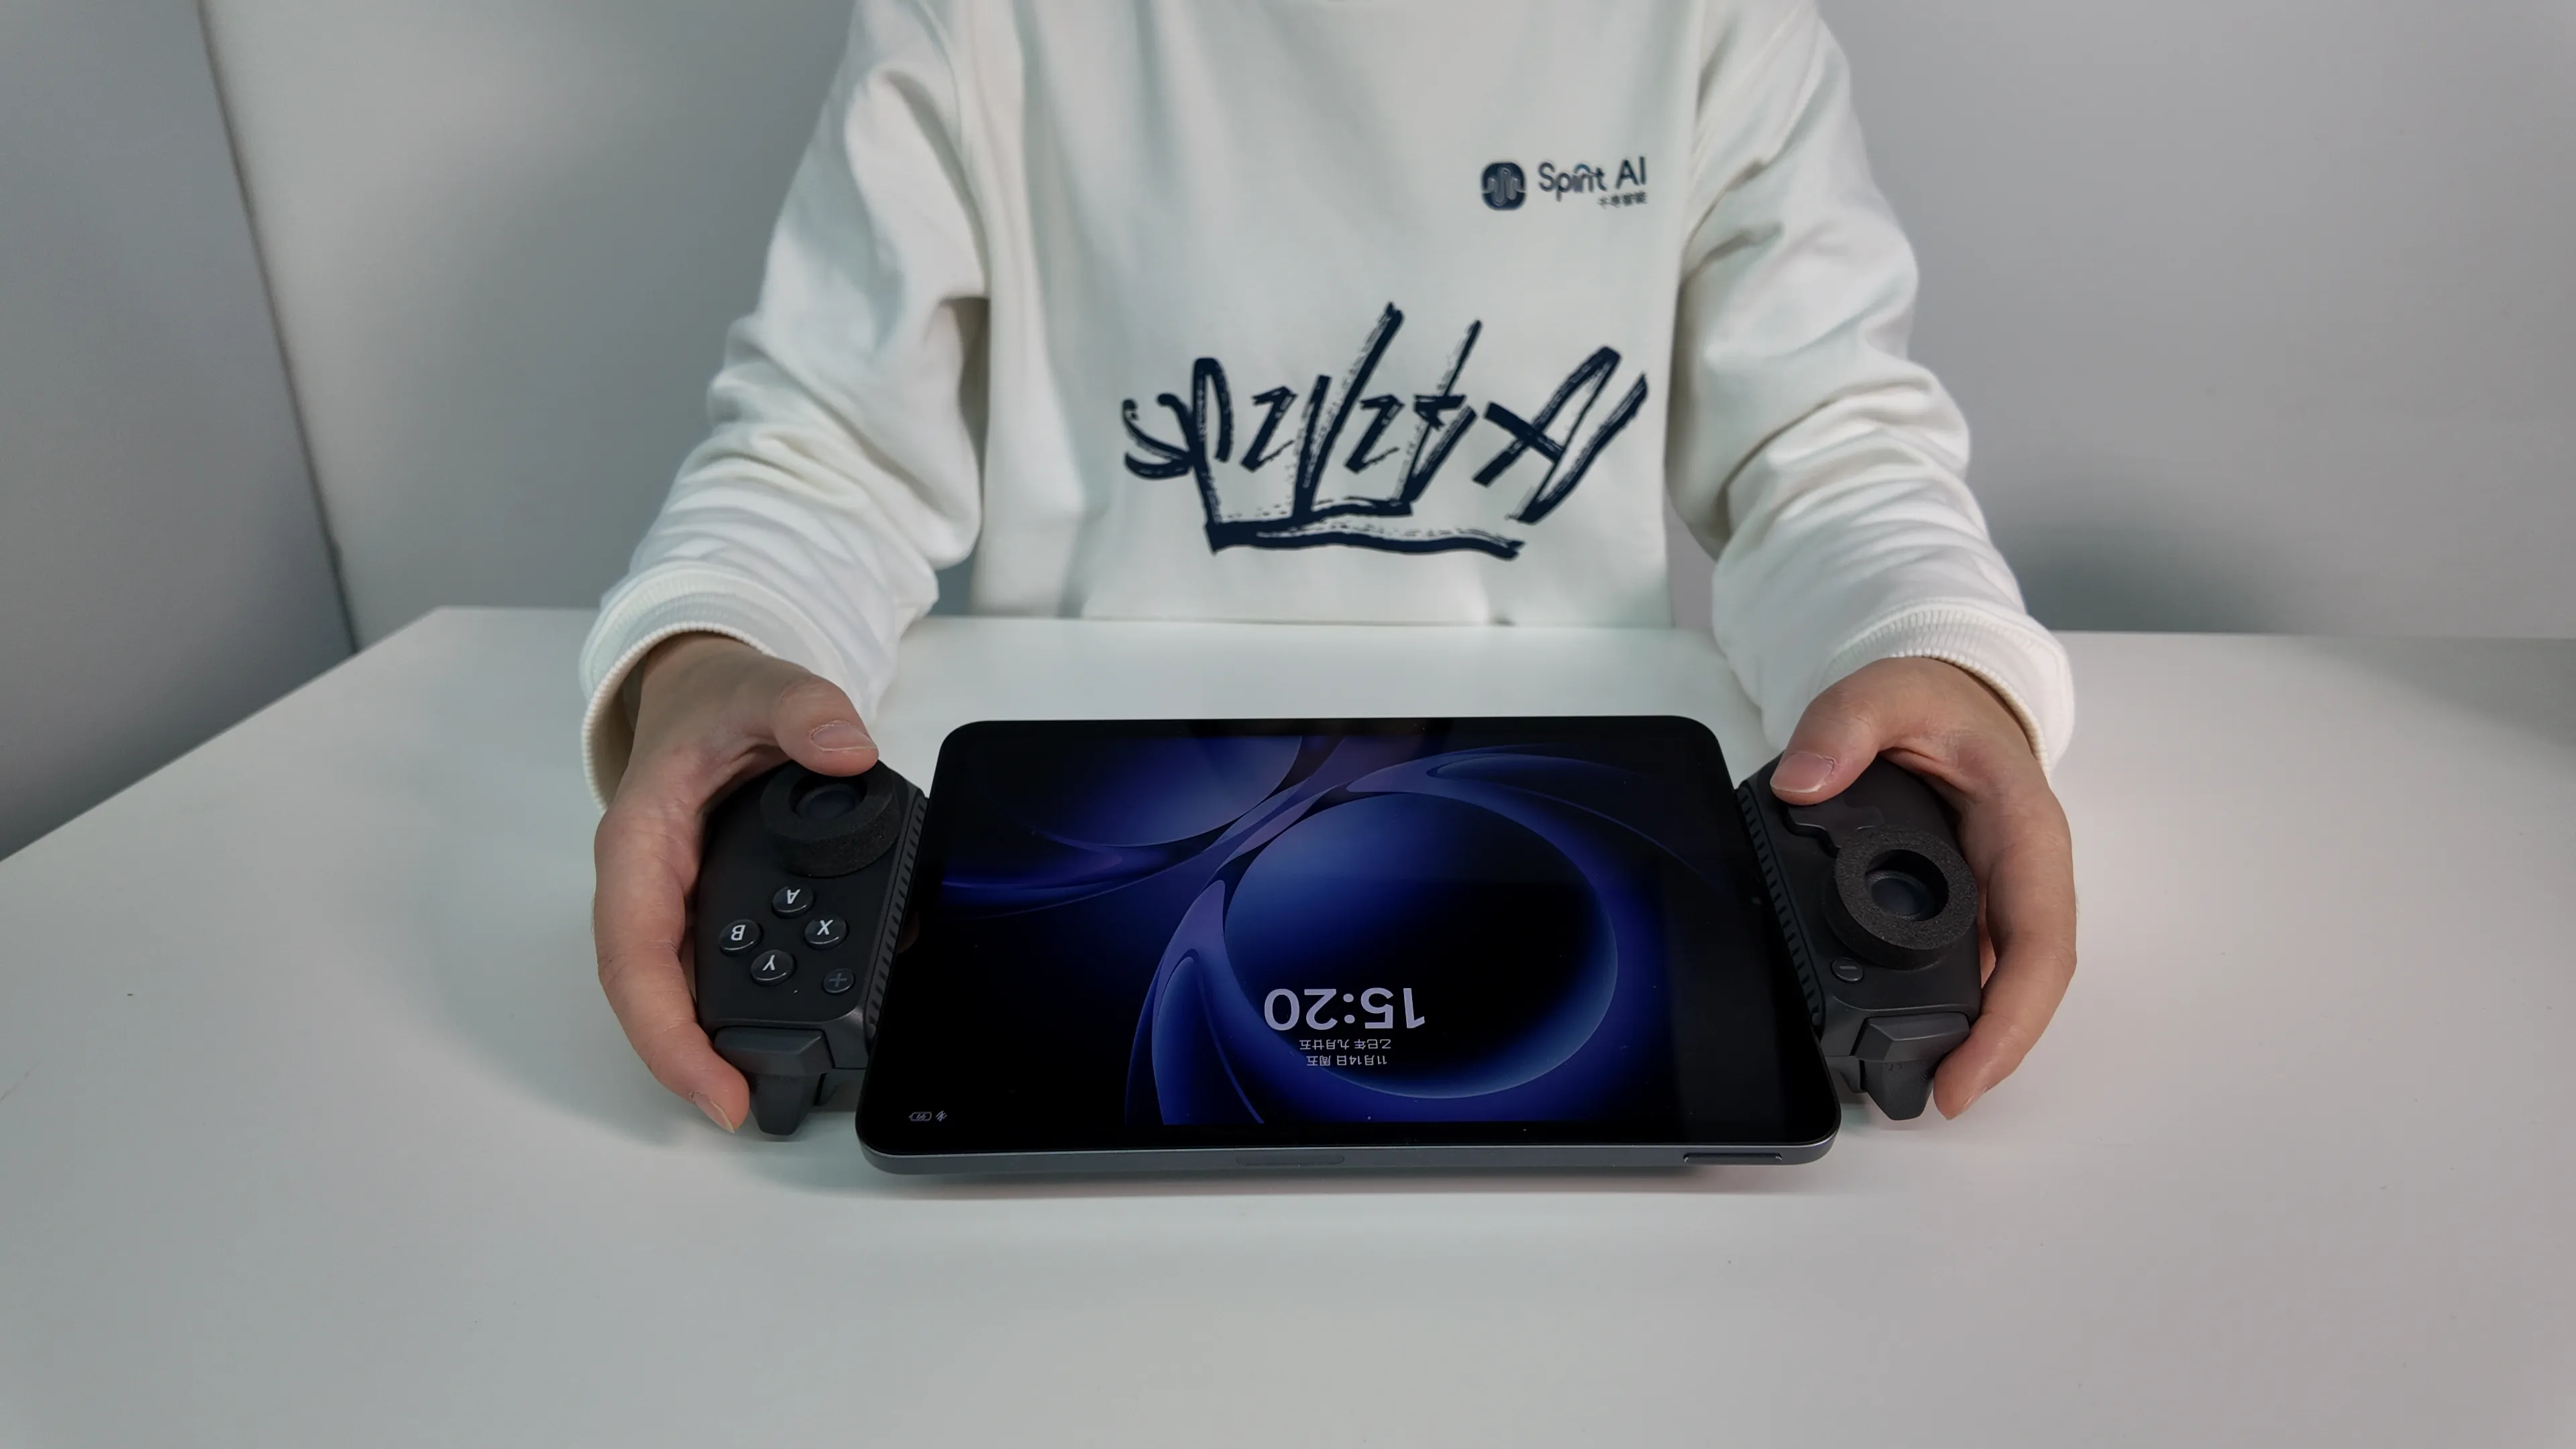
Step 15
Follow the steps below to place the tablet into the terminal slot of the controller.
 |  |  |
|---|
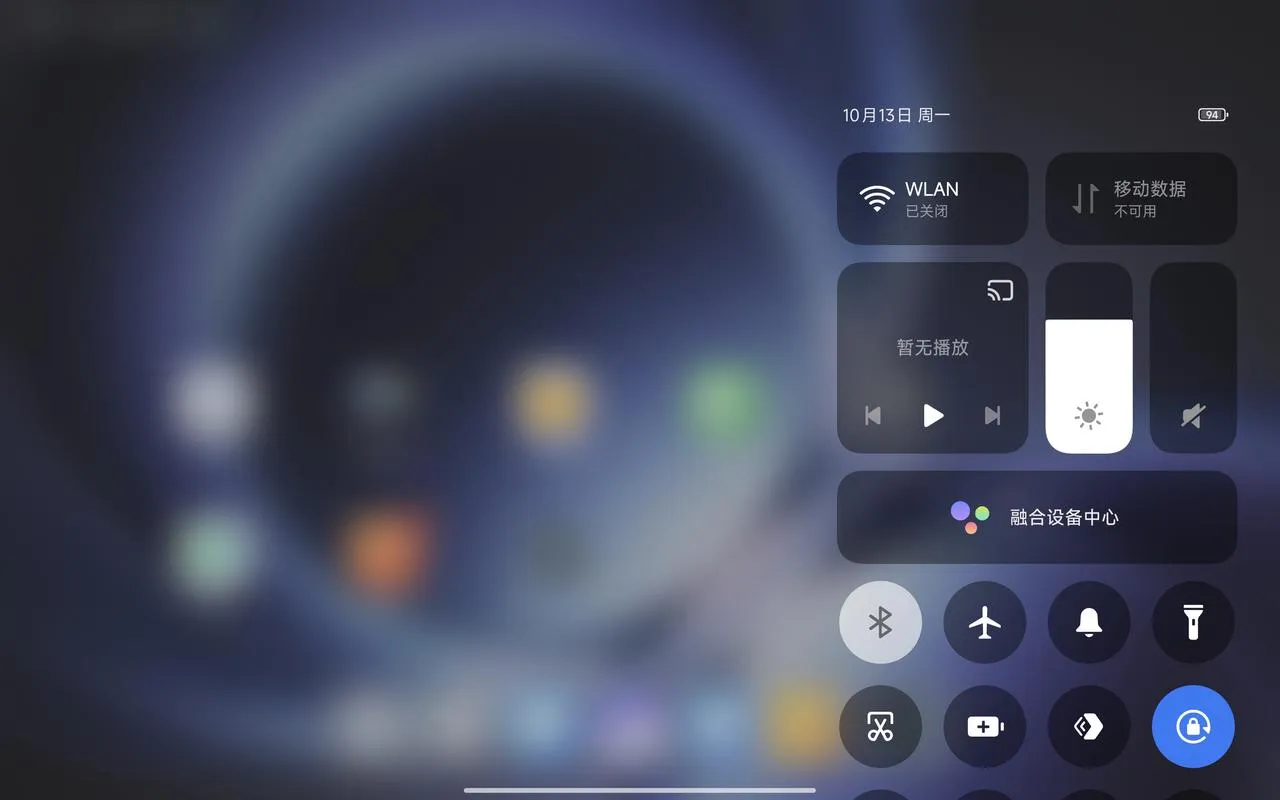
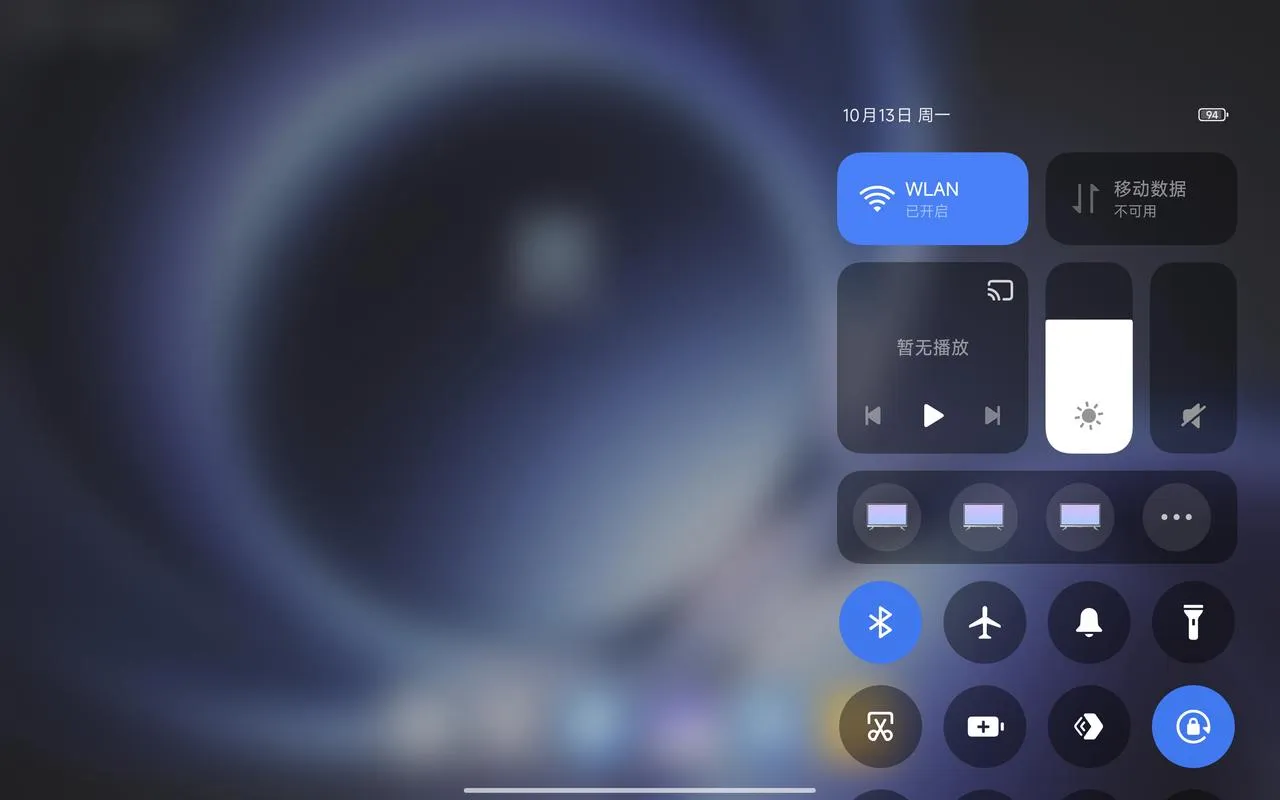
Step 16
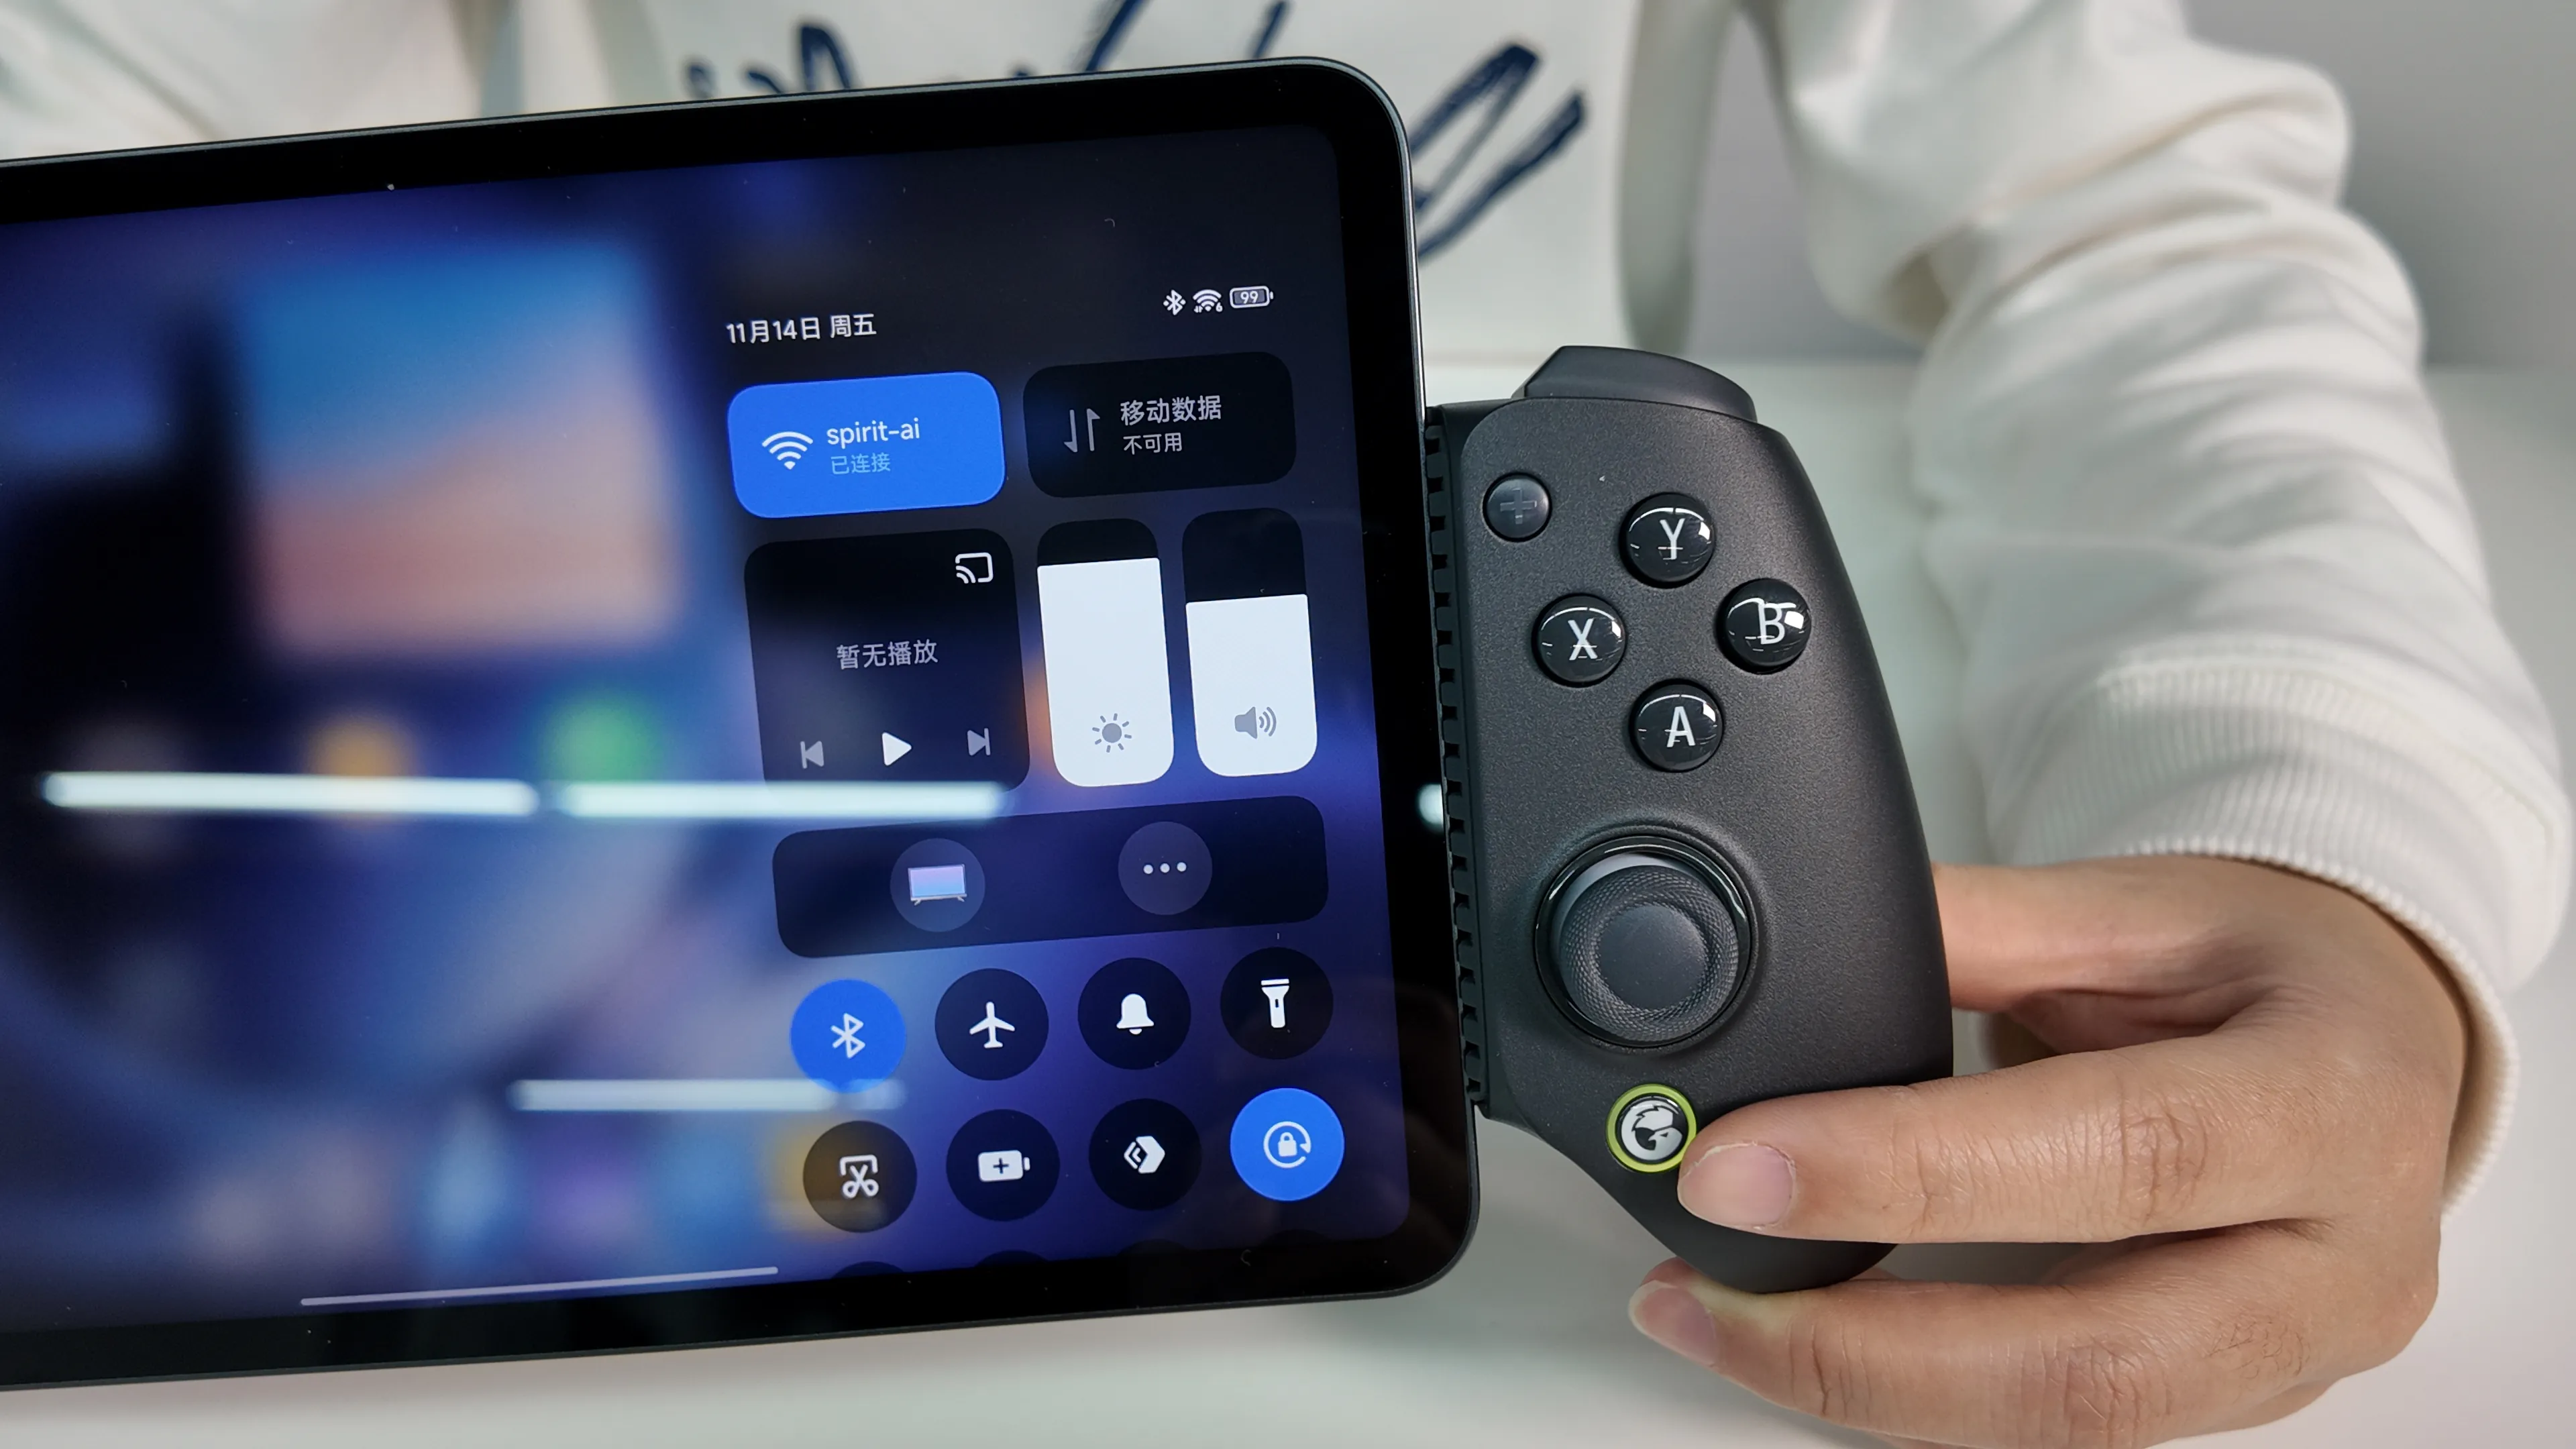
After the tablet starts, enter the handheld terminal system desktop and ensure that Wi-Fi and Bluetooth are enabled.
 |  |
|---|
Step 17
Use the tablet to connect via Wi-Fi to the robot’s built-in Wi-Fi hotspot MOZ1-0900x. The default password is spirit-ai.

Step 18
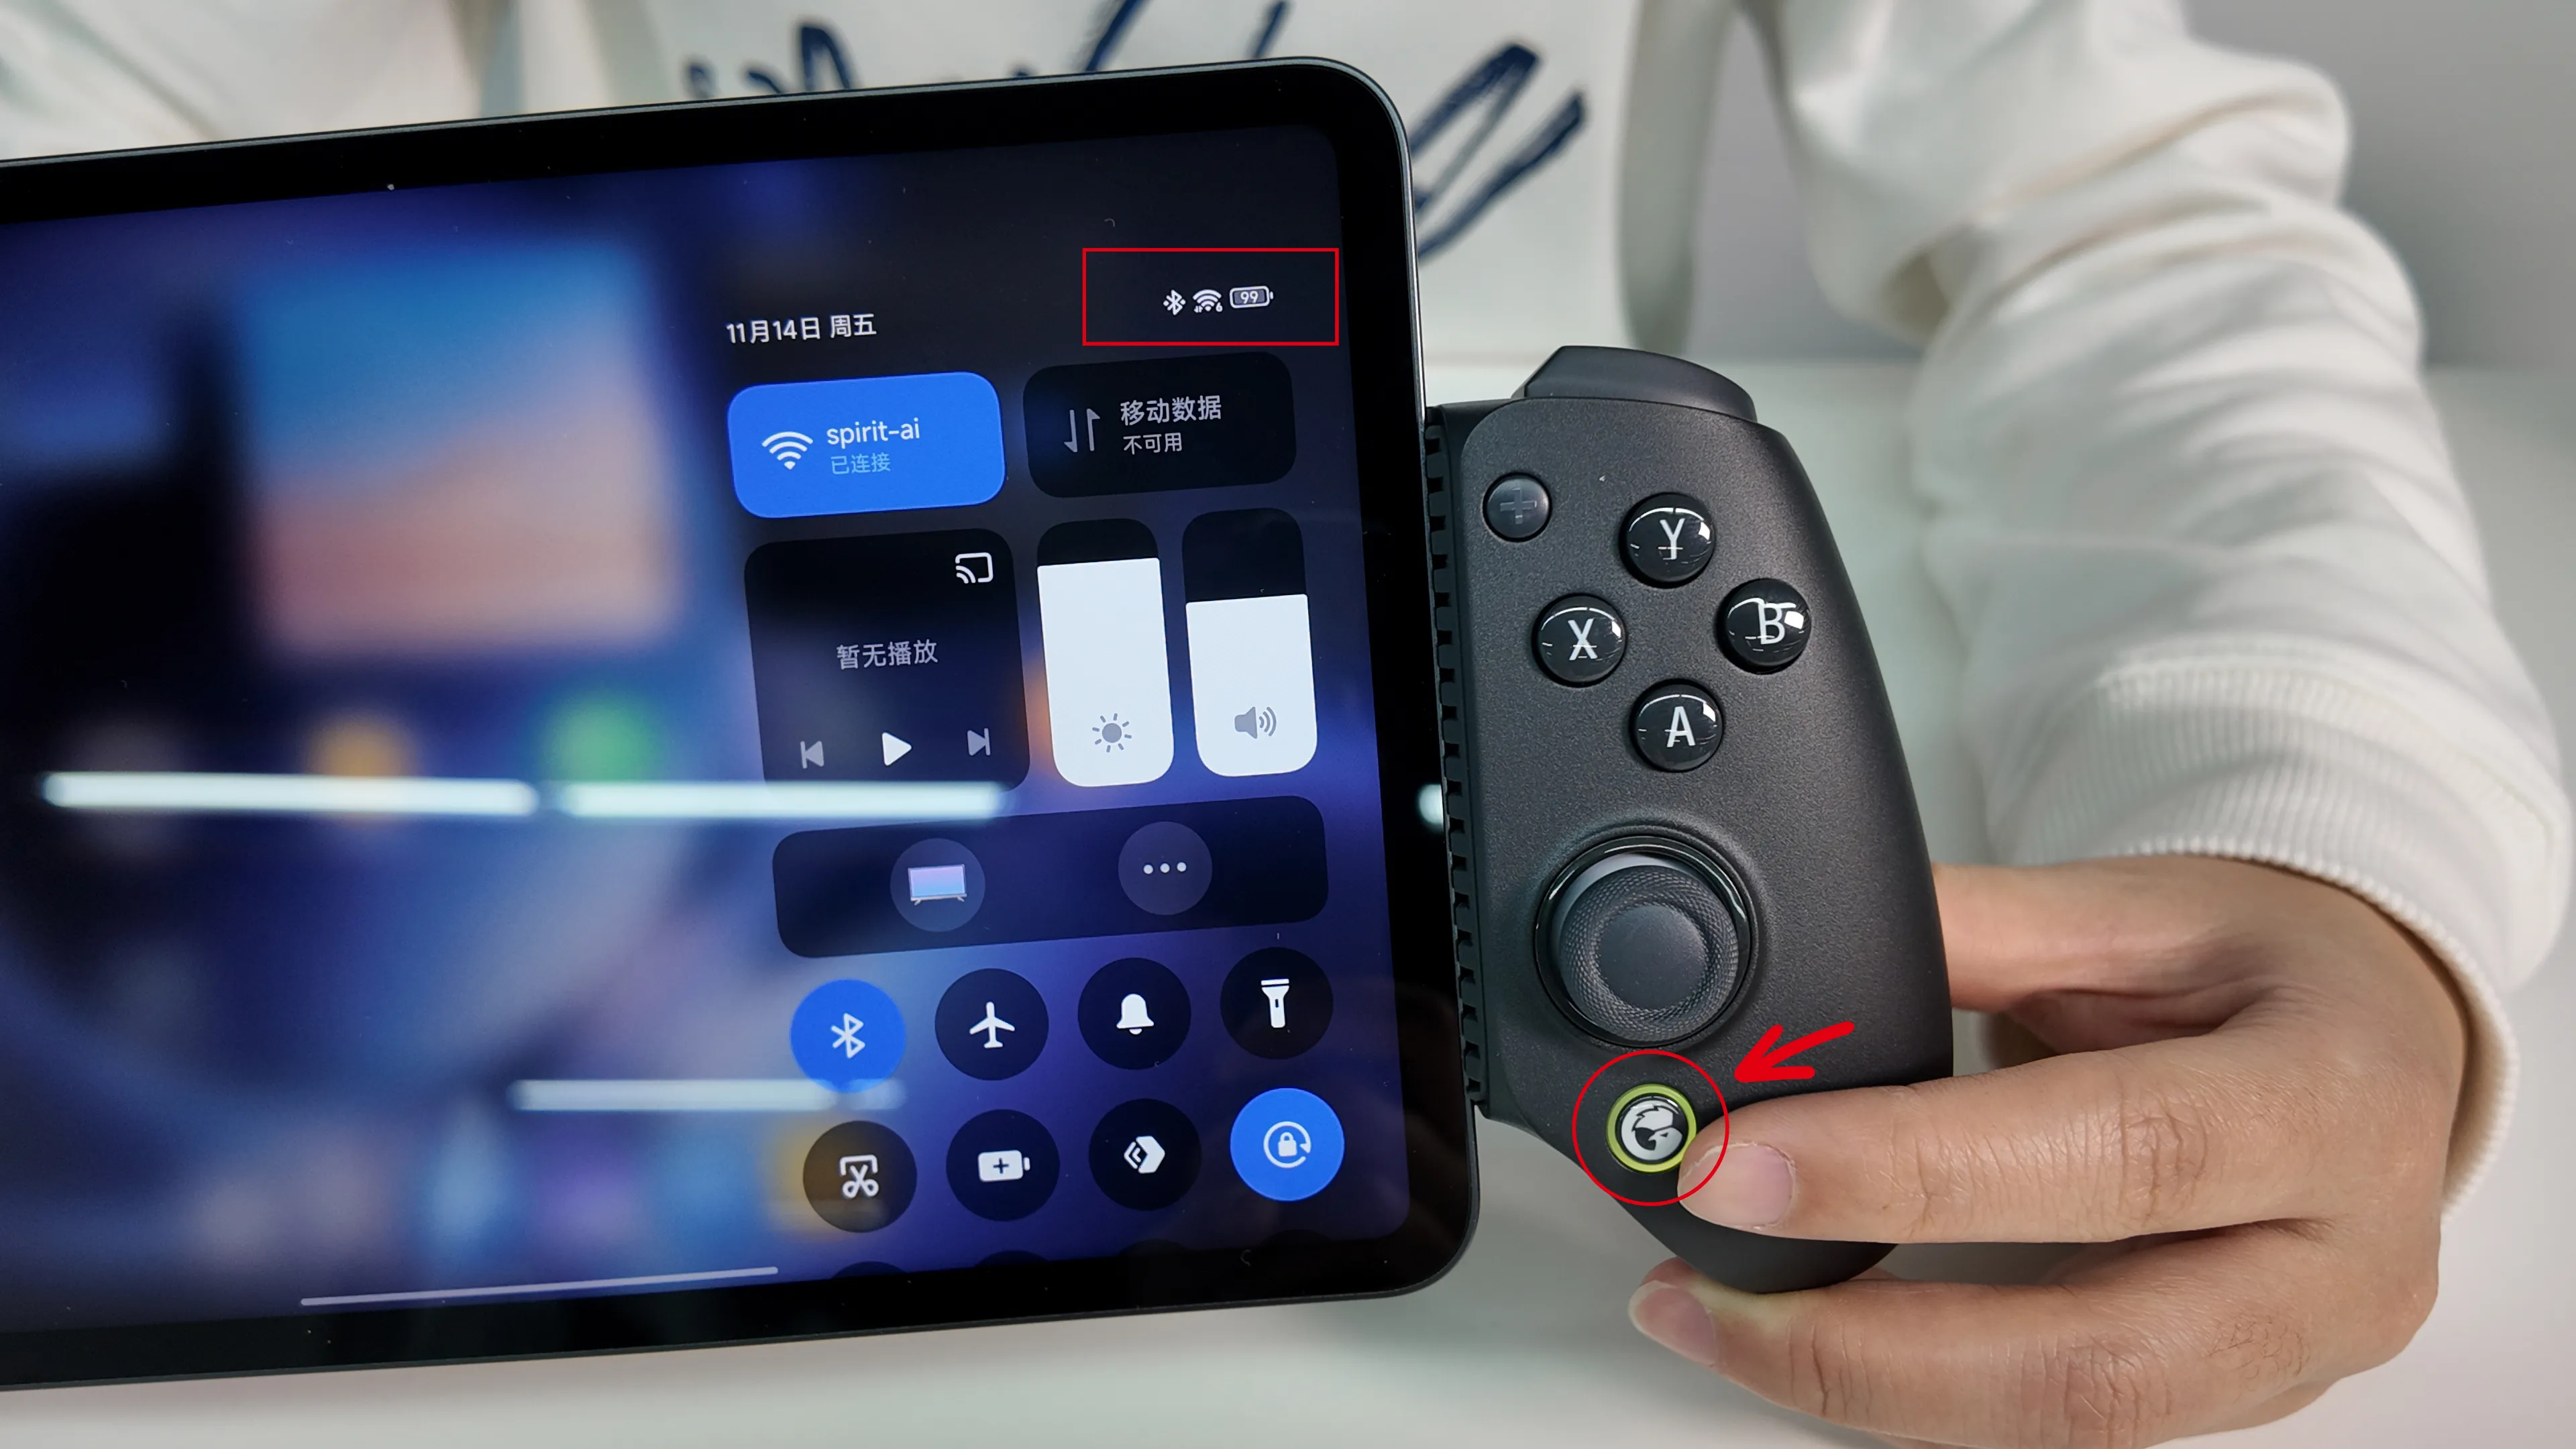
Press the pairing button (Home key) at the bottom right of the controller to pair the controller with the tablet. After successful connection, a Bluetooth icon will appear in the status bar at the top of the tablet.
 |  |
|---|
Step 19
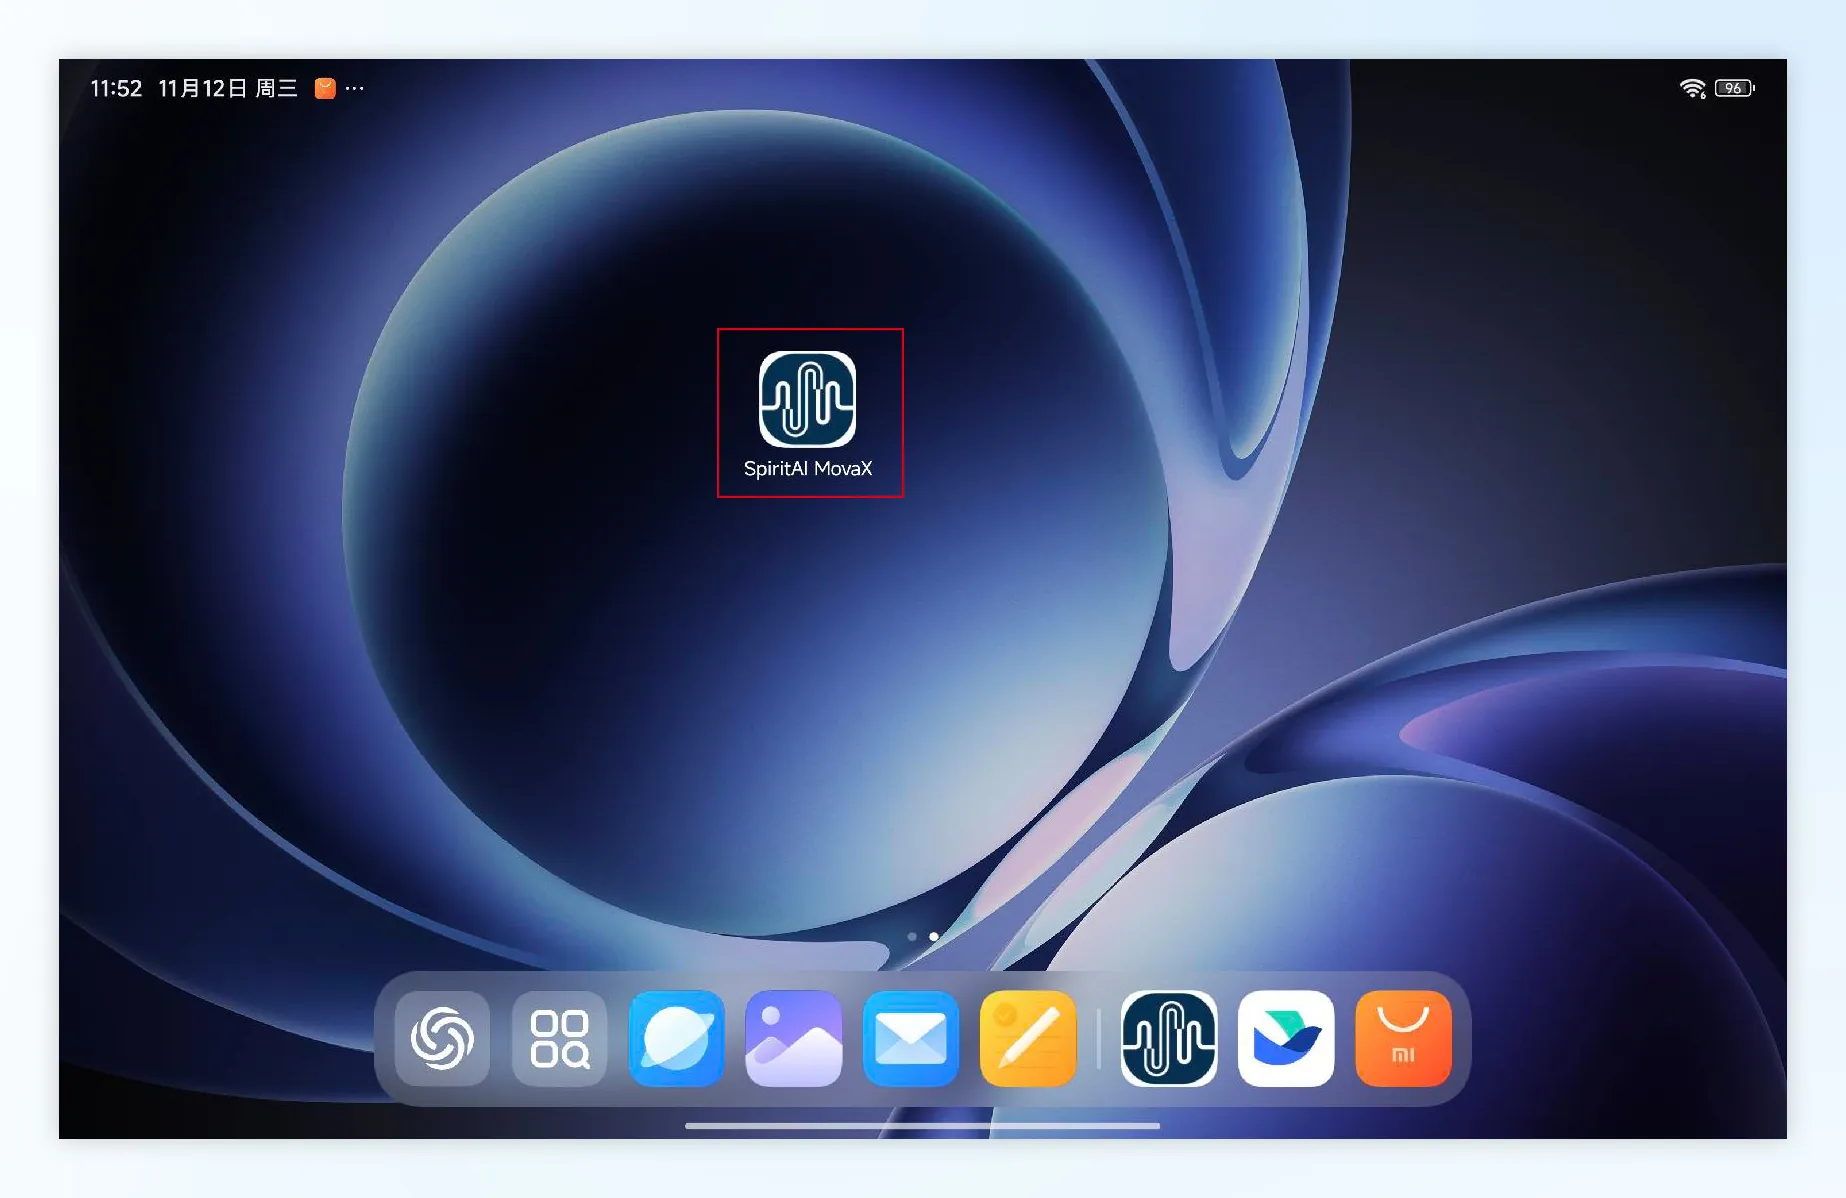
Launch the desktop application “SpiritAI MovaX” and wait for the interface to load.
 |
|---|
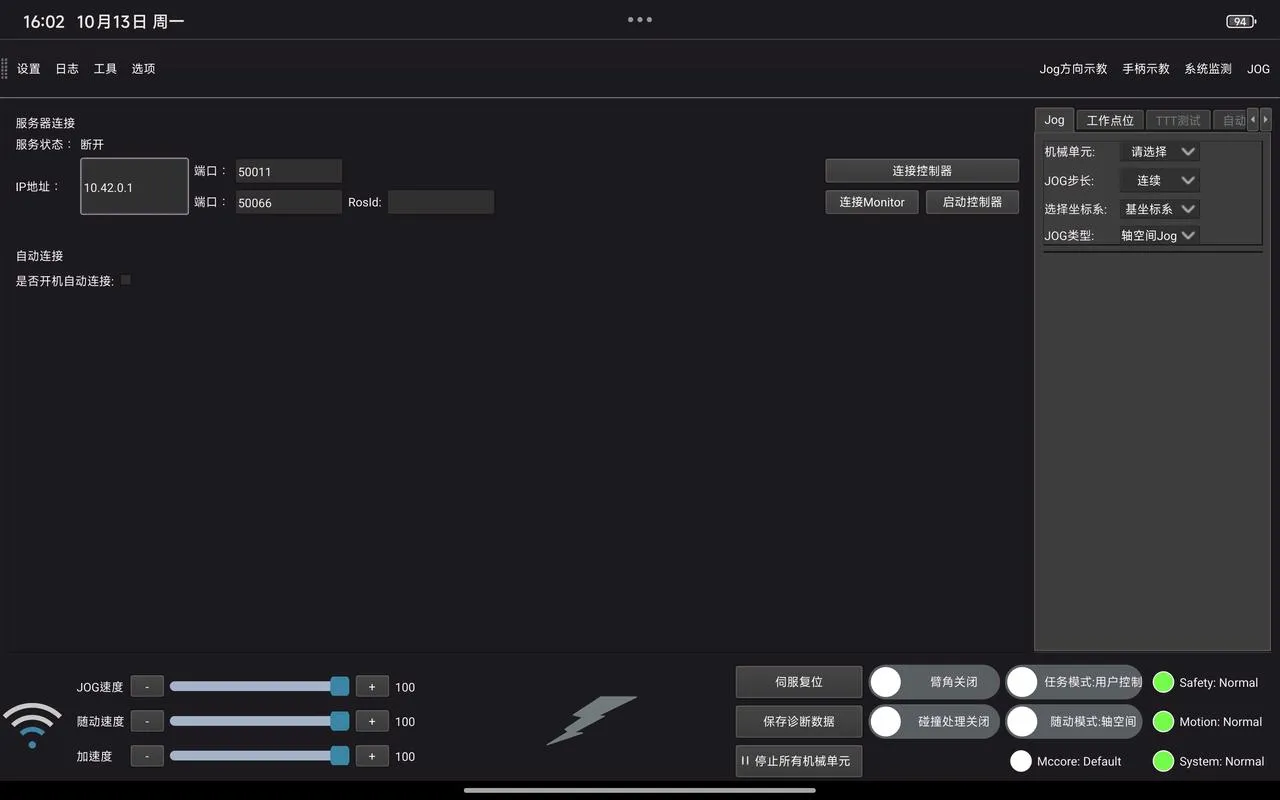 |
Step 20
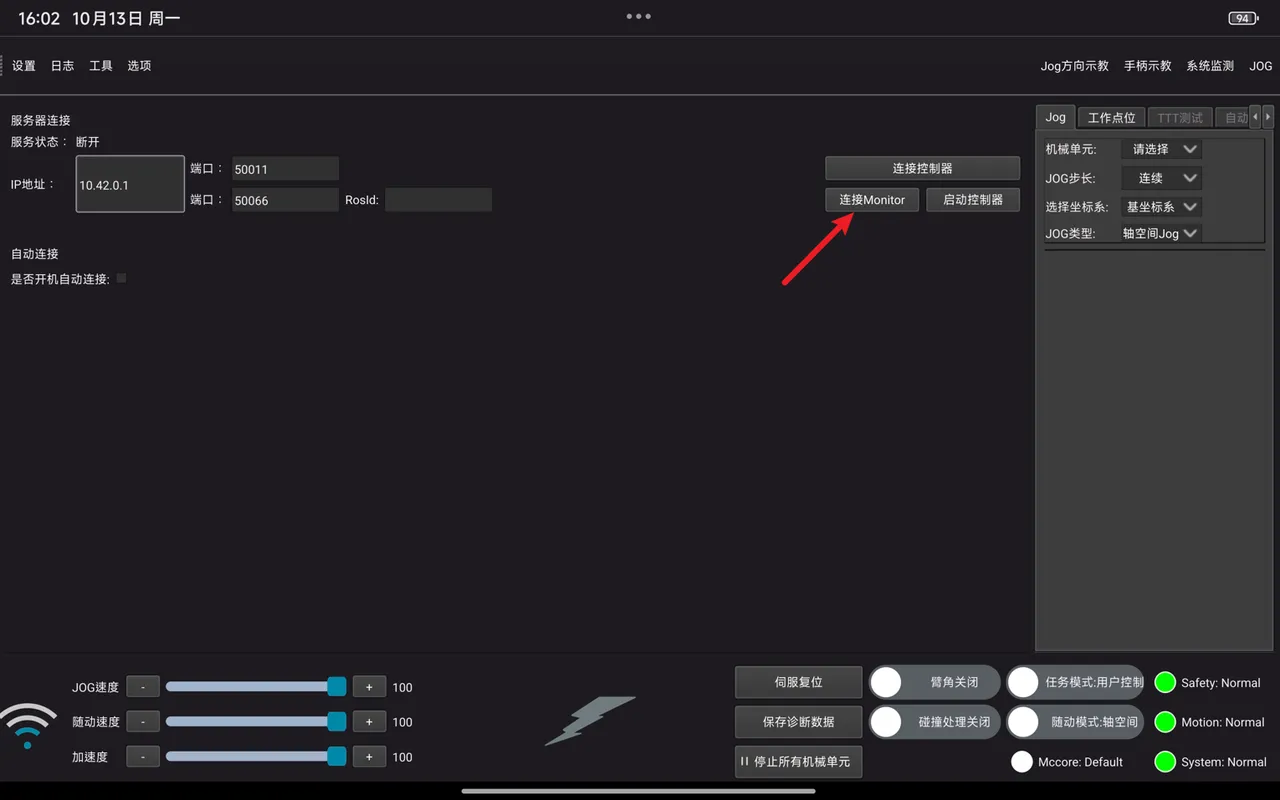
In the interface, click Connect Monitor. After the interface indicates that the Monitor is connected successfully, click Connect Controller.
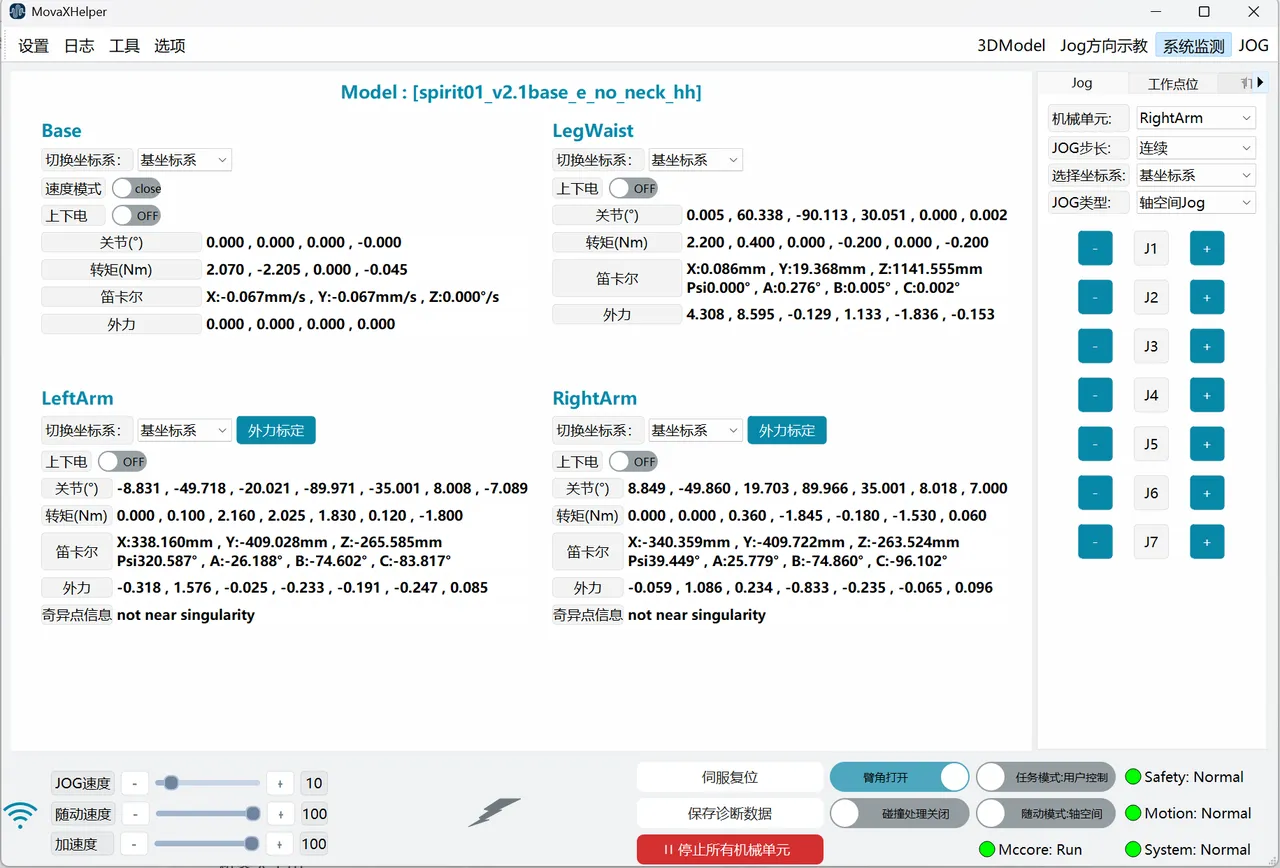
Step 21
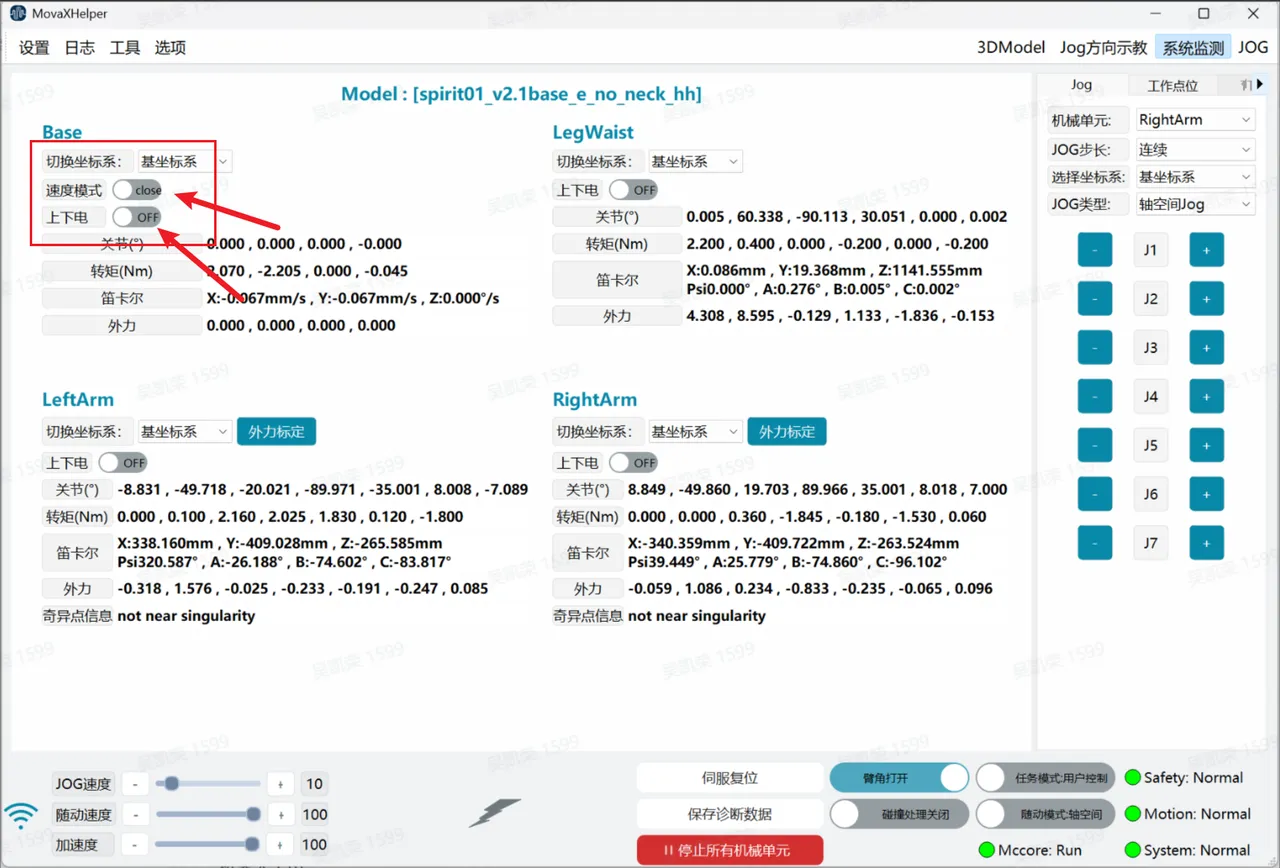
After successful connection, open the System Monitoring interface. In the Base panel at the top left, enable Speed Mode and Power On. You will hear the brake release sound. The interface after power-on is shown below.

Step 22
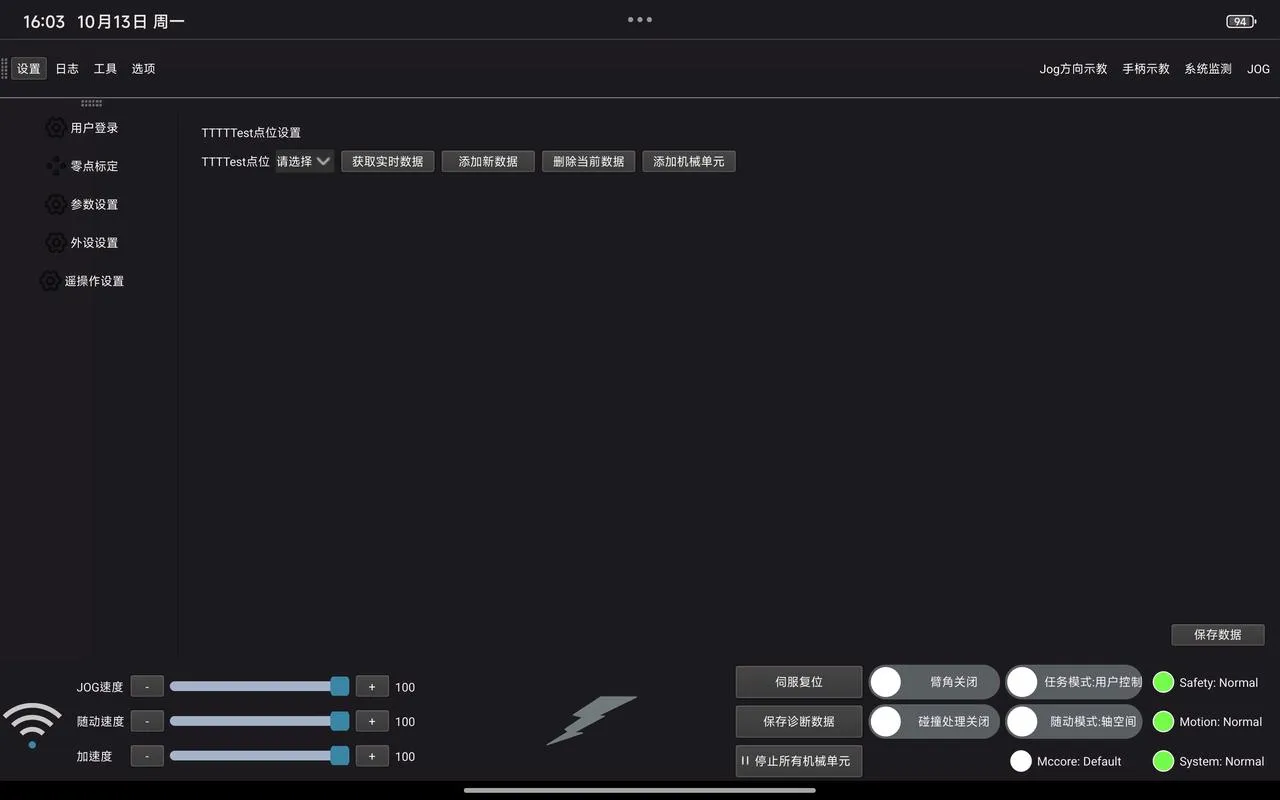
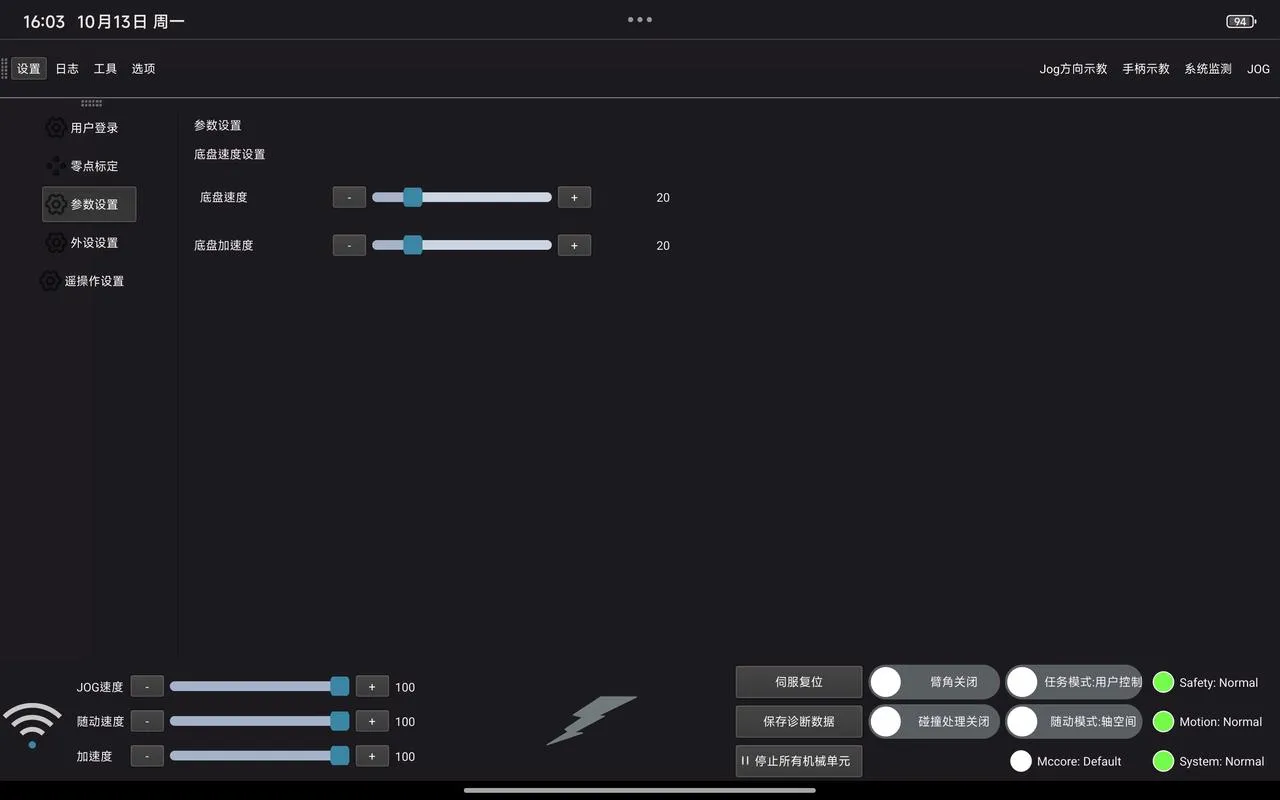
To ensure safety, set the chassis speed and acceleration to lower values. Click Settings in the upper left corner to enter the Parameter Settings page and confirm the speed is set to 10 and the acceleration to 10.
Step 23
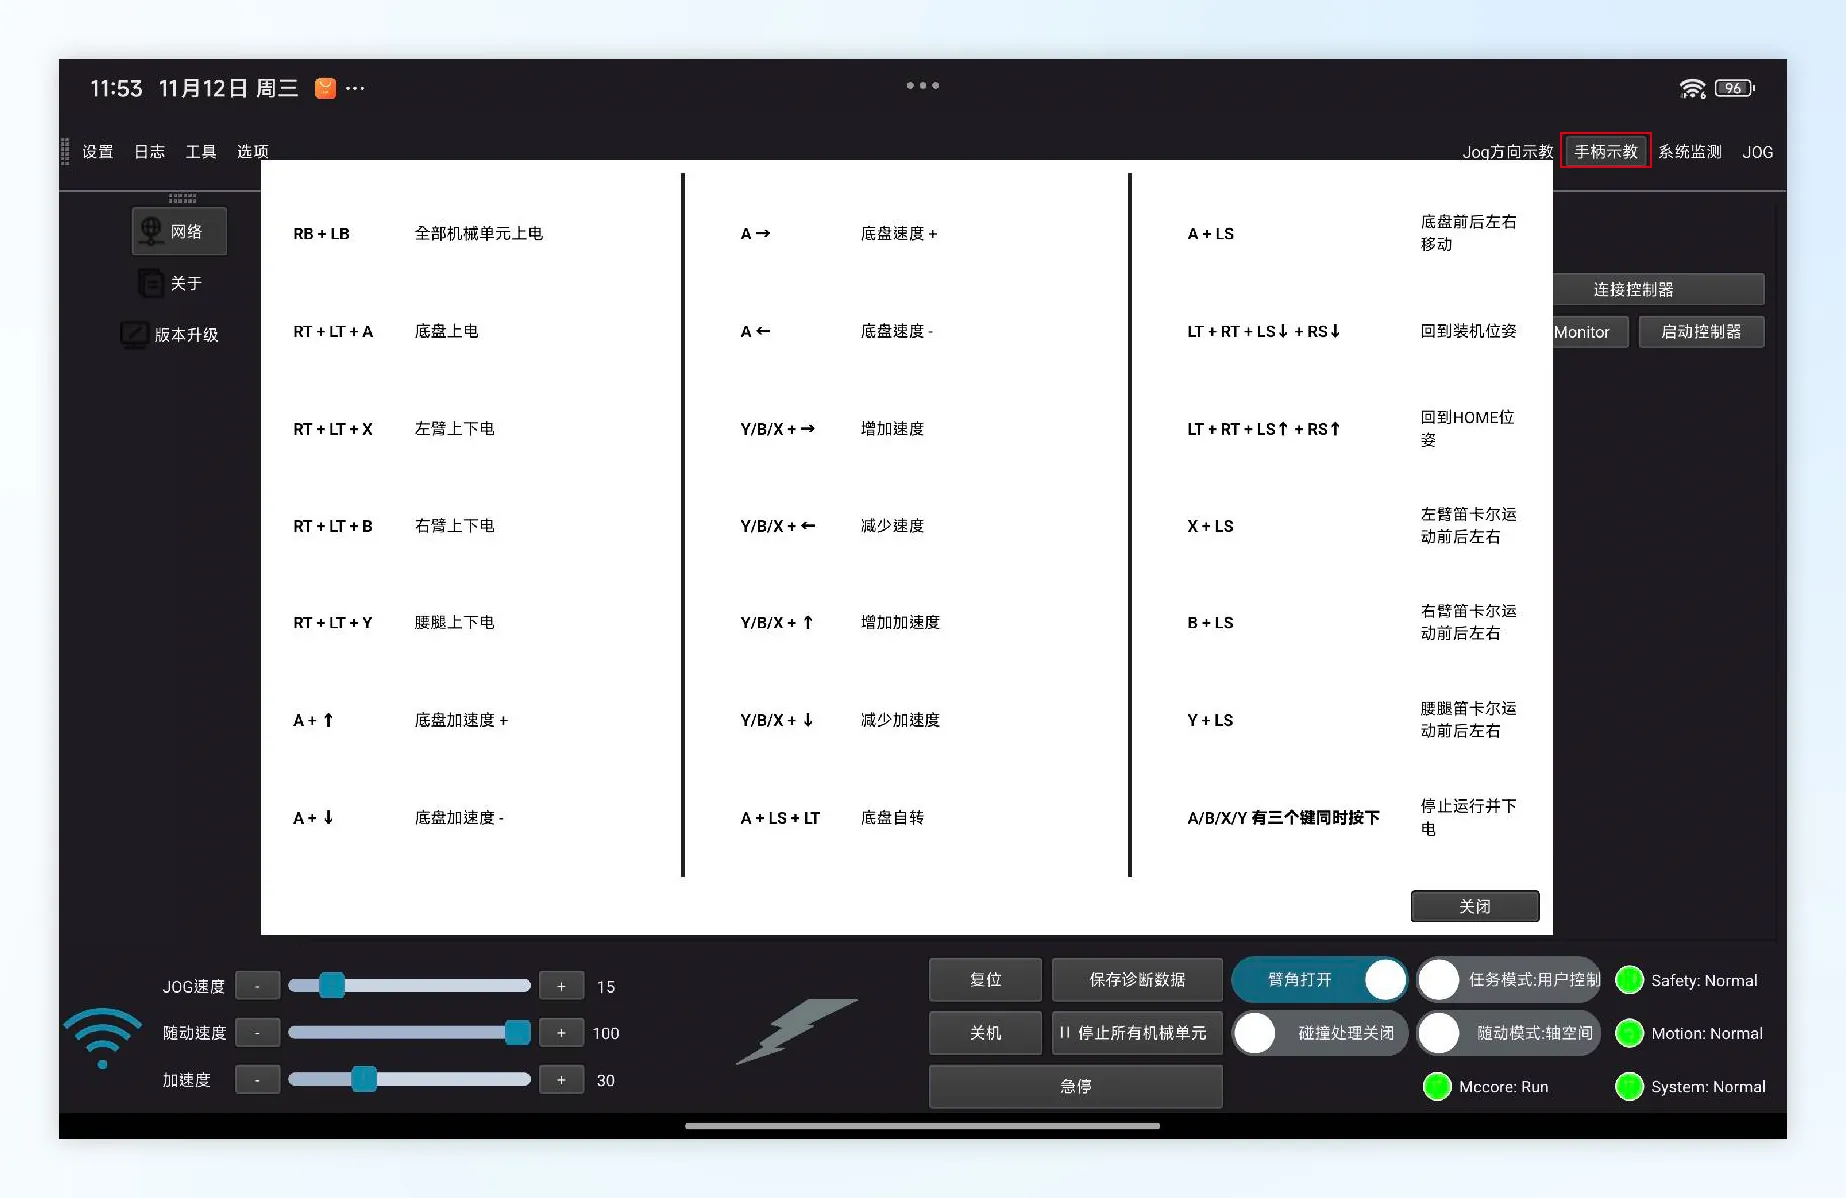
Enter the chassis control mode and use the controller to control the chassis. The controller key combination is the left joystick + button A. When inside the case, only move backward to avoid collision with the case. For first-time use, gently push the joystick.
Step 24
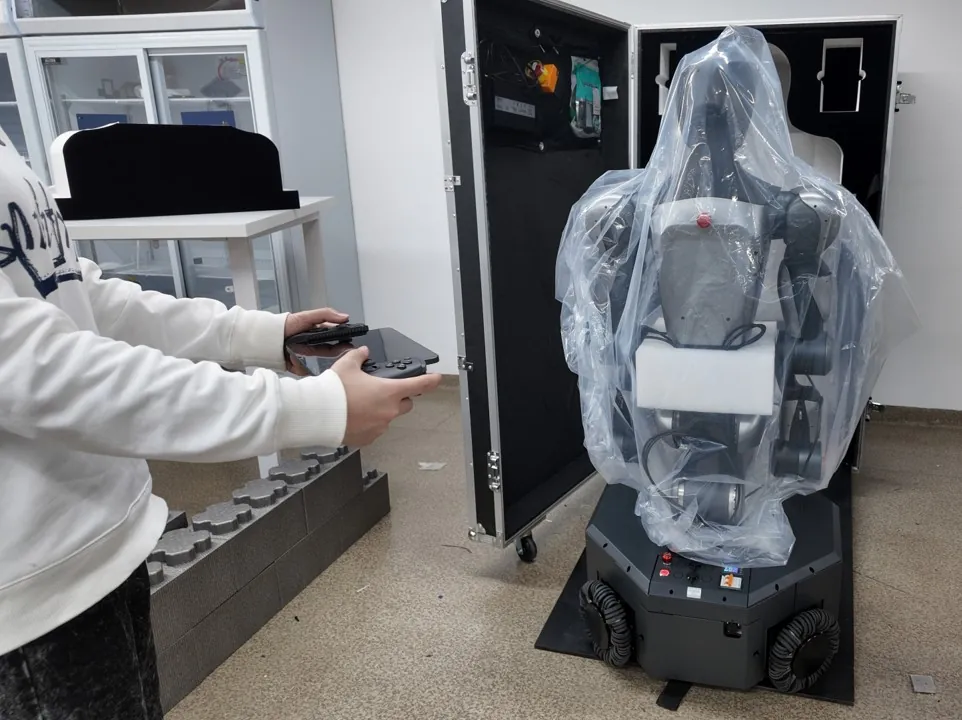
Remove the plastic film from the robot and bundle it above the chassis. Then use the controller to drive the chassis backward and slowly exit the flight case via the ramp. For first-time use, operate slowly, gently pushing the joystick while observing and adjusting.
Step 25
After the robot has fully exited the case, power off the chassis via the handheld terminal interface. You will hear the brake lock sound.
Step 26
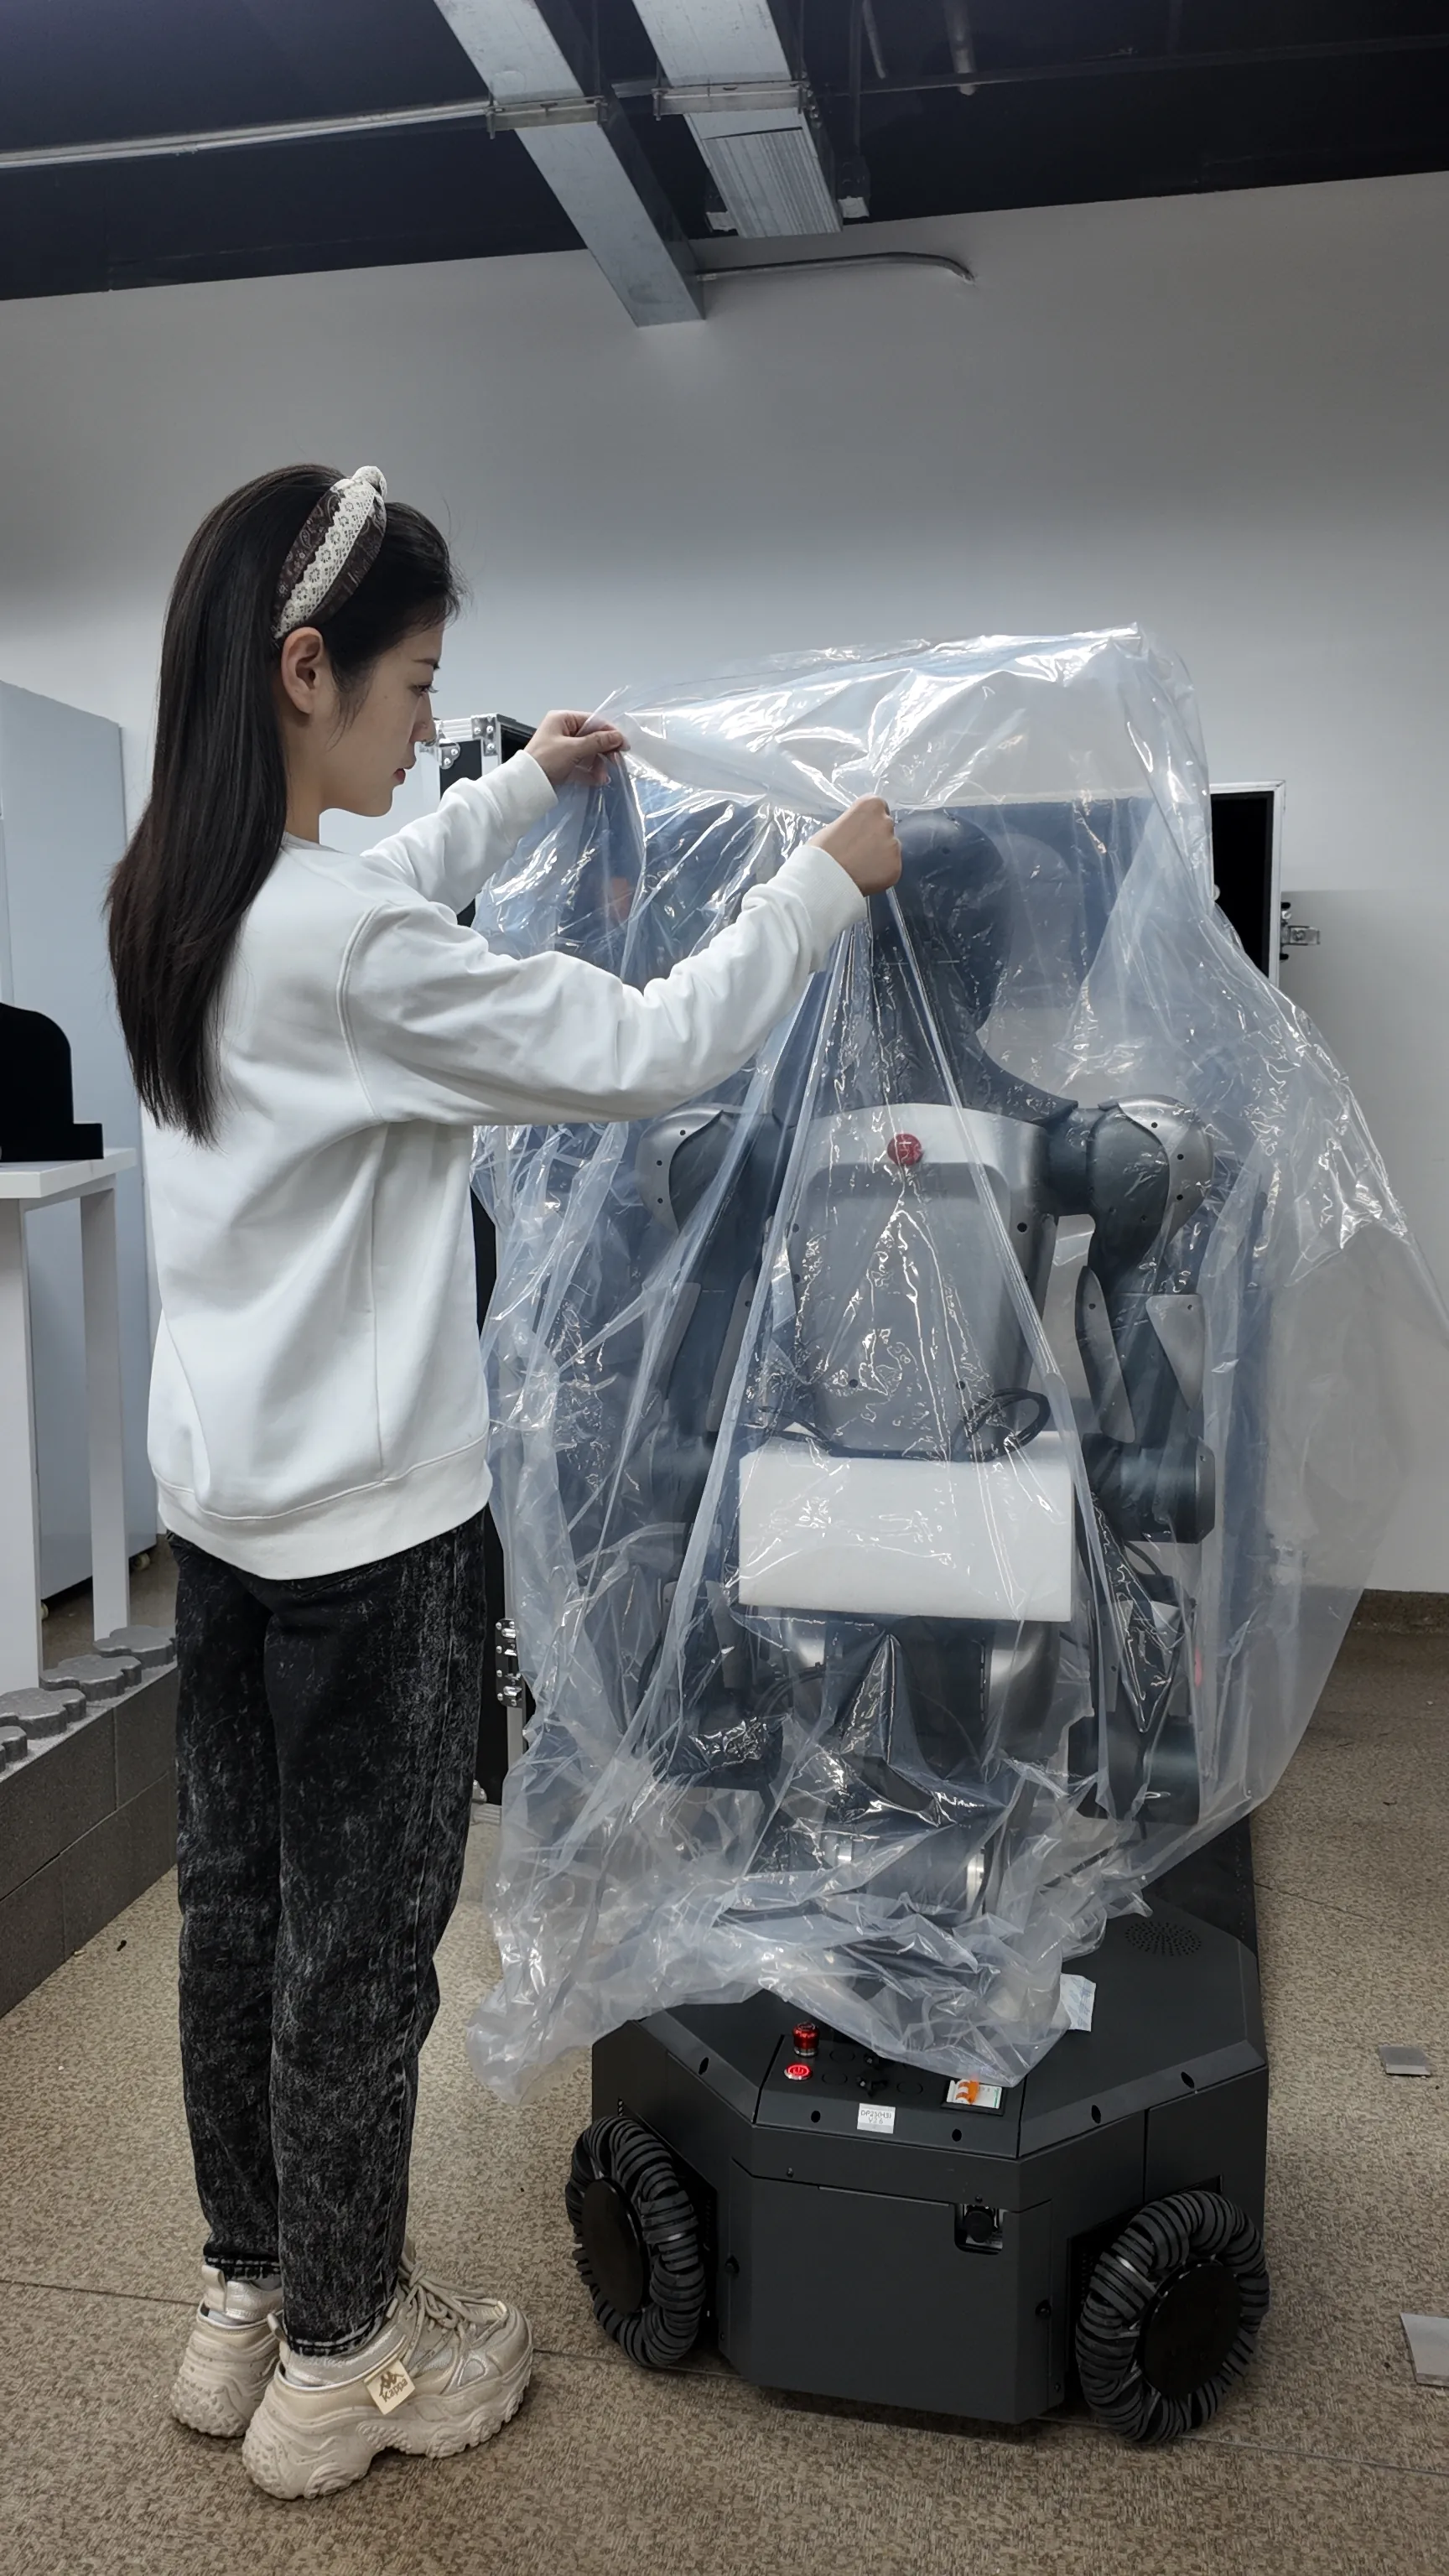
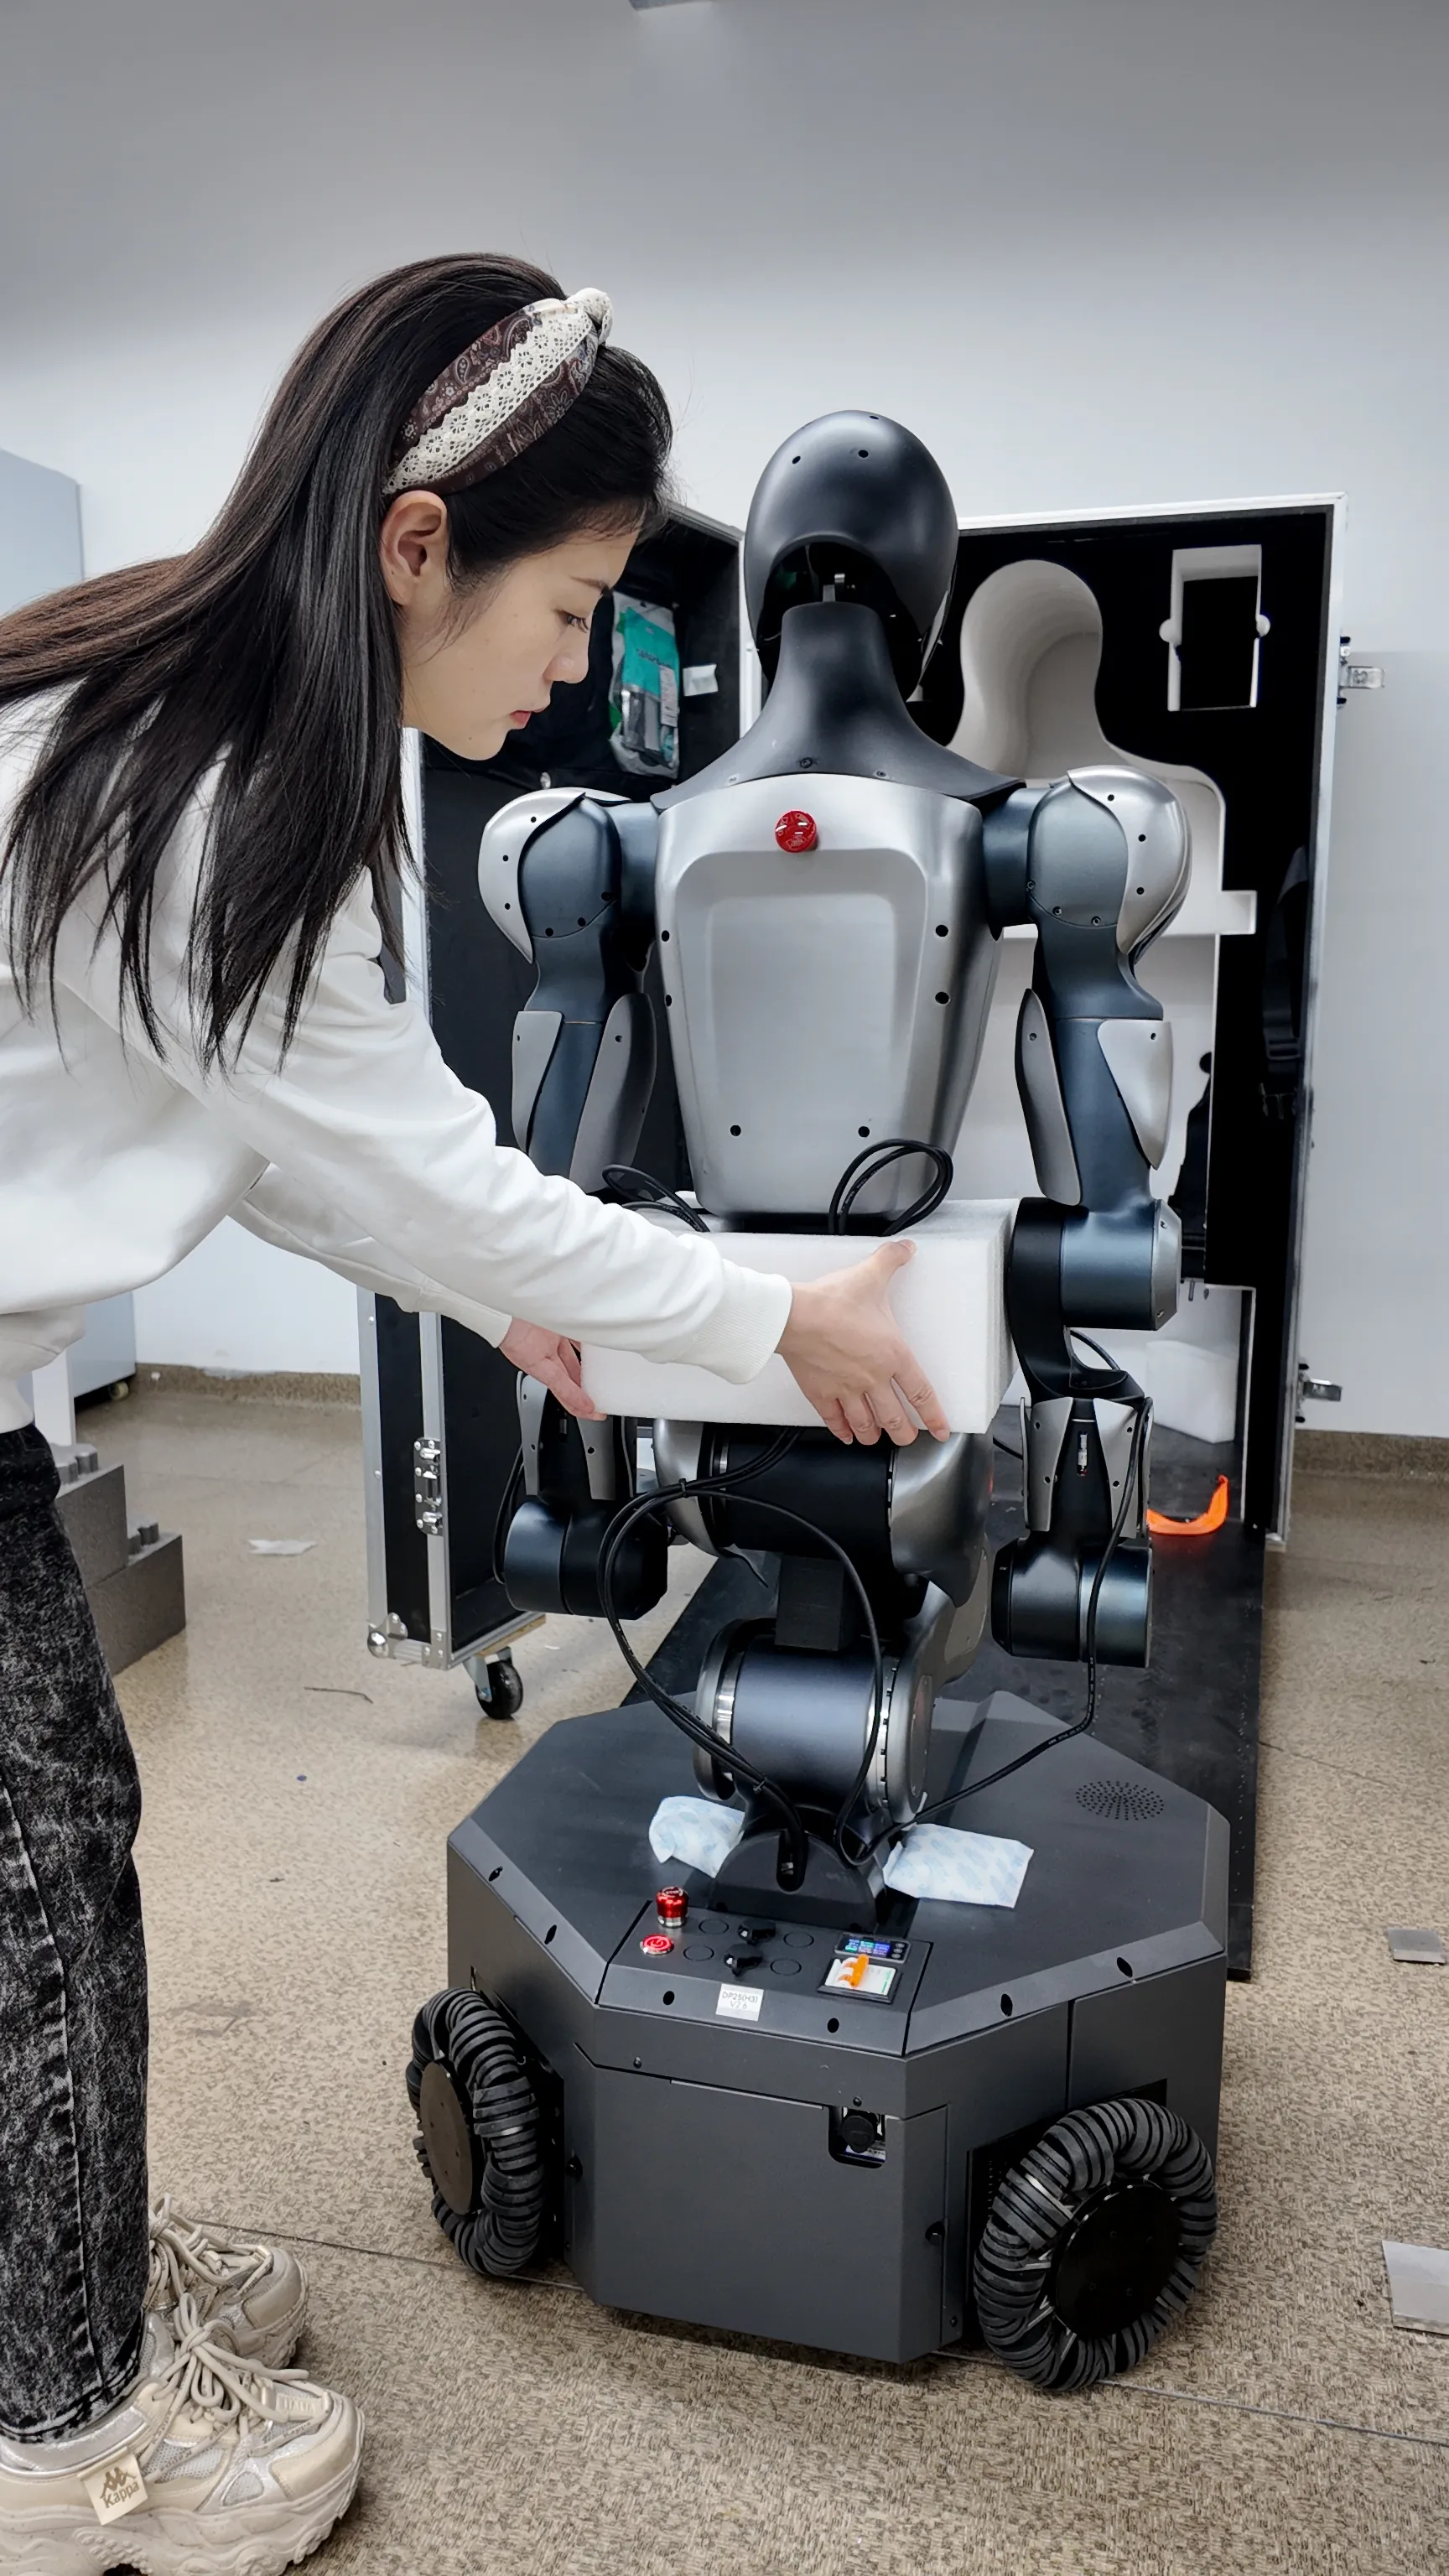
Remove the plastic cover from the top of the robot and take out the foam buffer blocks around the robot’s waist.
 |  |  |
|---|
Step 27
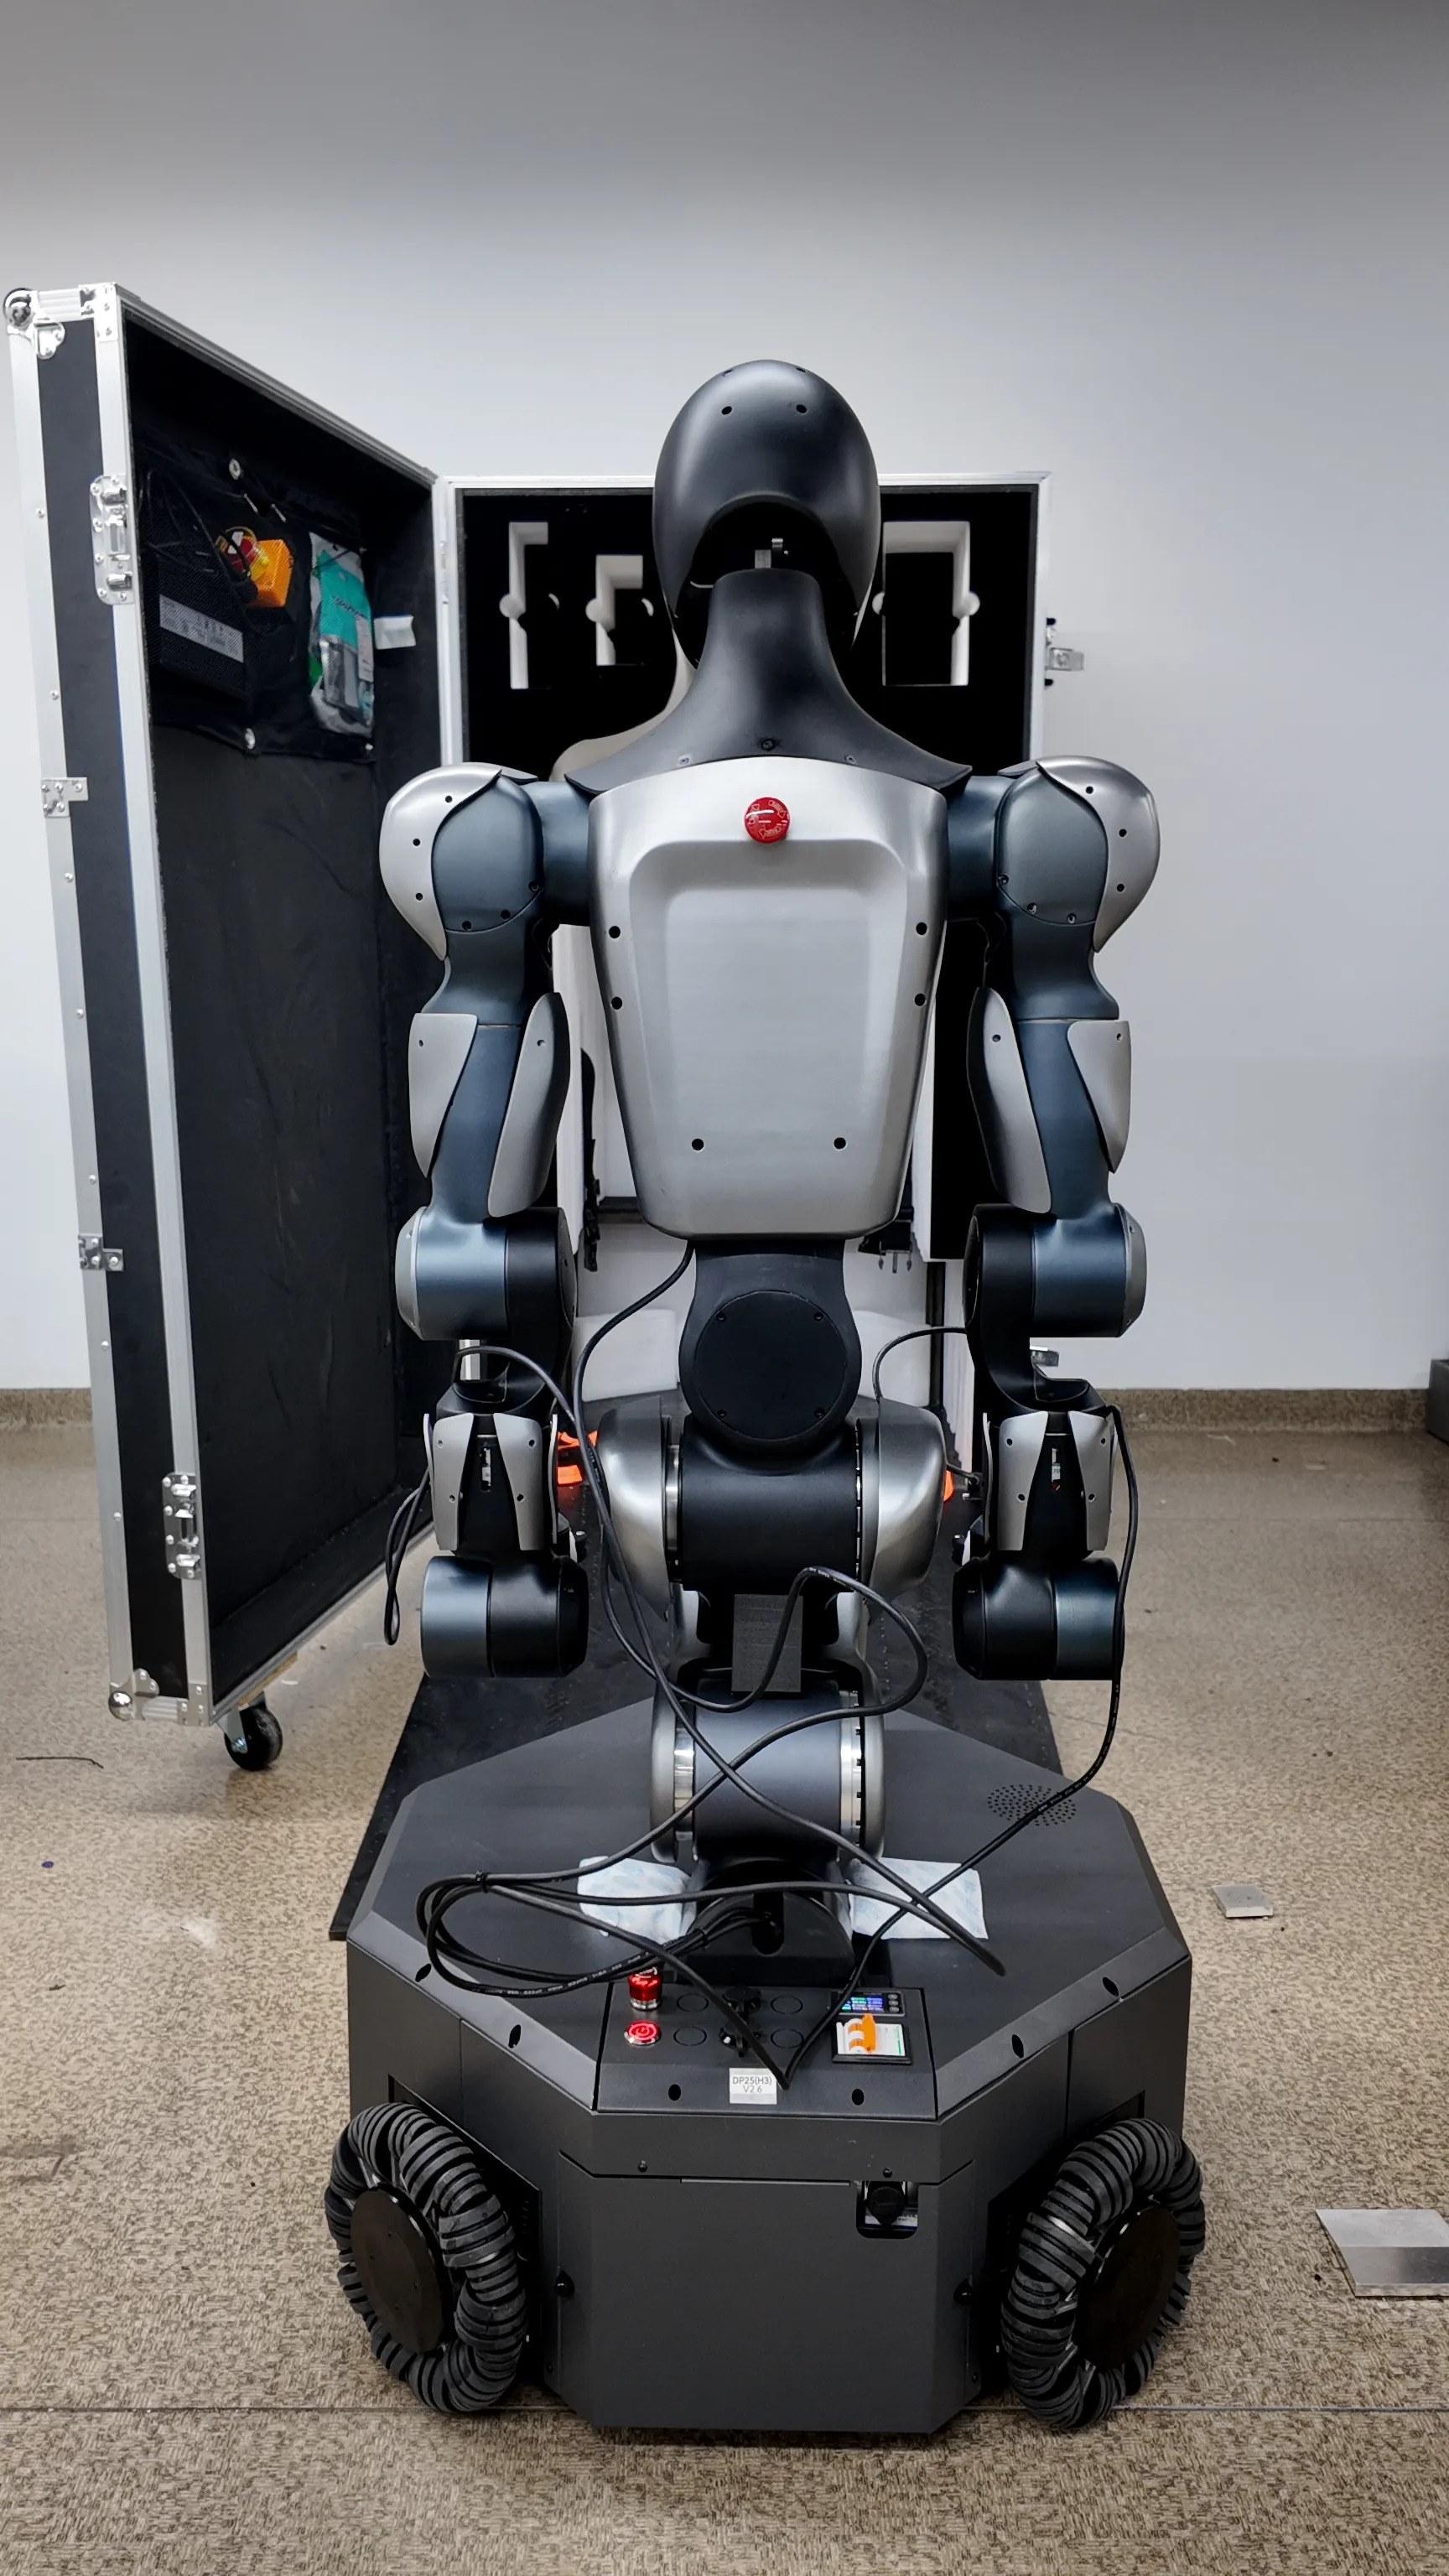
After completing the above steps, walk around the robot to inspect its exterior and check for any transport-related damage.
The robot unboxing process is now complete. Please read Moz Robot Quick Start to begin your Moz exploration journey!